Add JupyterHub as an App on Canvas
The final infrastructure step for this course is to add JupyterHub as an App to your Canvas course shell. Follow the steps below to do this.
Note: If your University typically provides instructors their course shells (as is typically done at UBC) then the University IT/LT team may have to perform the steps outlined below:
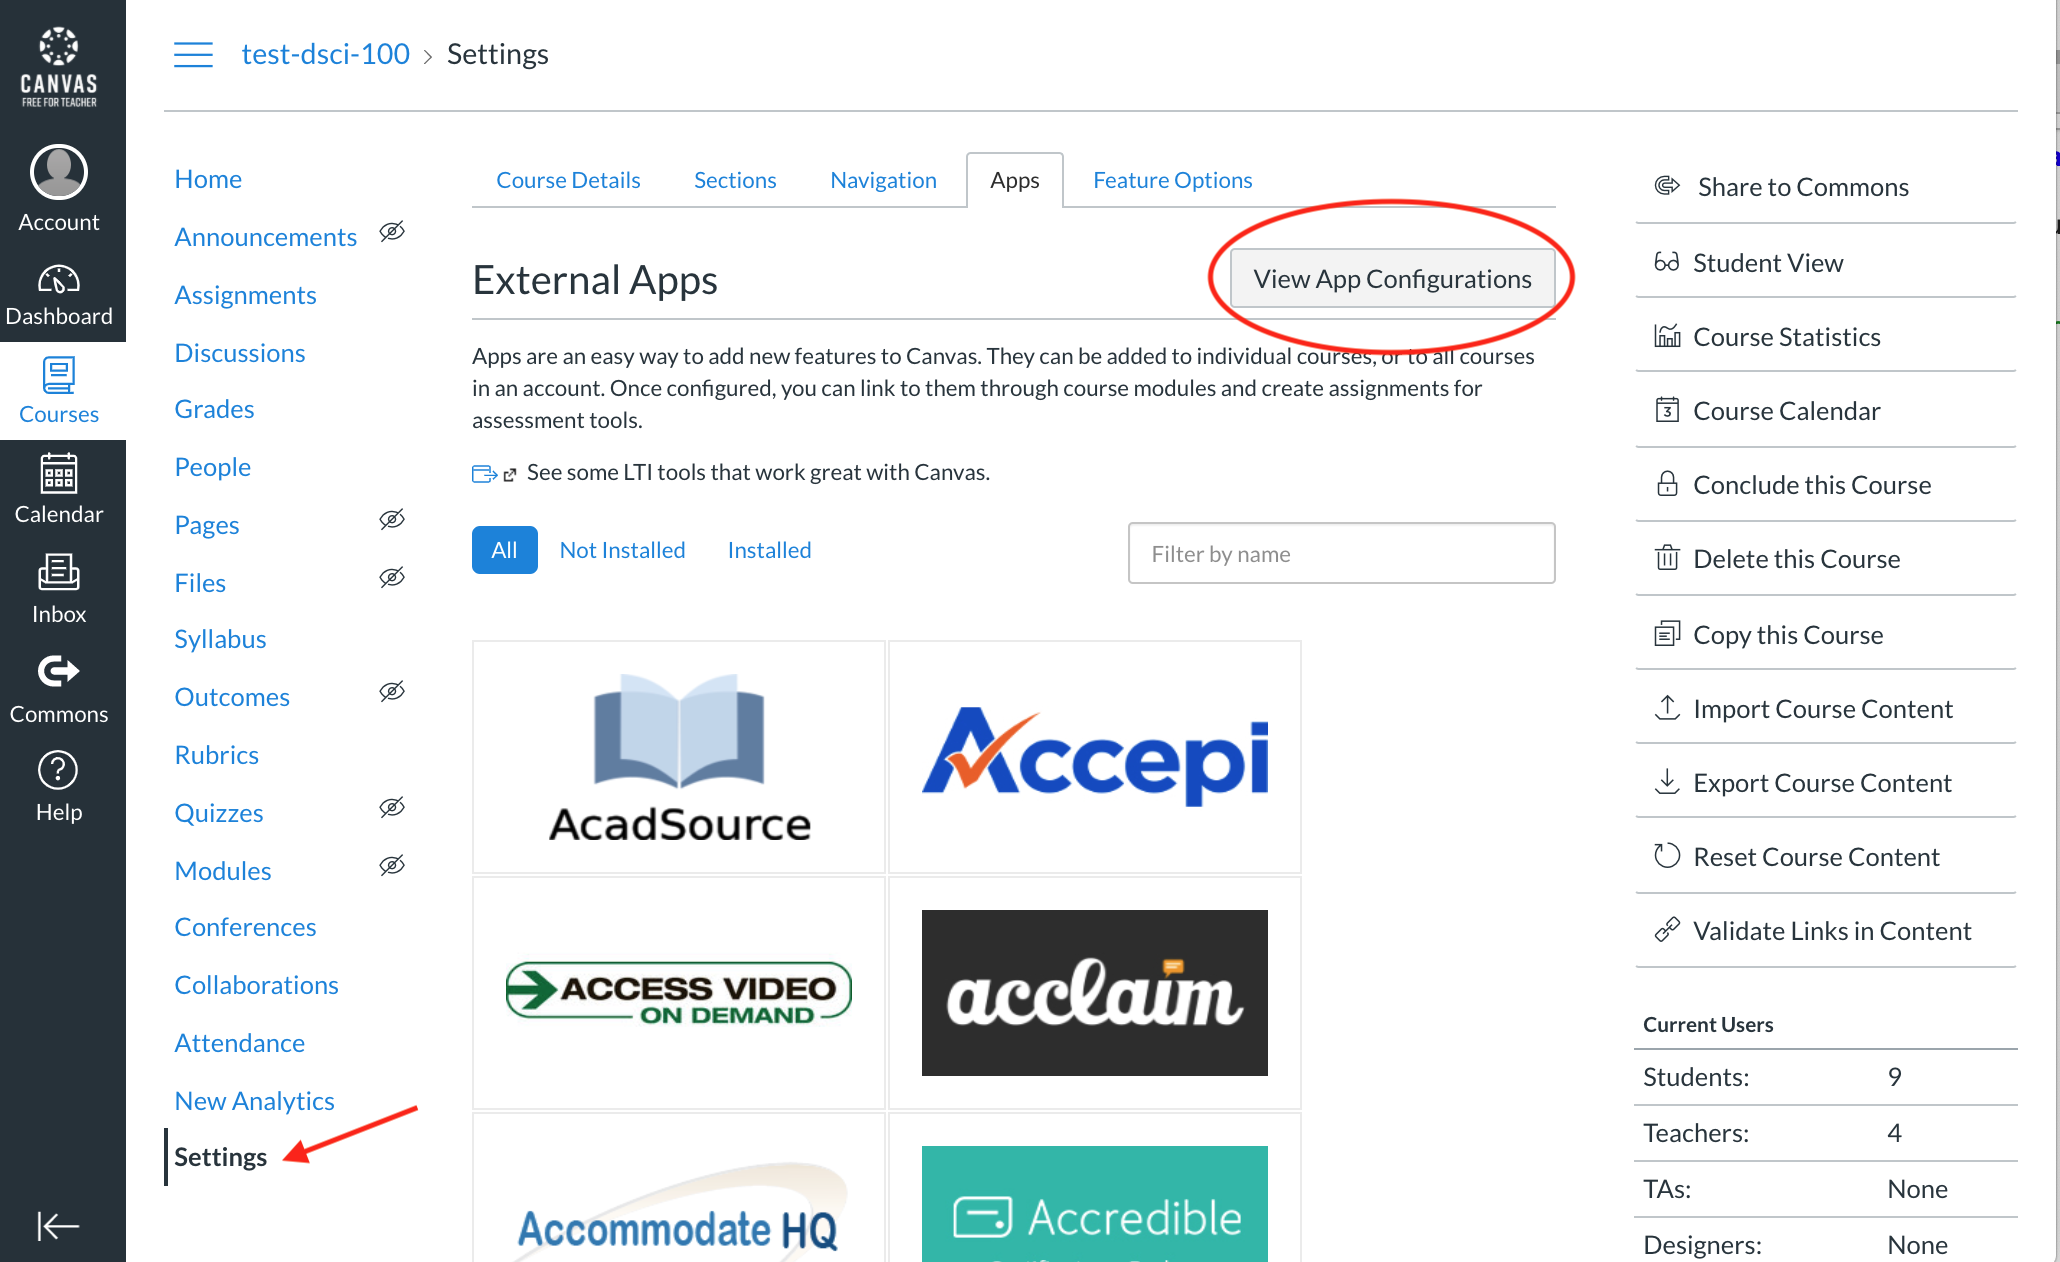
In the Setting page, click on “View App Configuration”
Next, click the blue “+App” button:

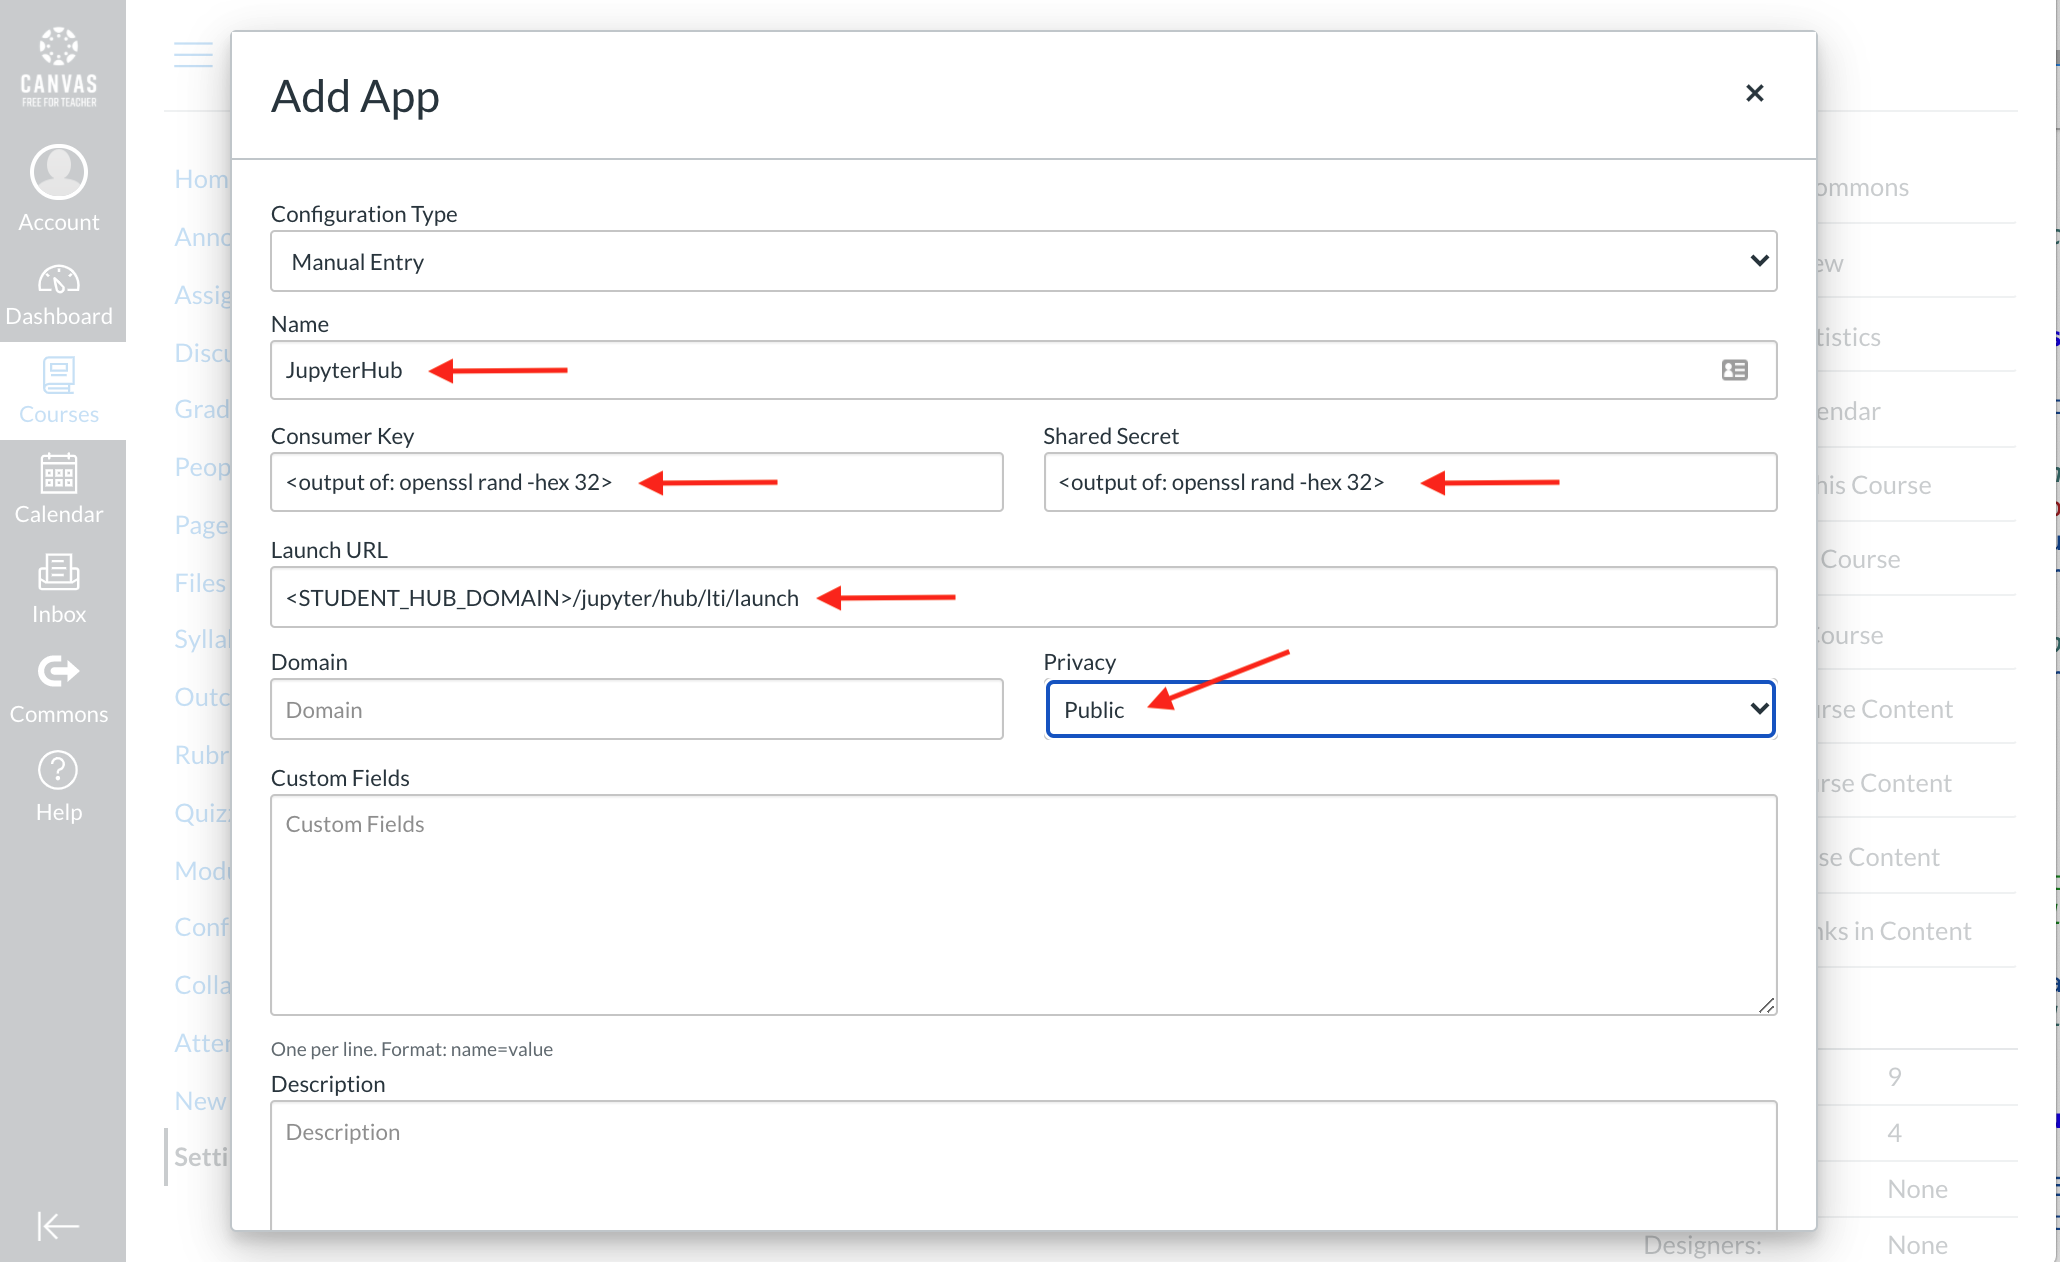
On the Add App page, enter/select the values listed below, and then click the blue “Submit” button:
Name (What you would like to call the app, here we call it JupyterHub)
Consumer Key (the output from
openssl rand -hex 32that was set asjupyterhub_lti_client_keyinansible/group_vars/hubs/secrets.yml)Shared Secret (the output from
openssl rand -hex 32that was set asjupyterhub_lti_client_secretinansible/group_vars/hubs/secrets.yml)Launch URL (the Let’s Encrypt compatible domain for the student JupyterHub concatenated with
/jupyter/hub/lti/launch)Privacy (set as Public)
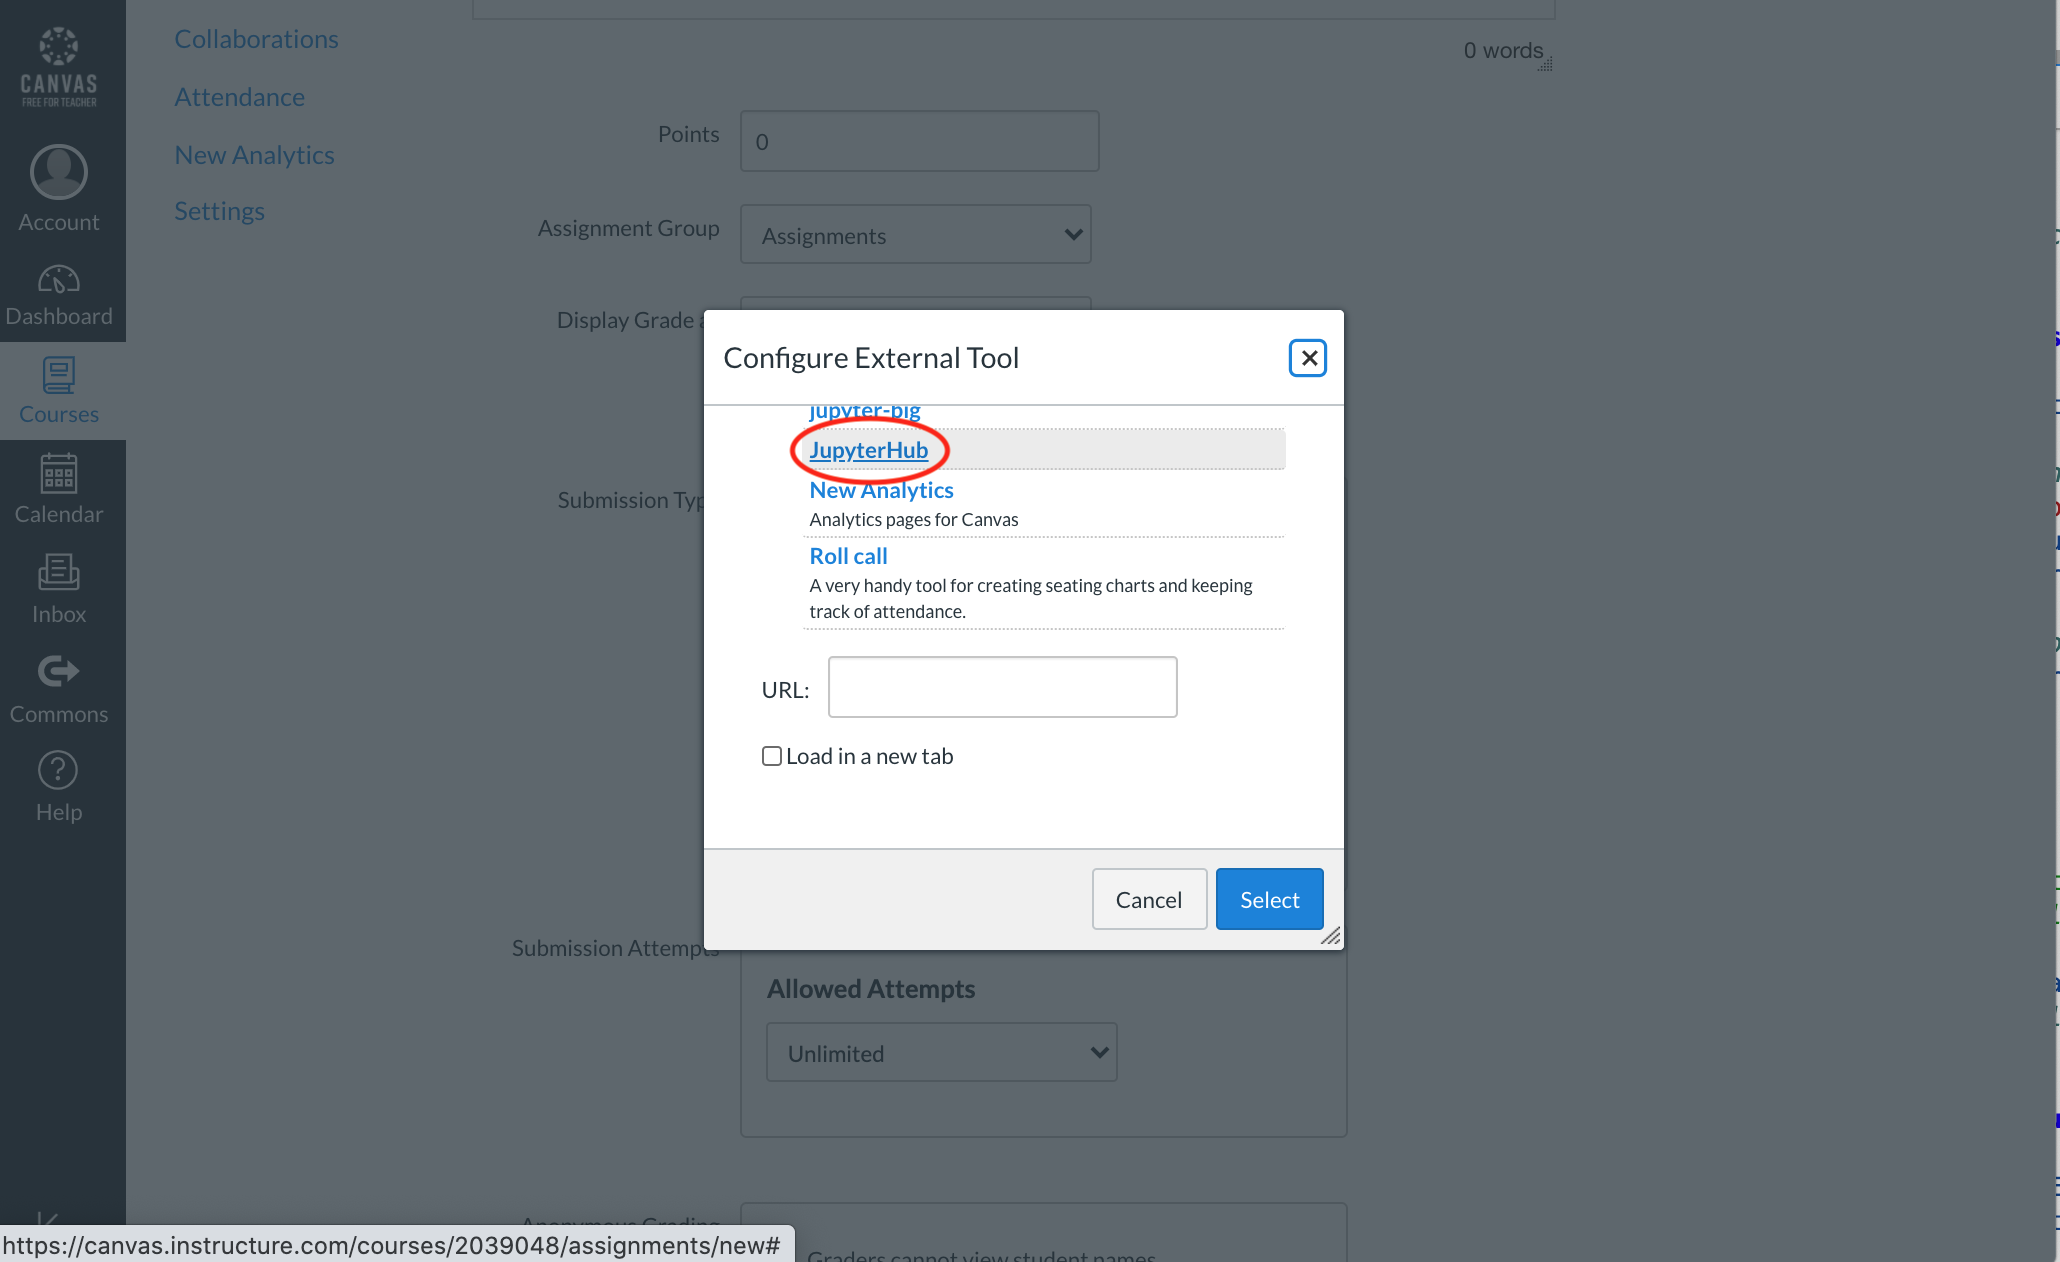
Now JupyterHub should be available as an App to your Canvas course shell. You can test this by trying to create an assignment and under Submission Type, select “External Tool” and click Find:

You should be able to see the name of the App you just created: