
Set up EC2 instance for grading JupyterHub
Follow the instructions below to setup an AWS EC2 instance which will be used to host and serve the grading JupyterHub (where the teaching team will perform grading and where the autograding will be done).
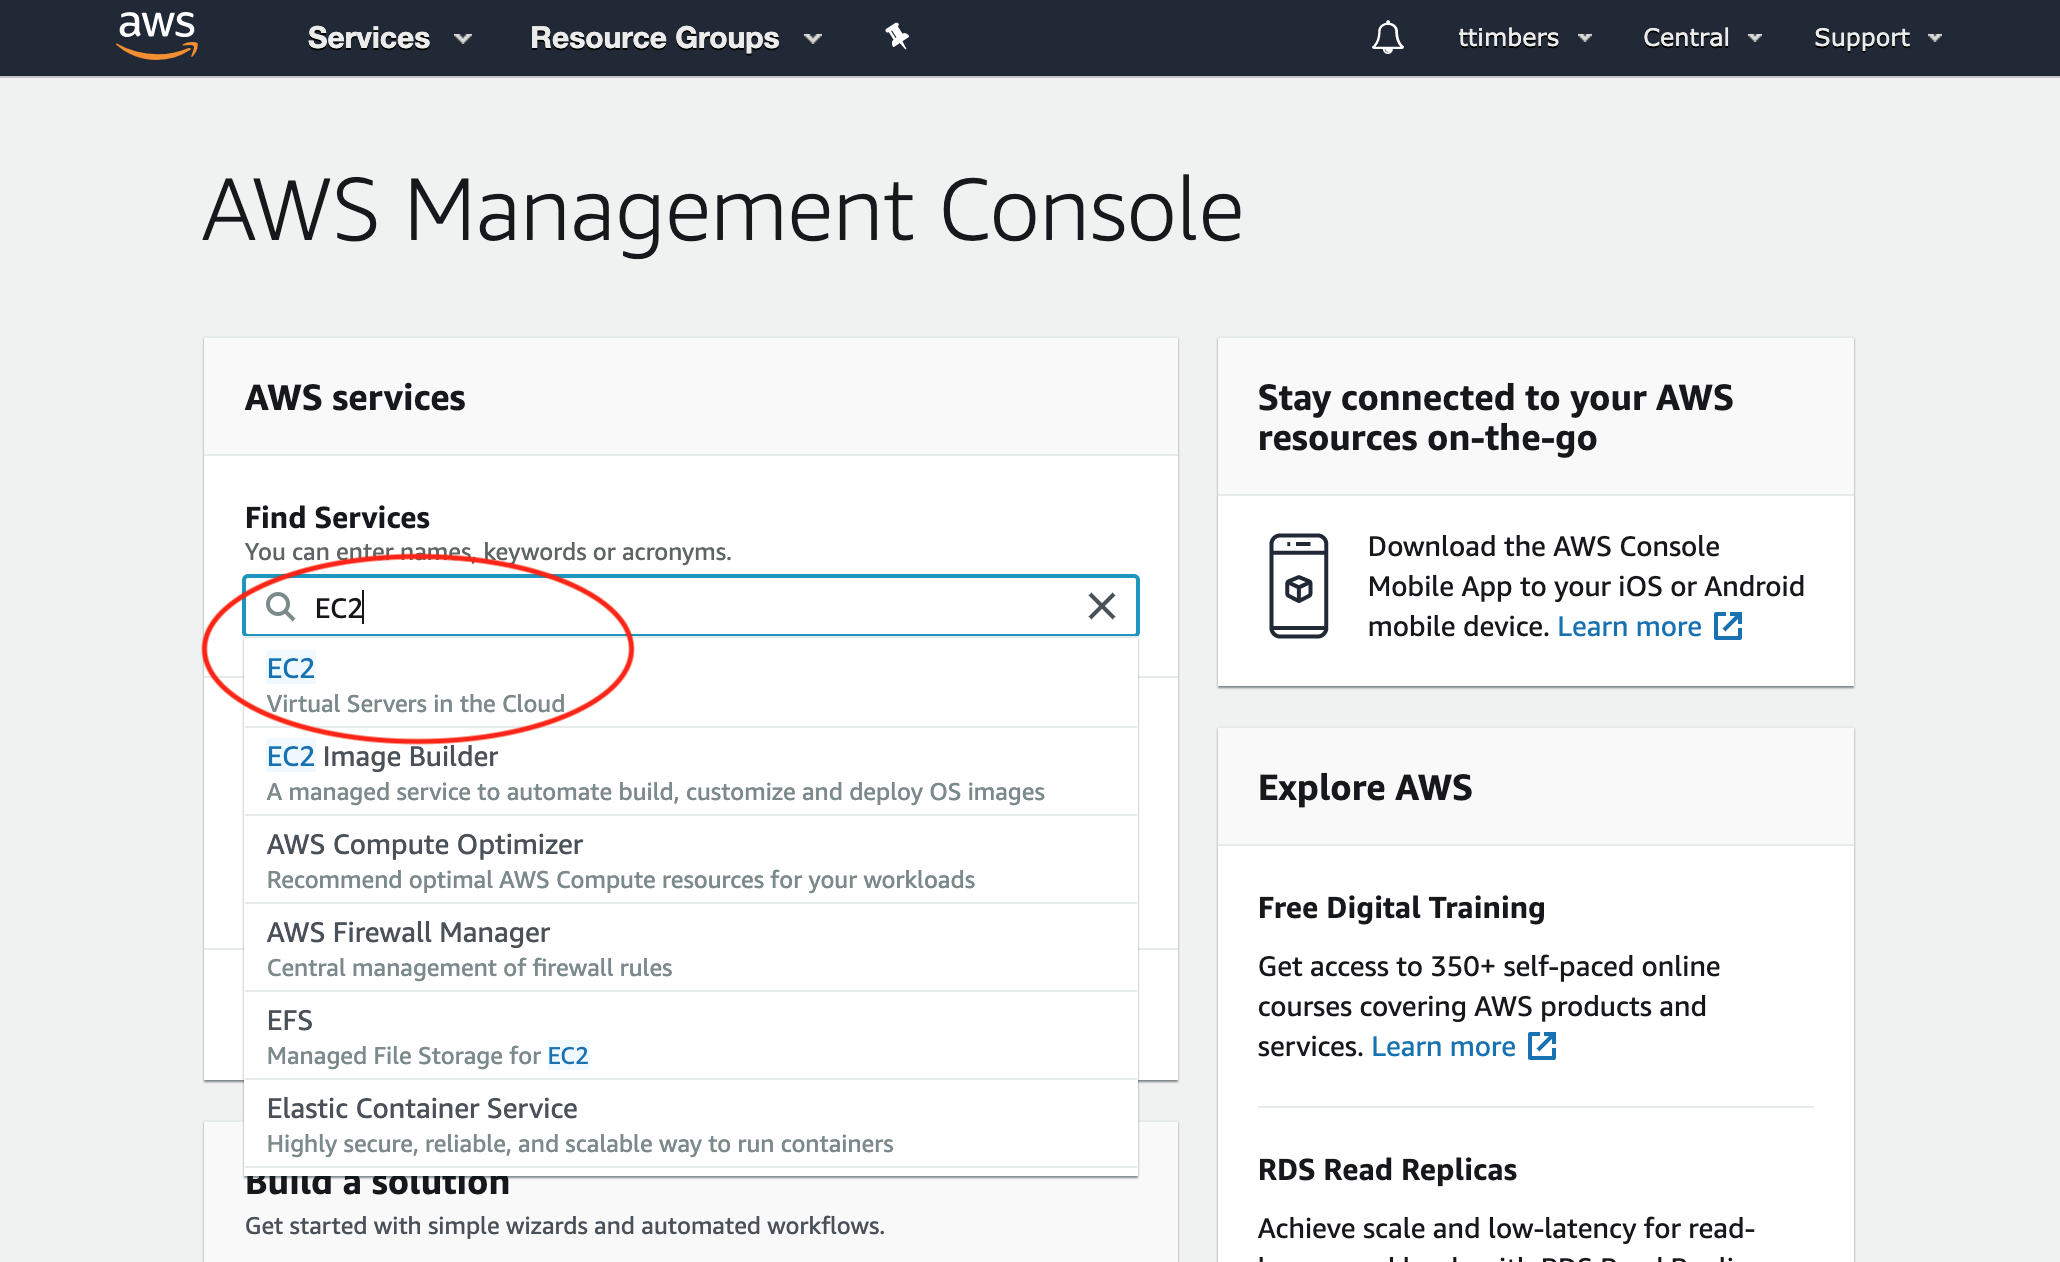
Log into the AWS Management console and search for EC2 in the AWS services search bar:
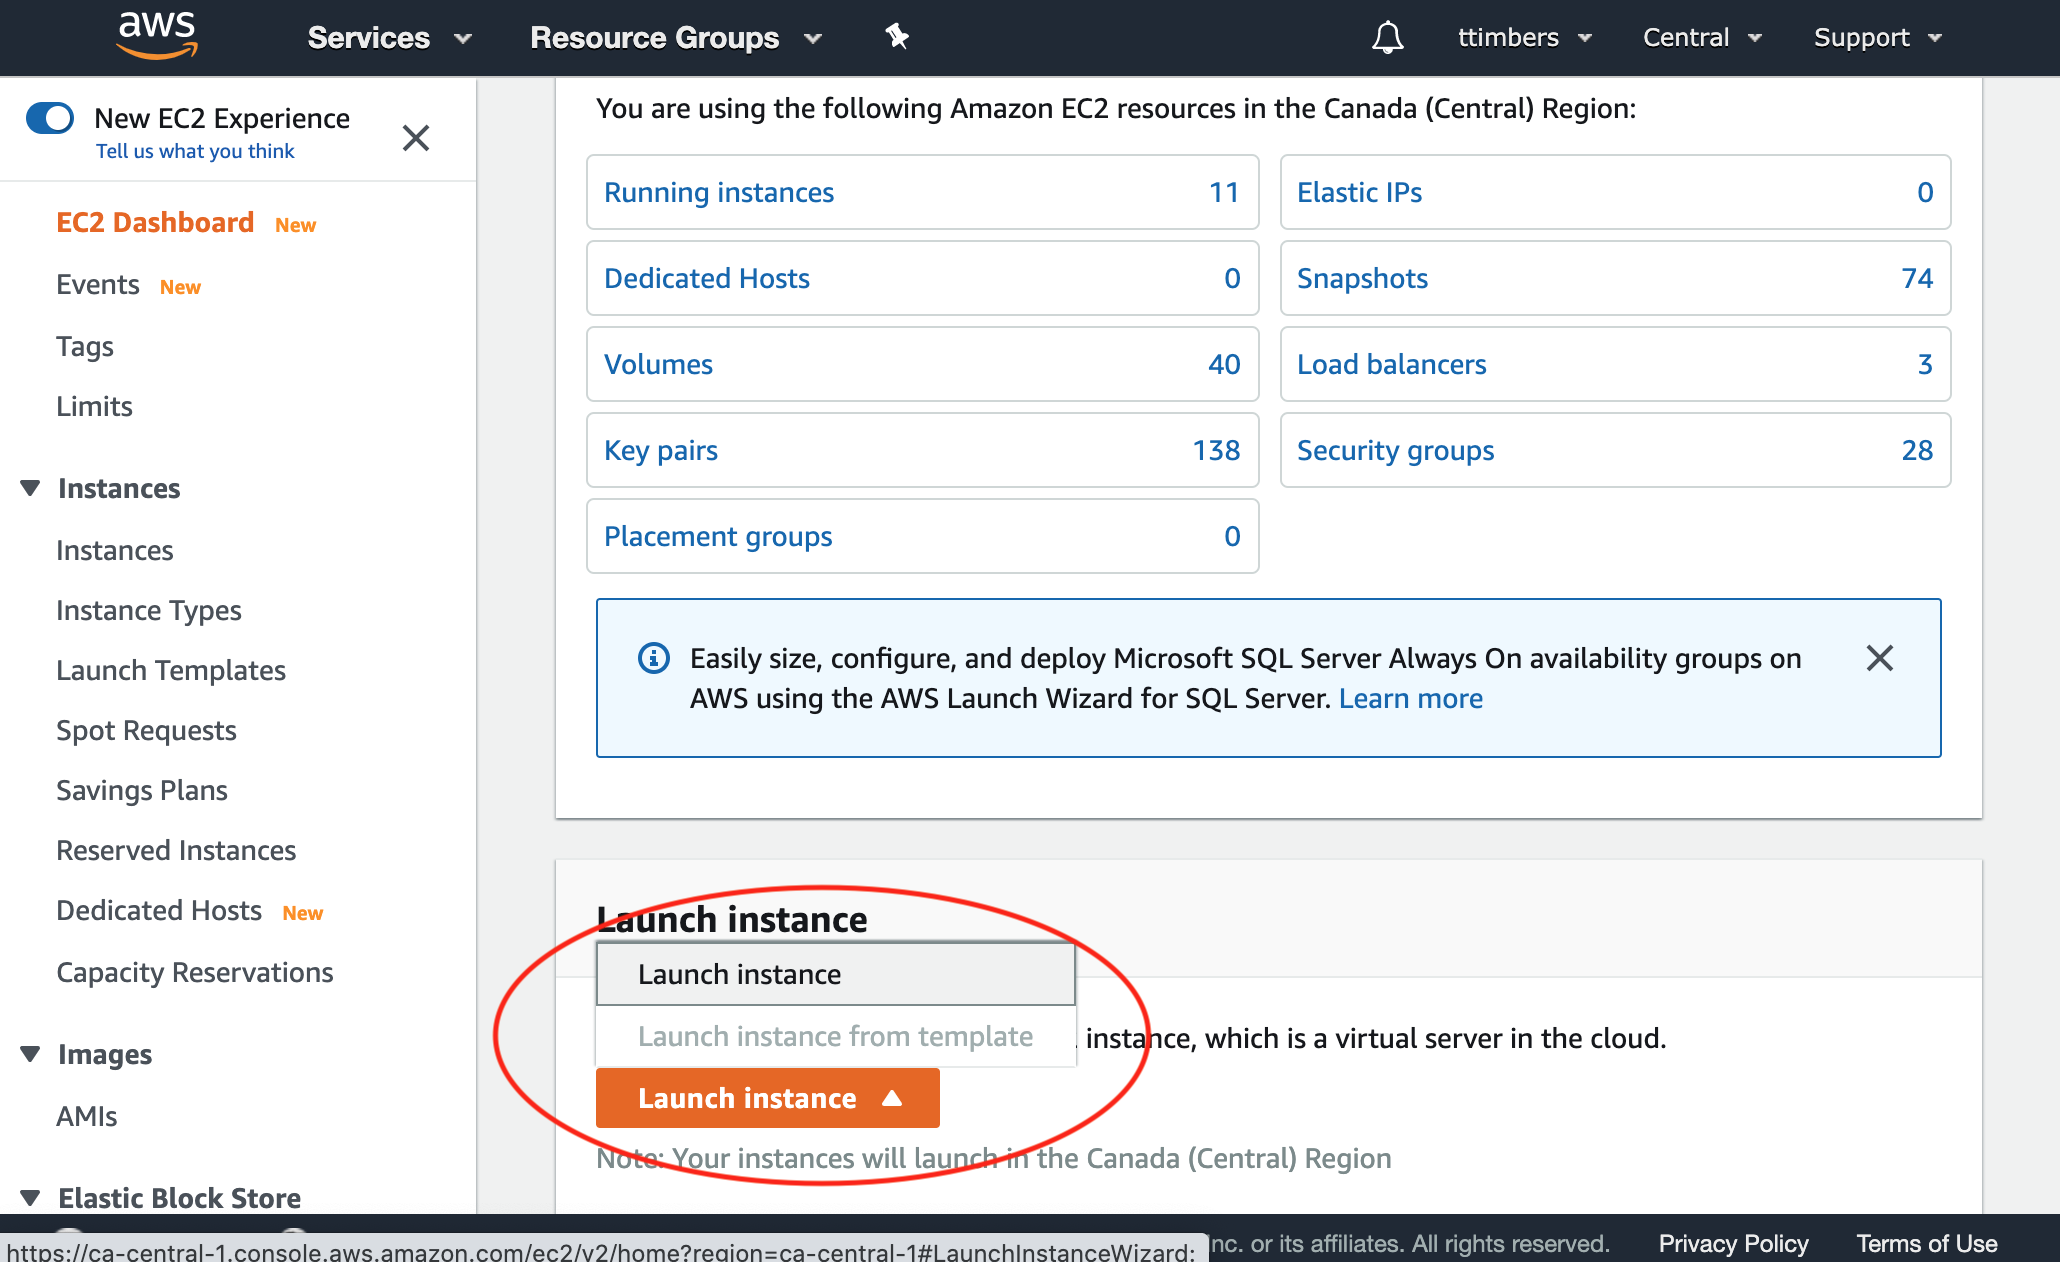
Scroll down and click on the orange “Launch Instance” button:
Search for the Centos 7.8 Community Amazon machine image (AMI) that has the id
ami-0252eebc56636a56b:
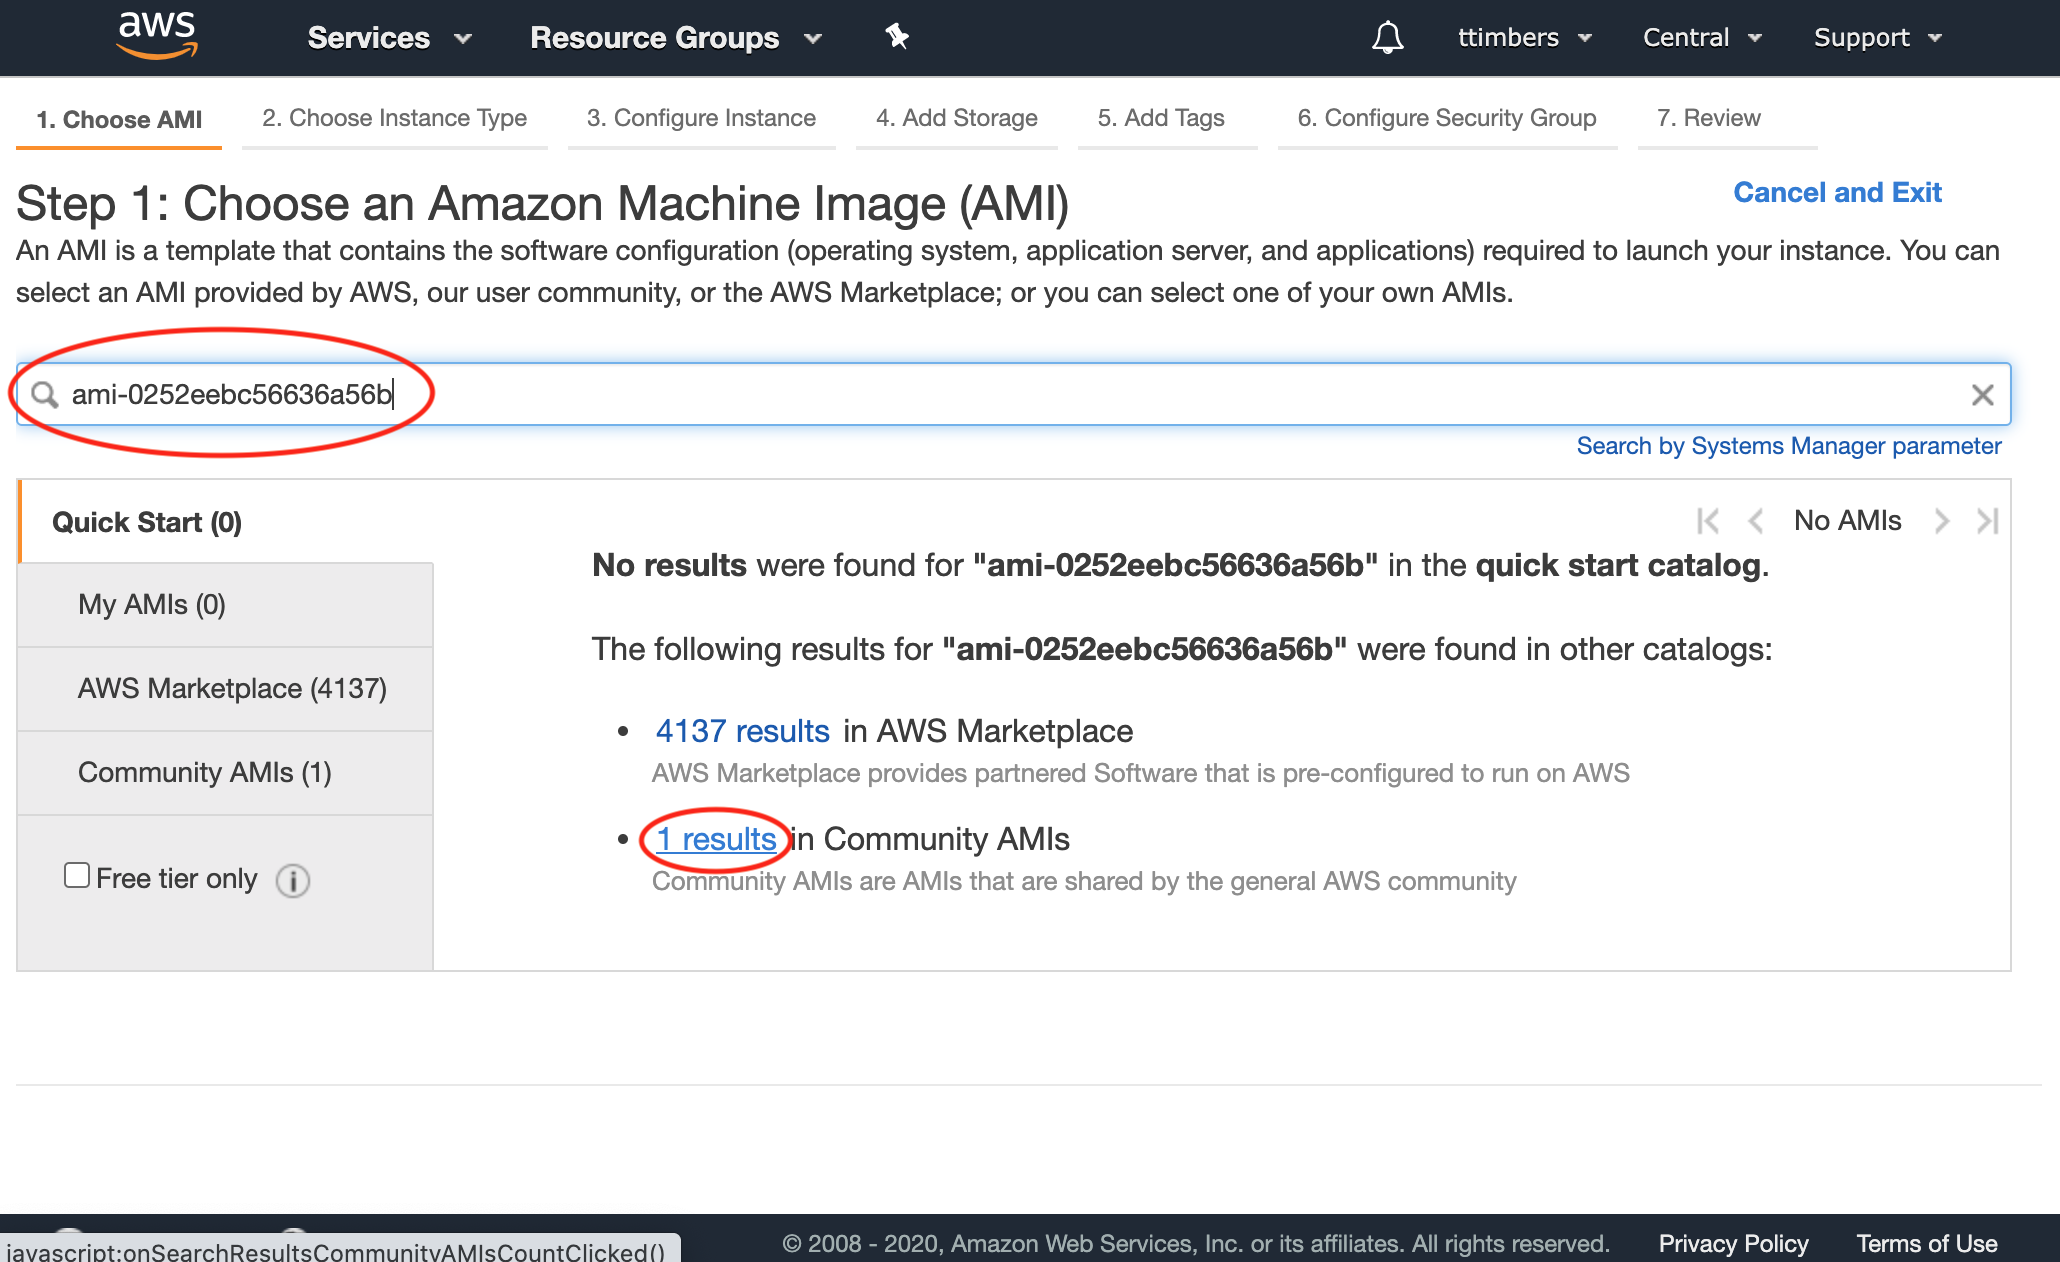
and select it:
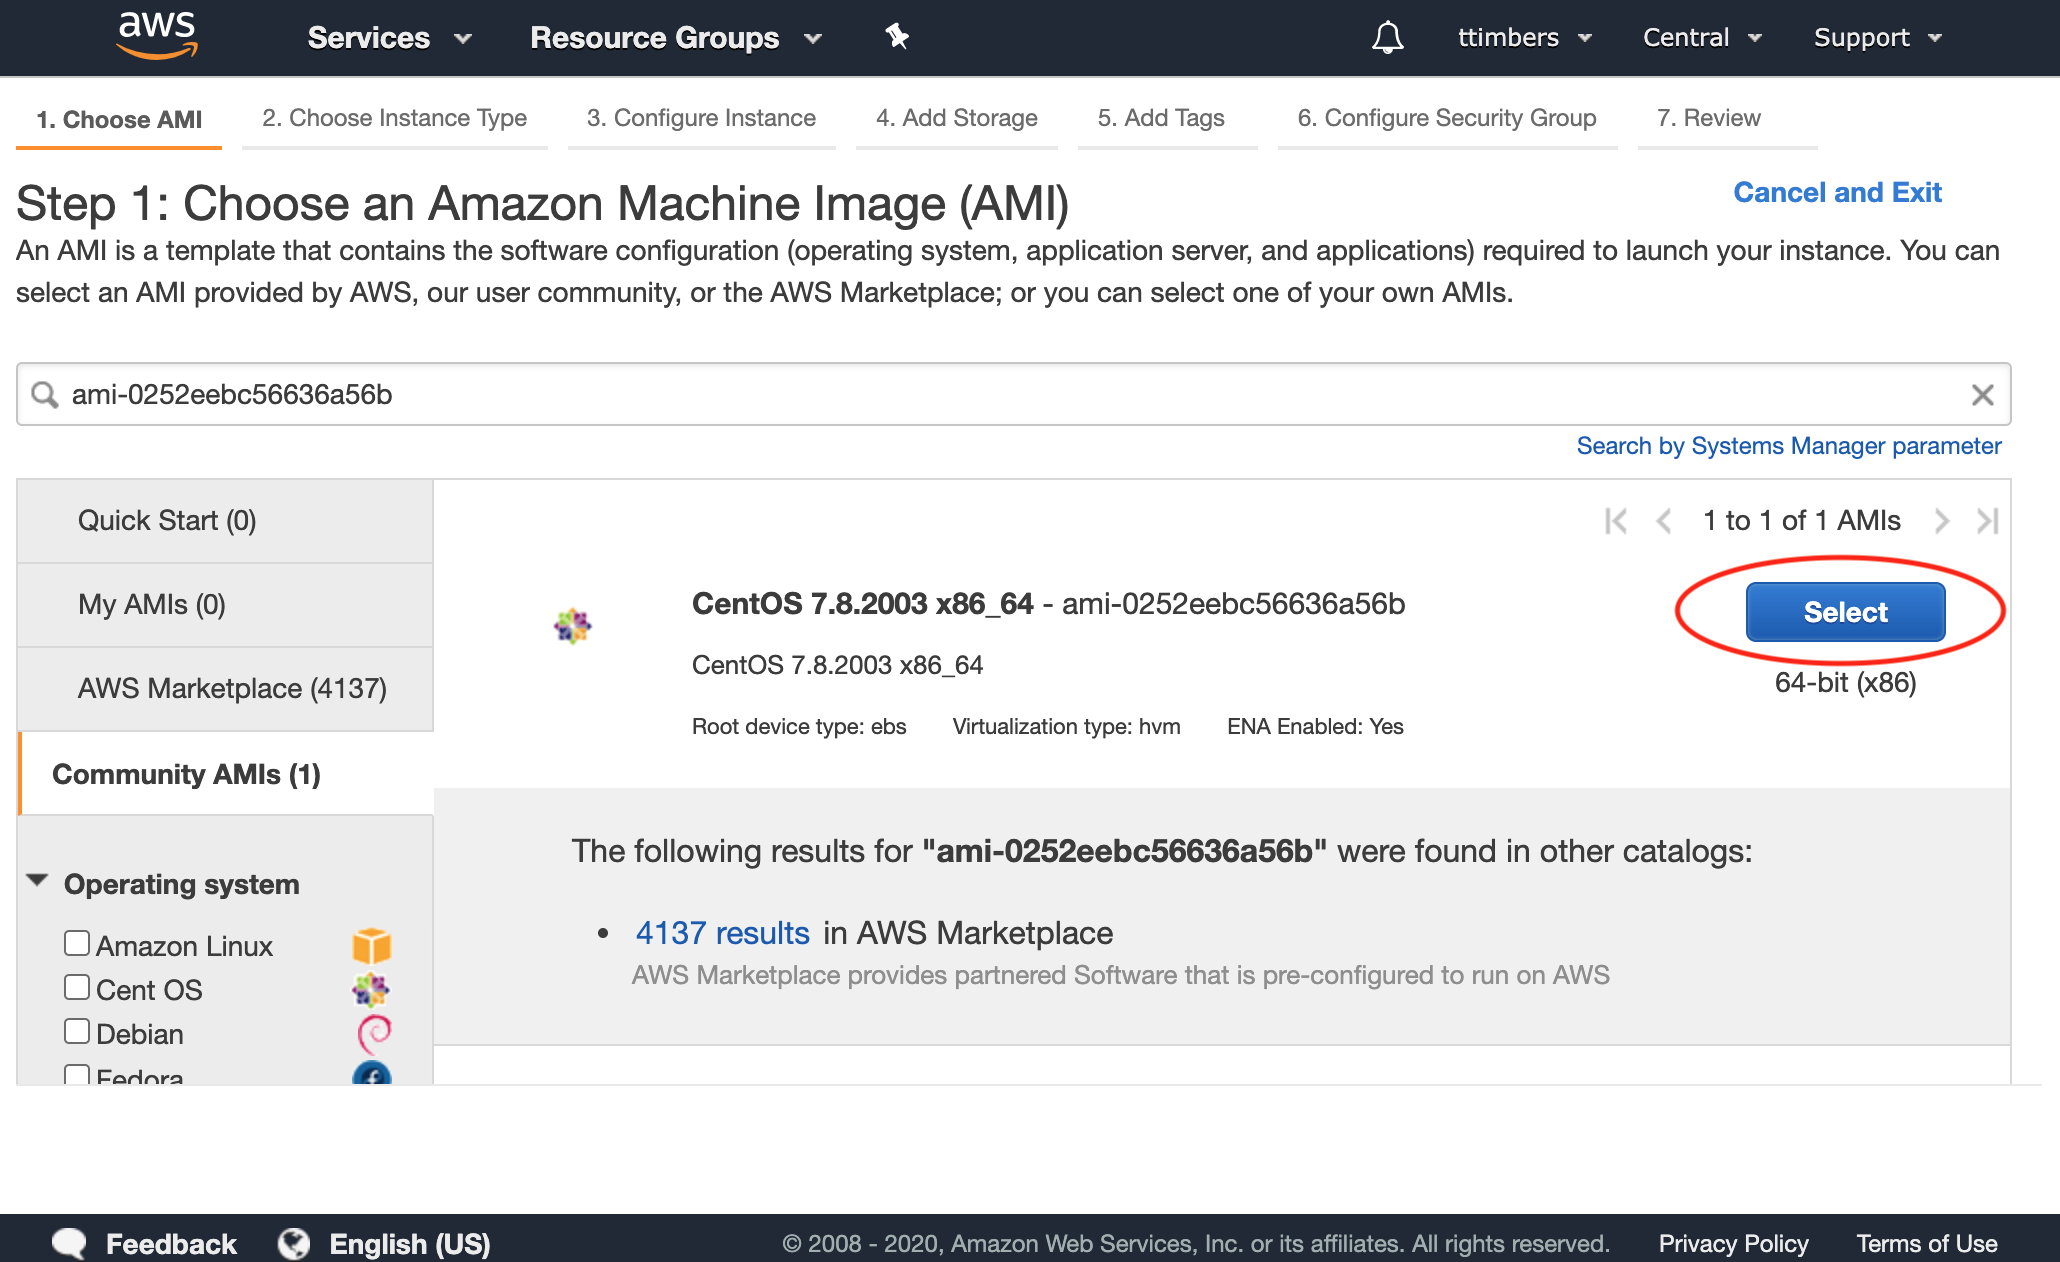
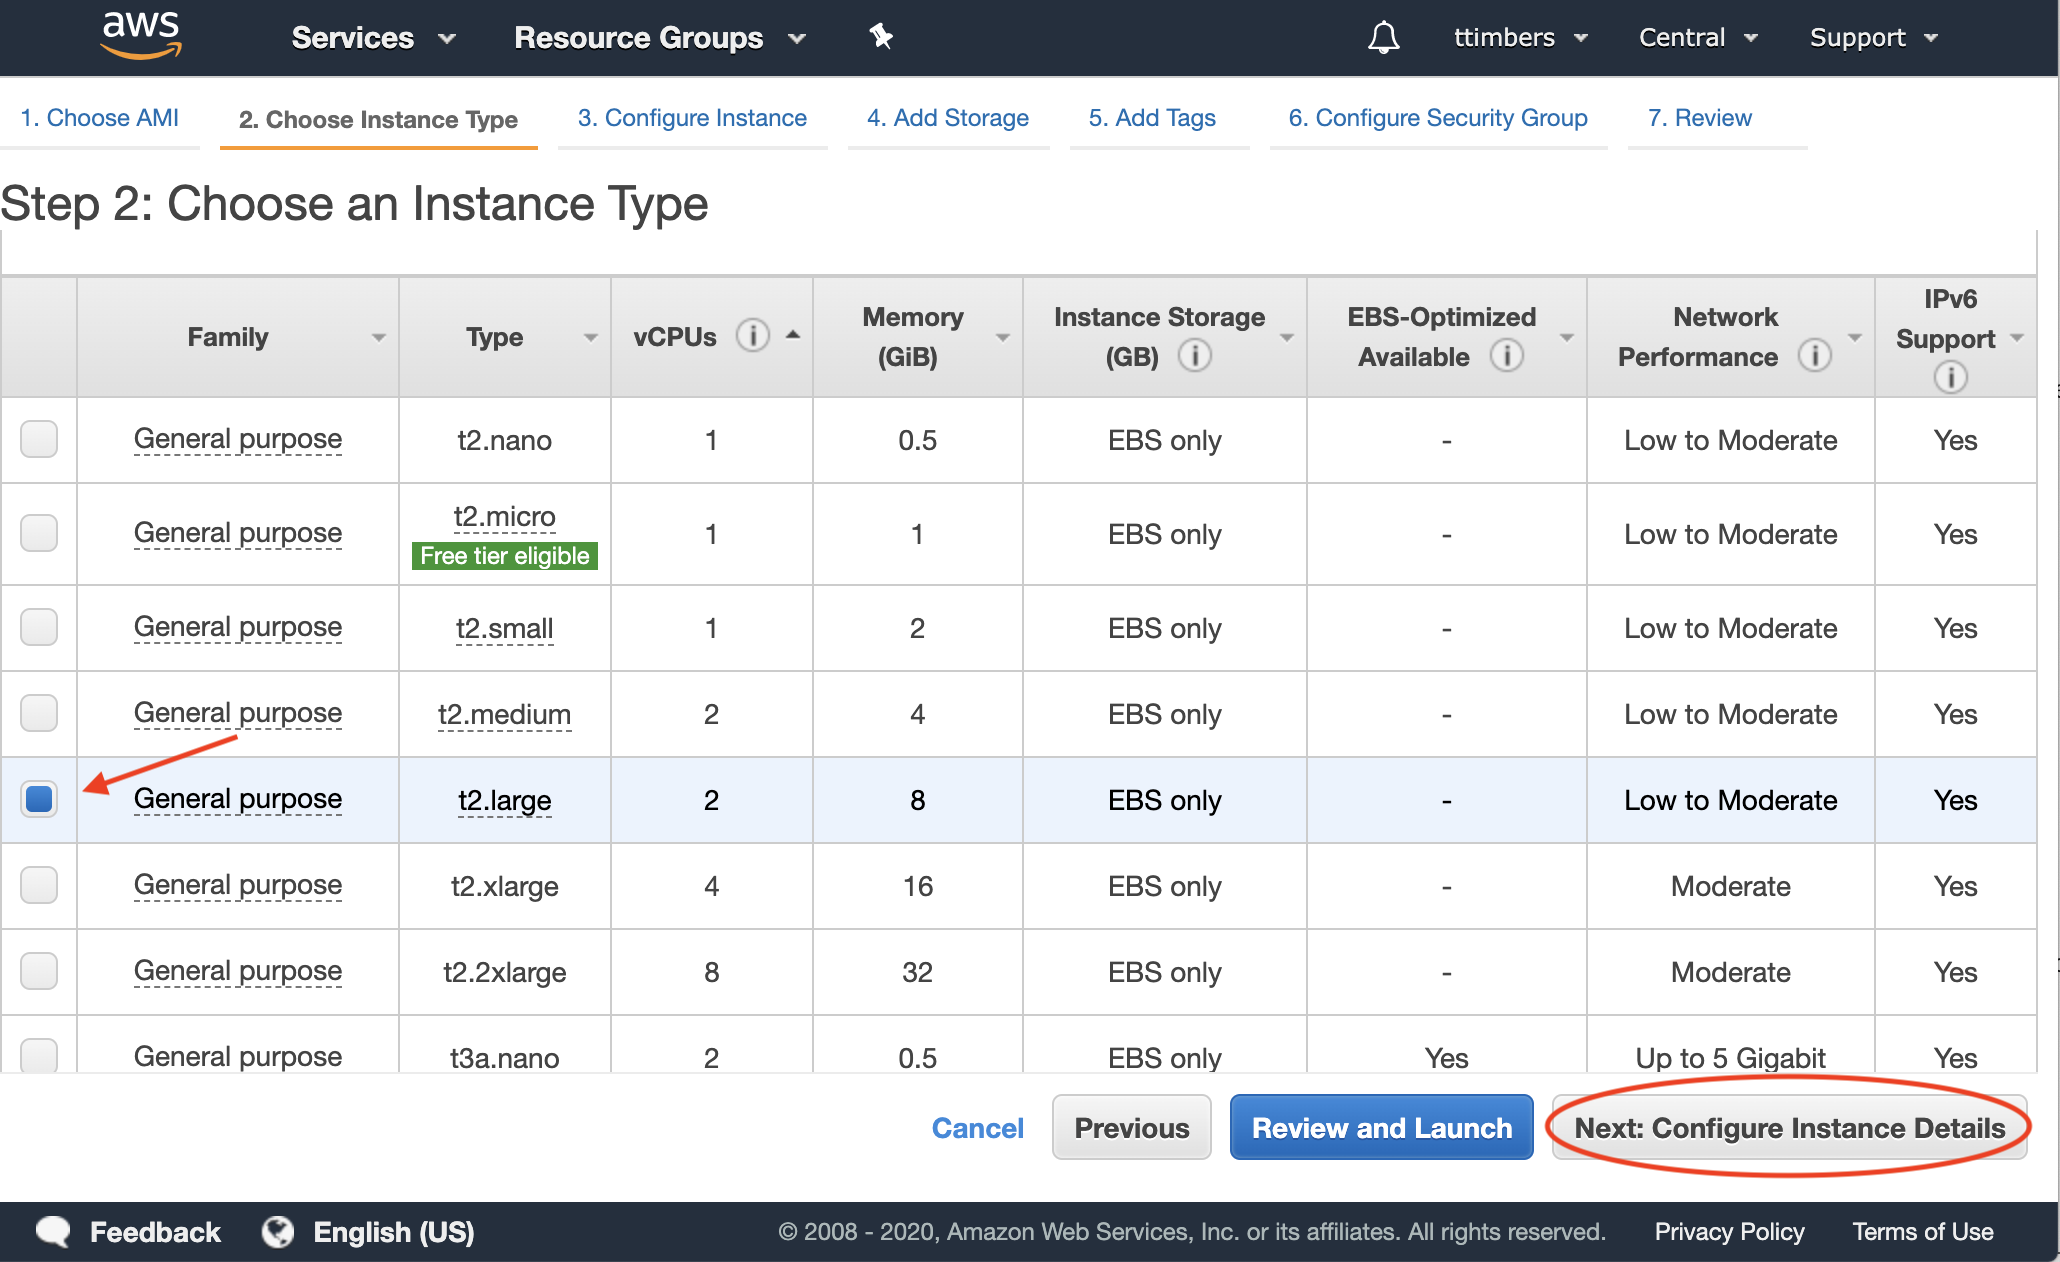
Select an instance type (we use a t2.large) and click “Next: Configure Instance Details”:
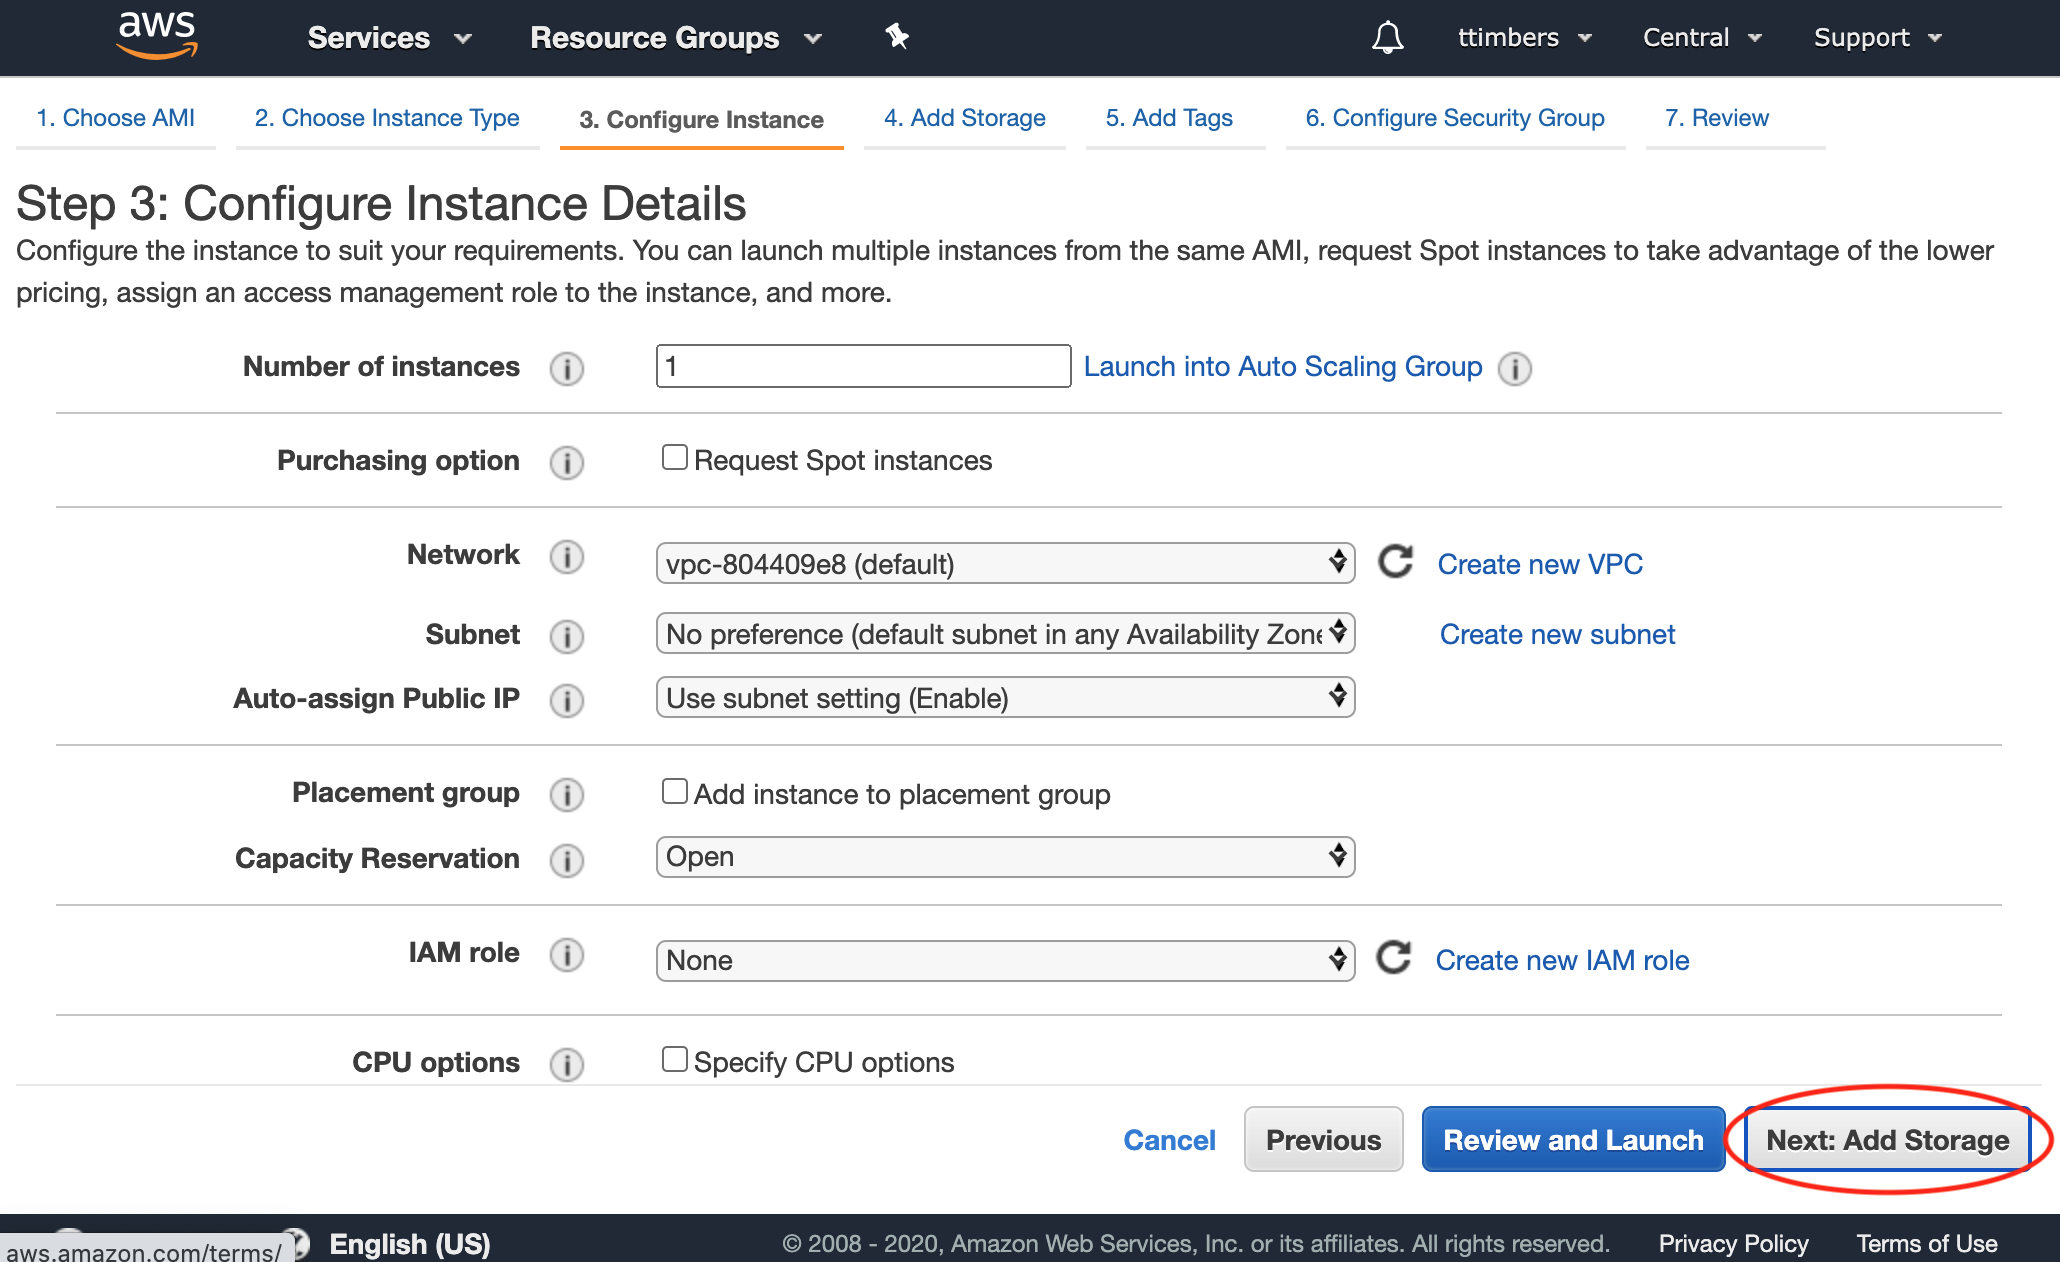
Leave these settings as is, and click on “Next: Add Storage”:
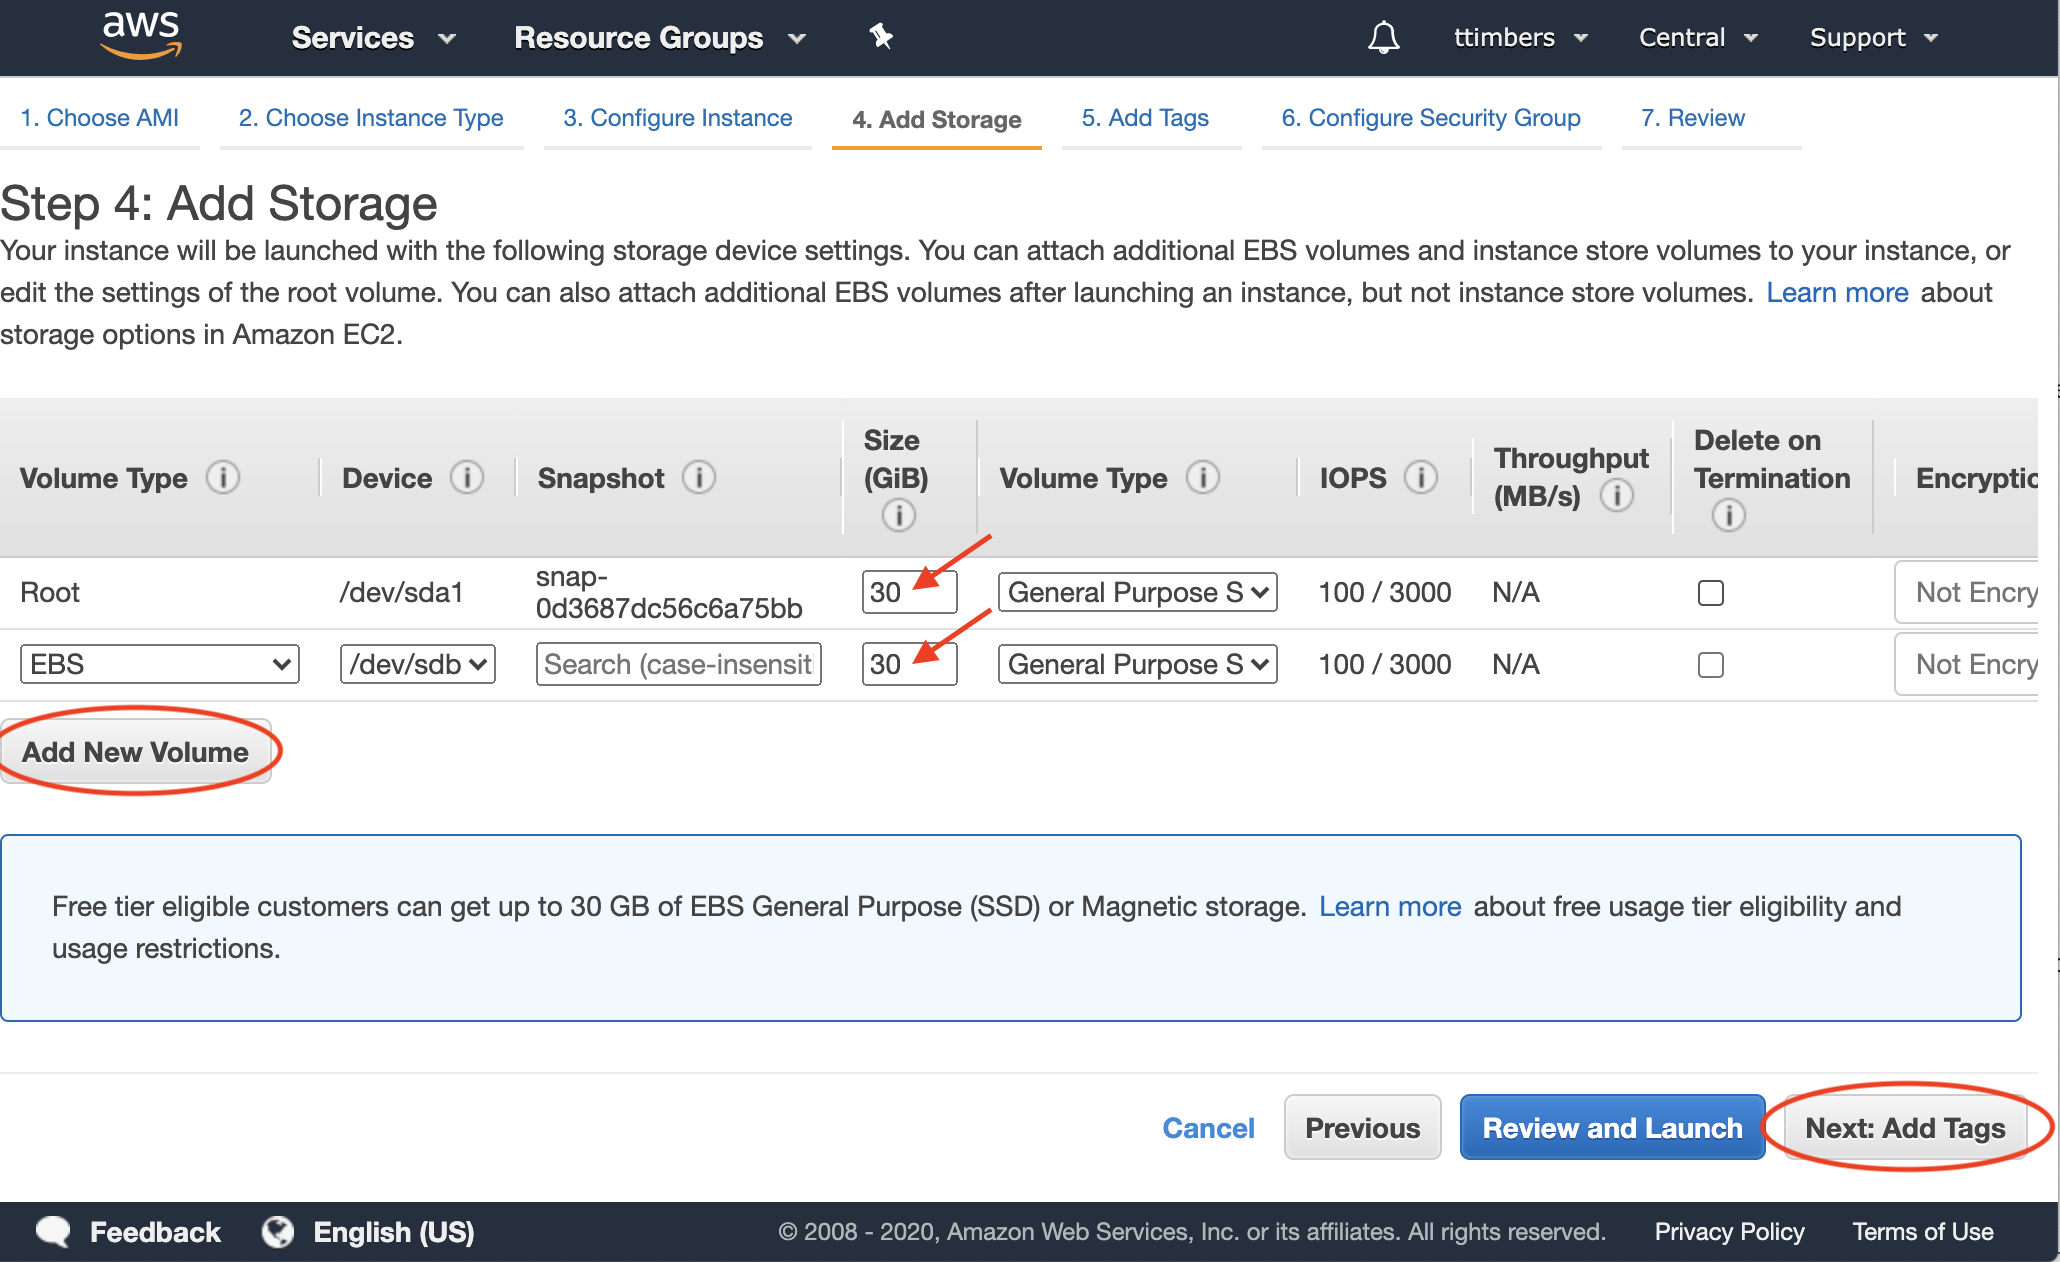
Click the “Add New Volume” button to add an additional EBS volume for Docker. Edit the sizes to both be 30. Click the “Next: Add Tags” button:
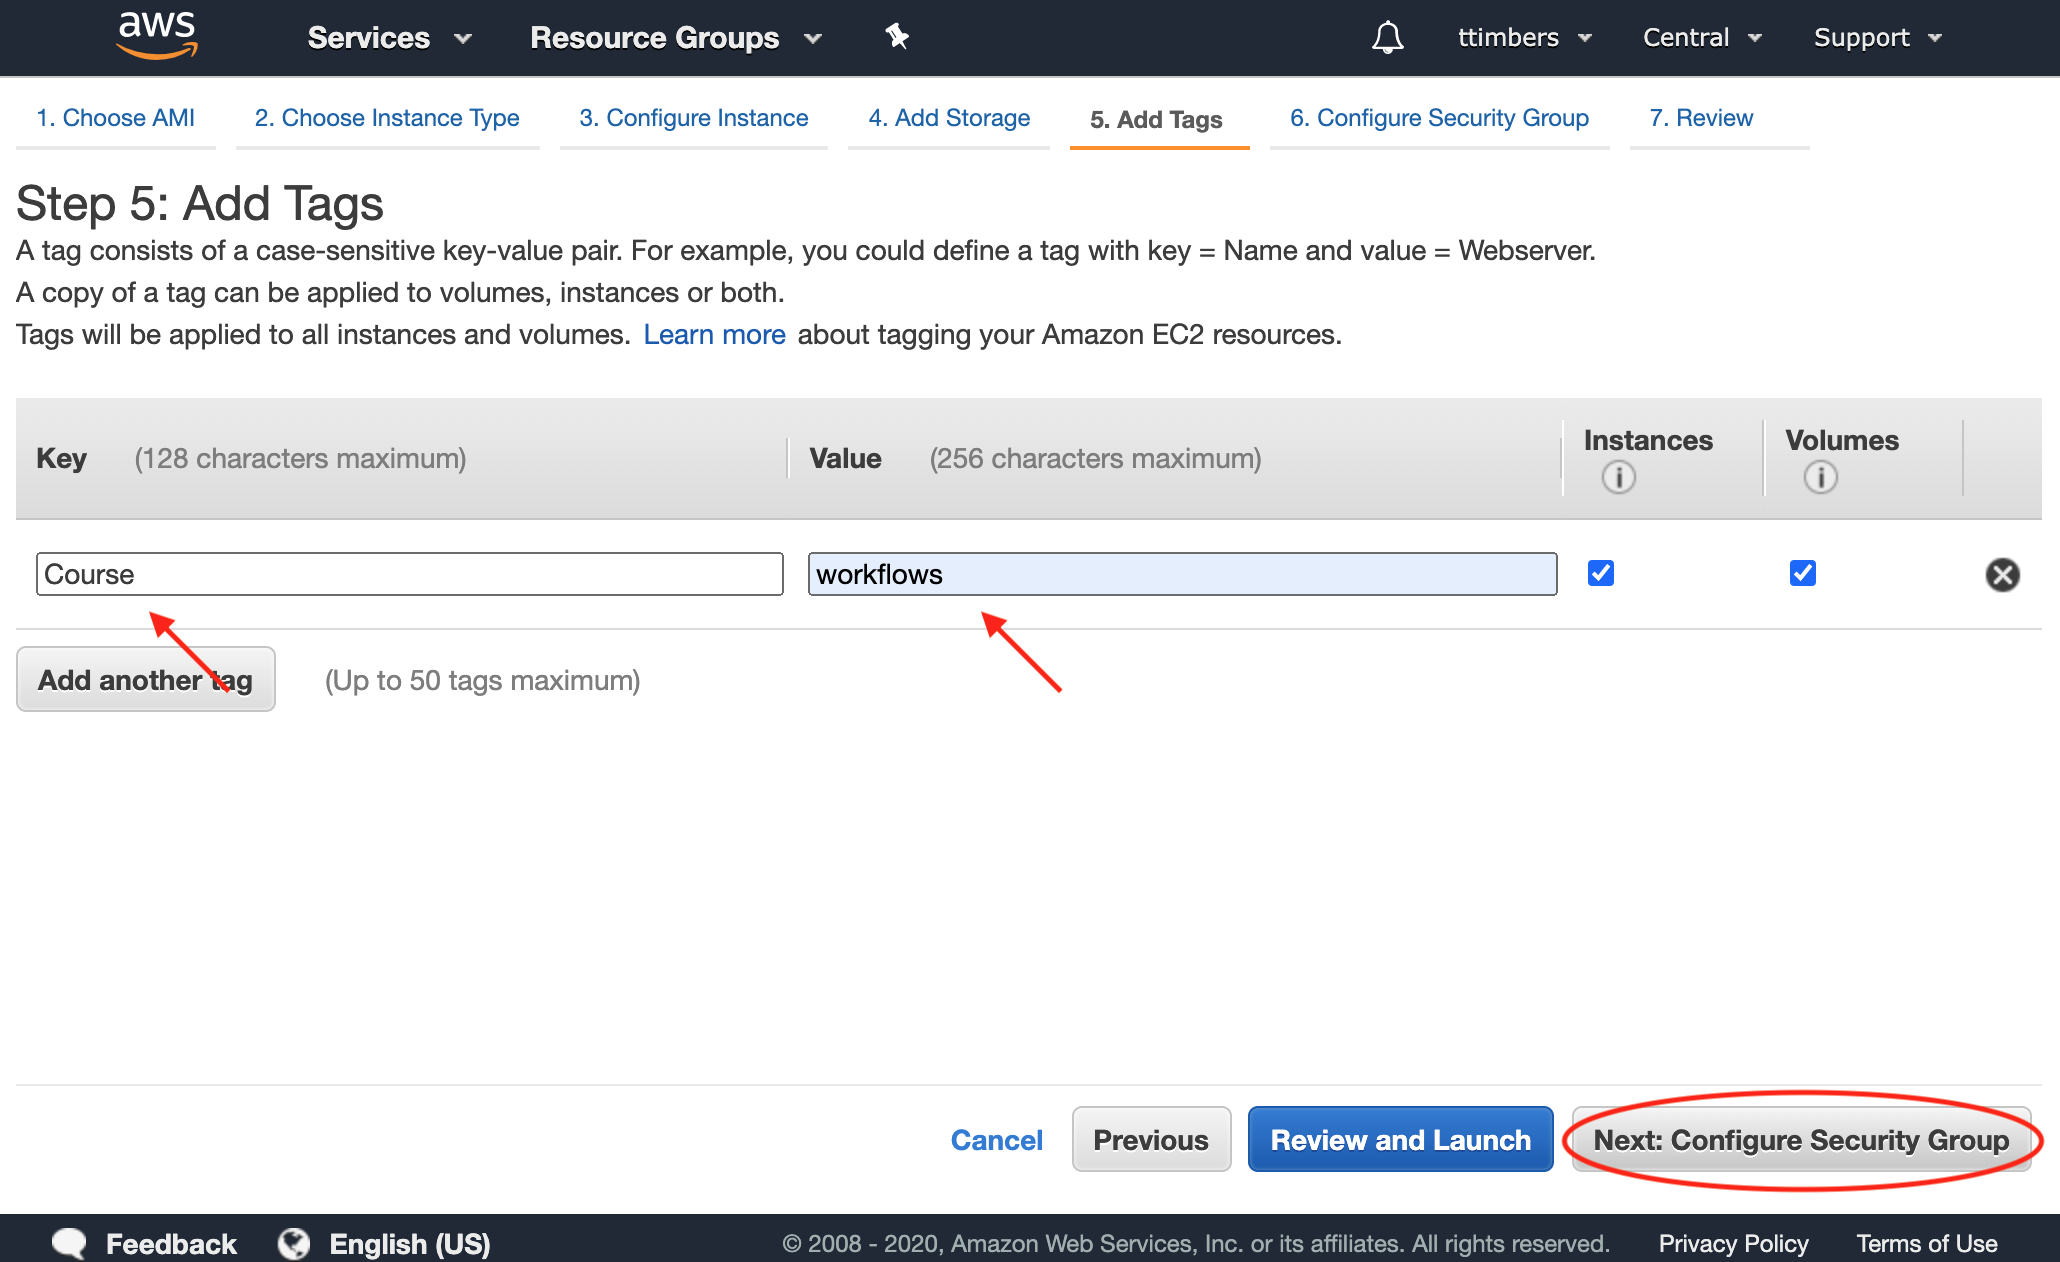
Add a key and value pair to easily identify the machine later on your EC2 console (we used the key “Course” and value “workflows” here, but you can choose whatever is meaningful to you). Click the “Next: Configure Security Group” button:
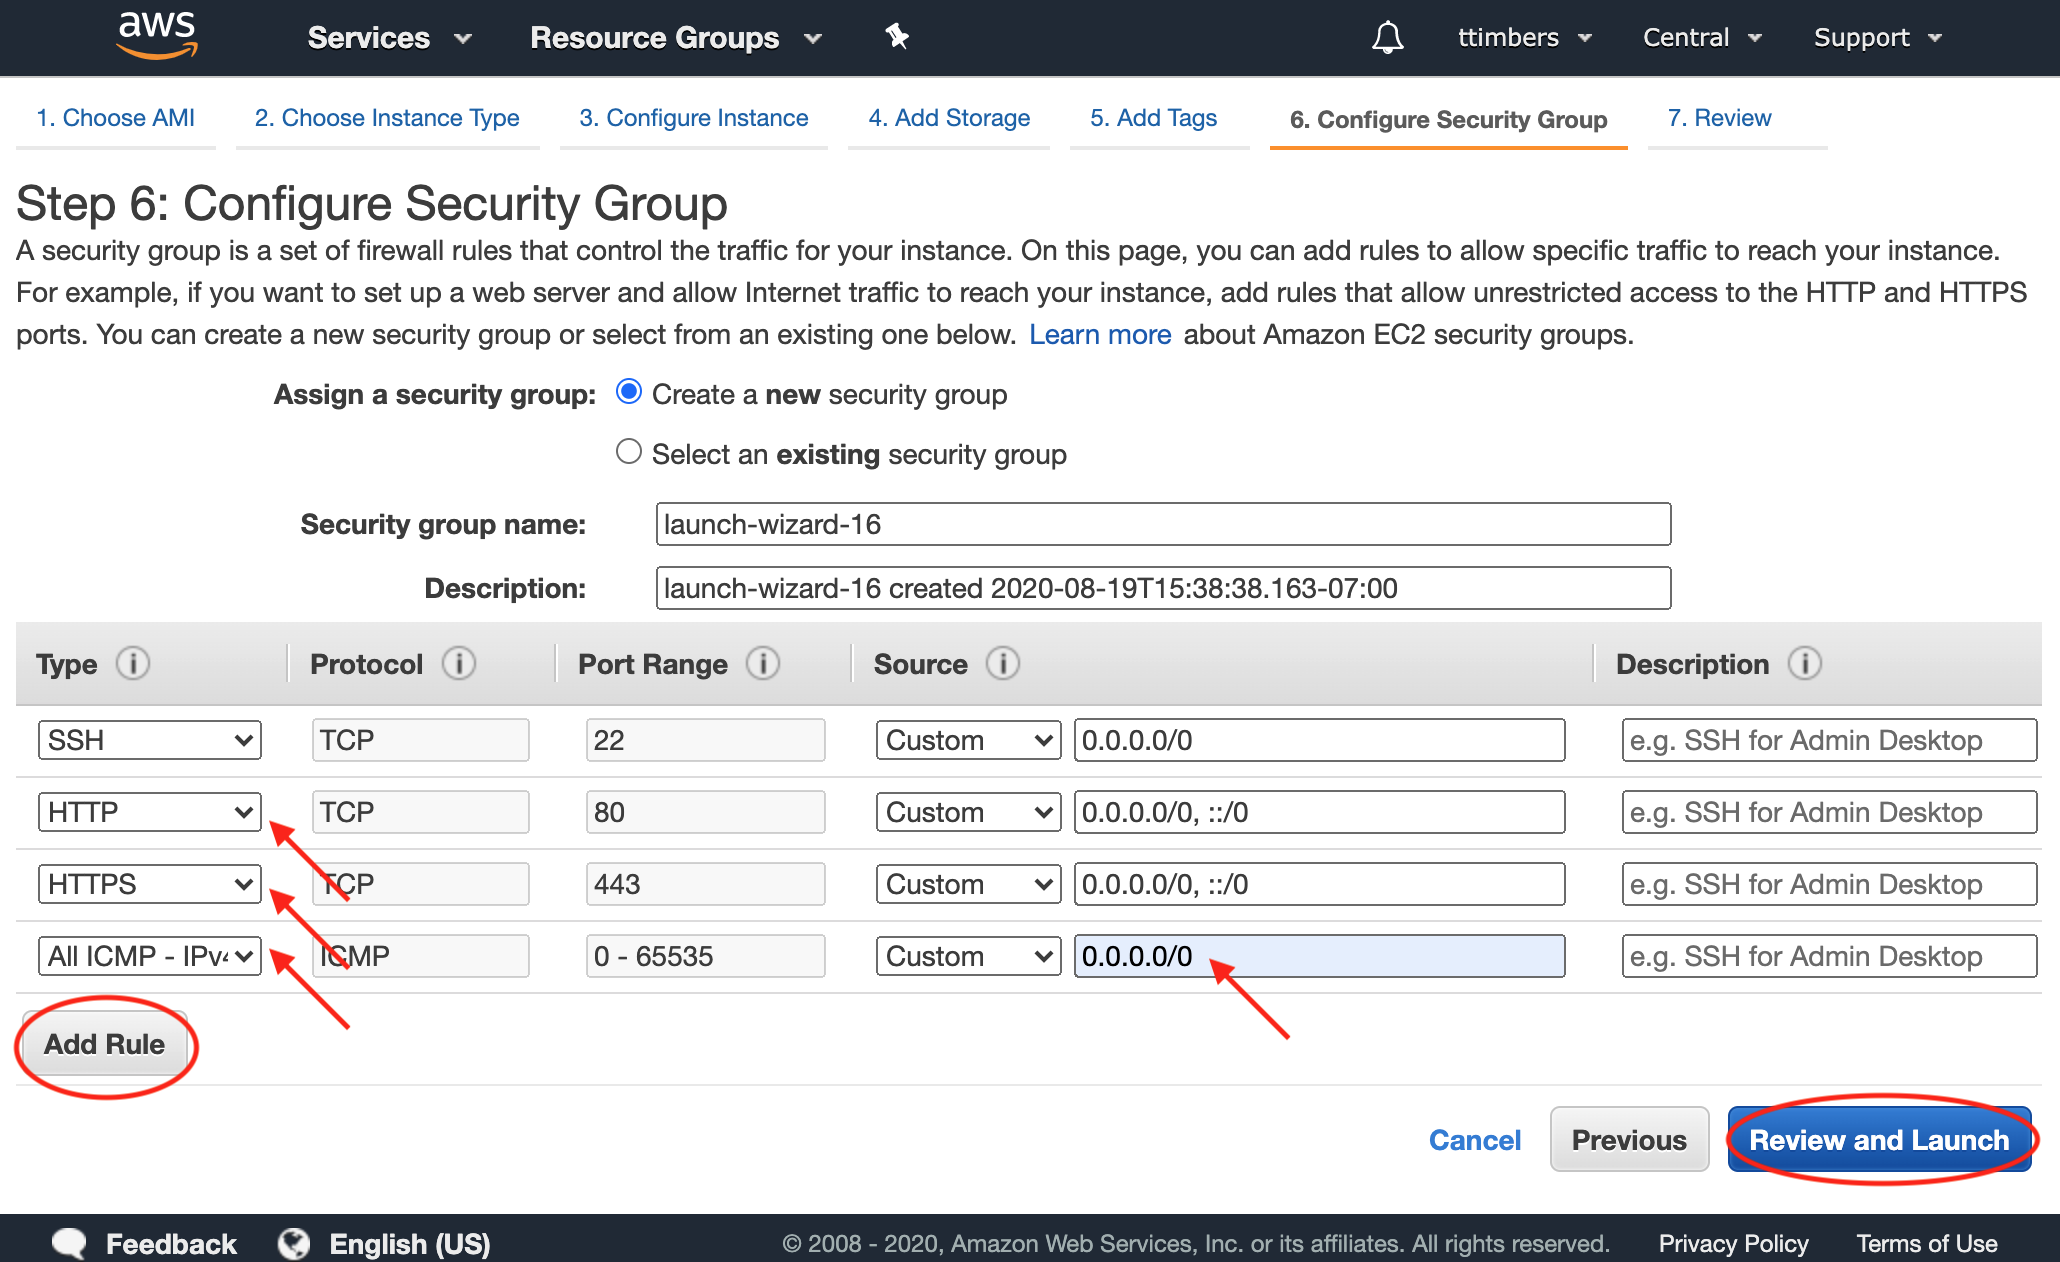
Click the “Add Rule” button three times to add three additional security groups. Choose the one each of the following types: HTTP, HTTPS and All ICMP - IPv4. For the All ICMP - IPv4 security group, edit the value for the Source to be Custom and 0.0.0.0/0. Click the blue “Review and Launch” button:
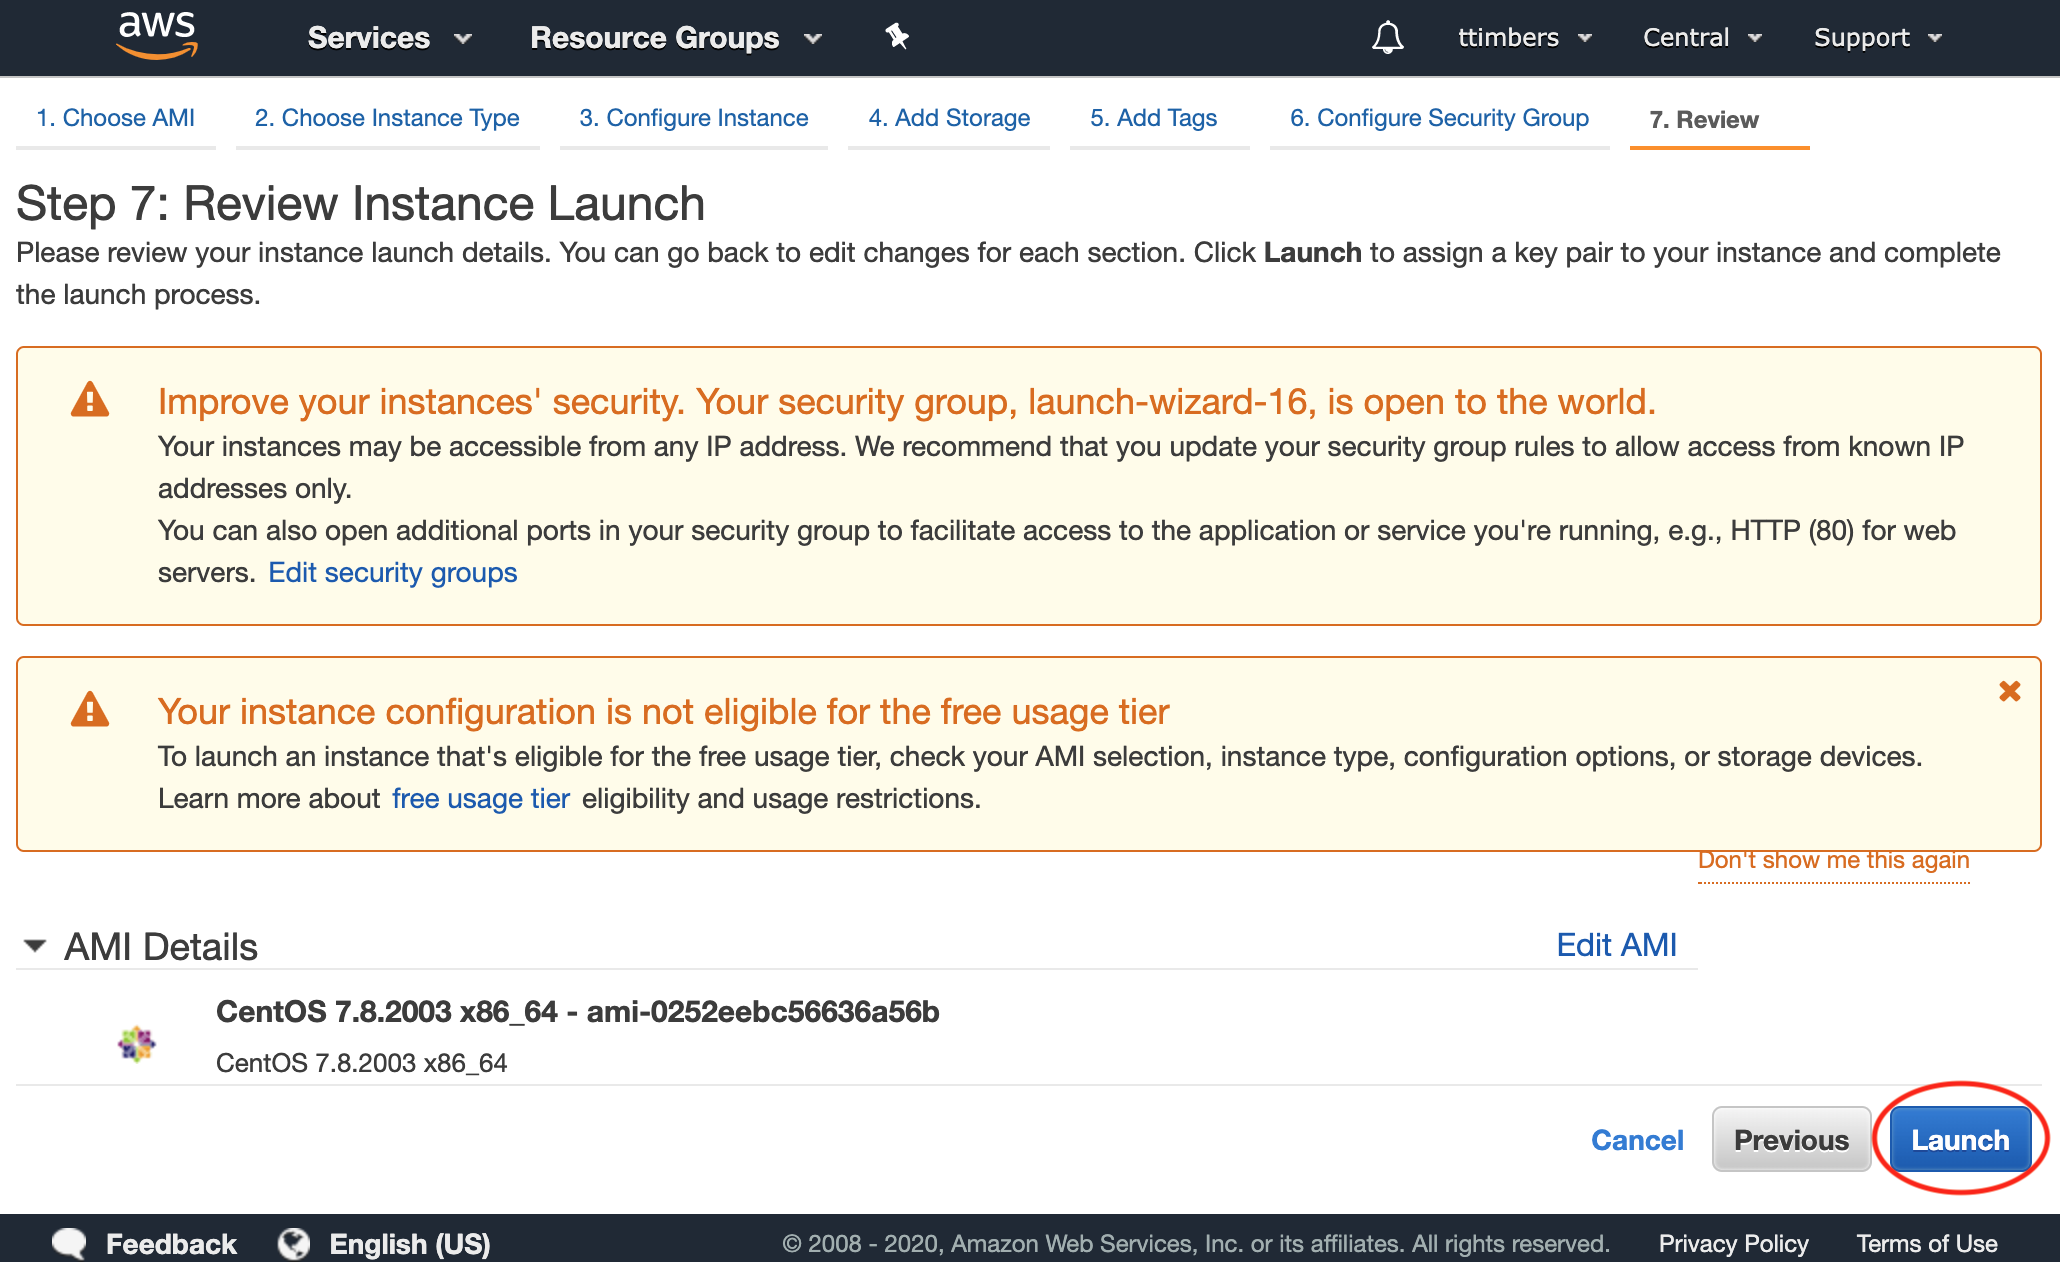
Review your settings, and if satisfied, click the blue “Launch” button:
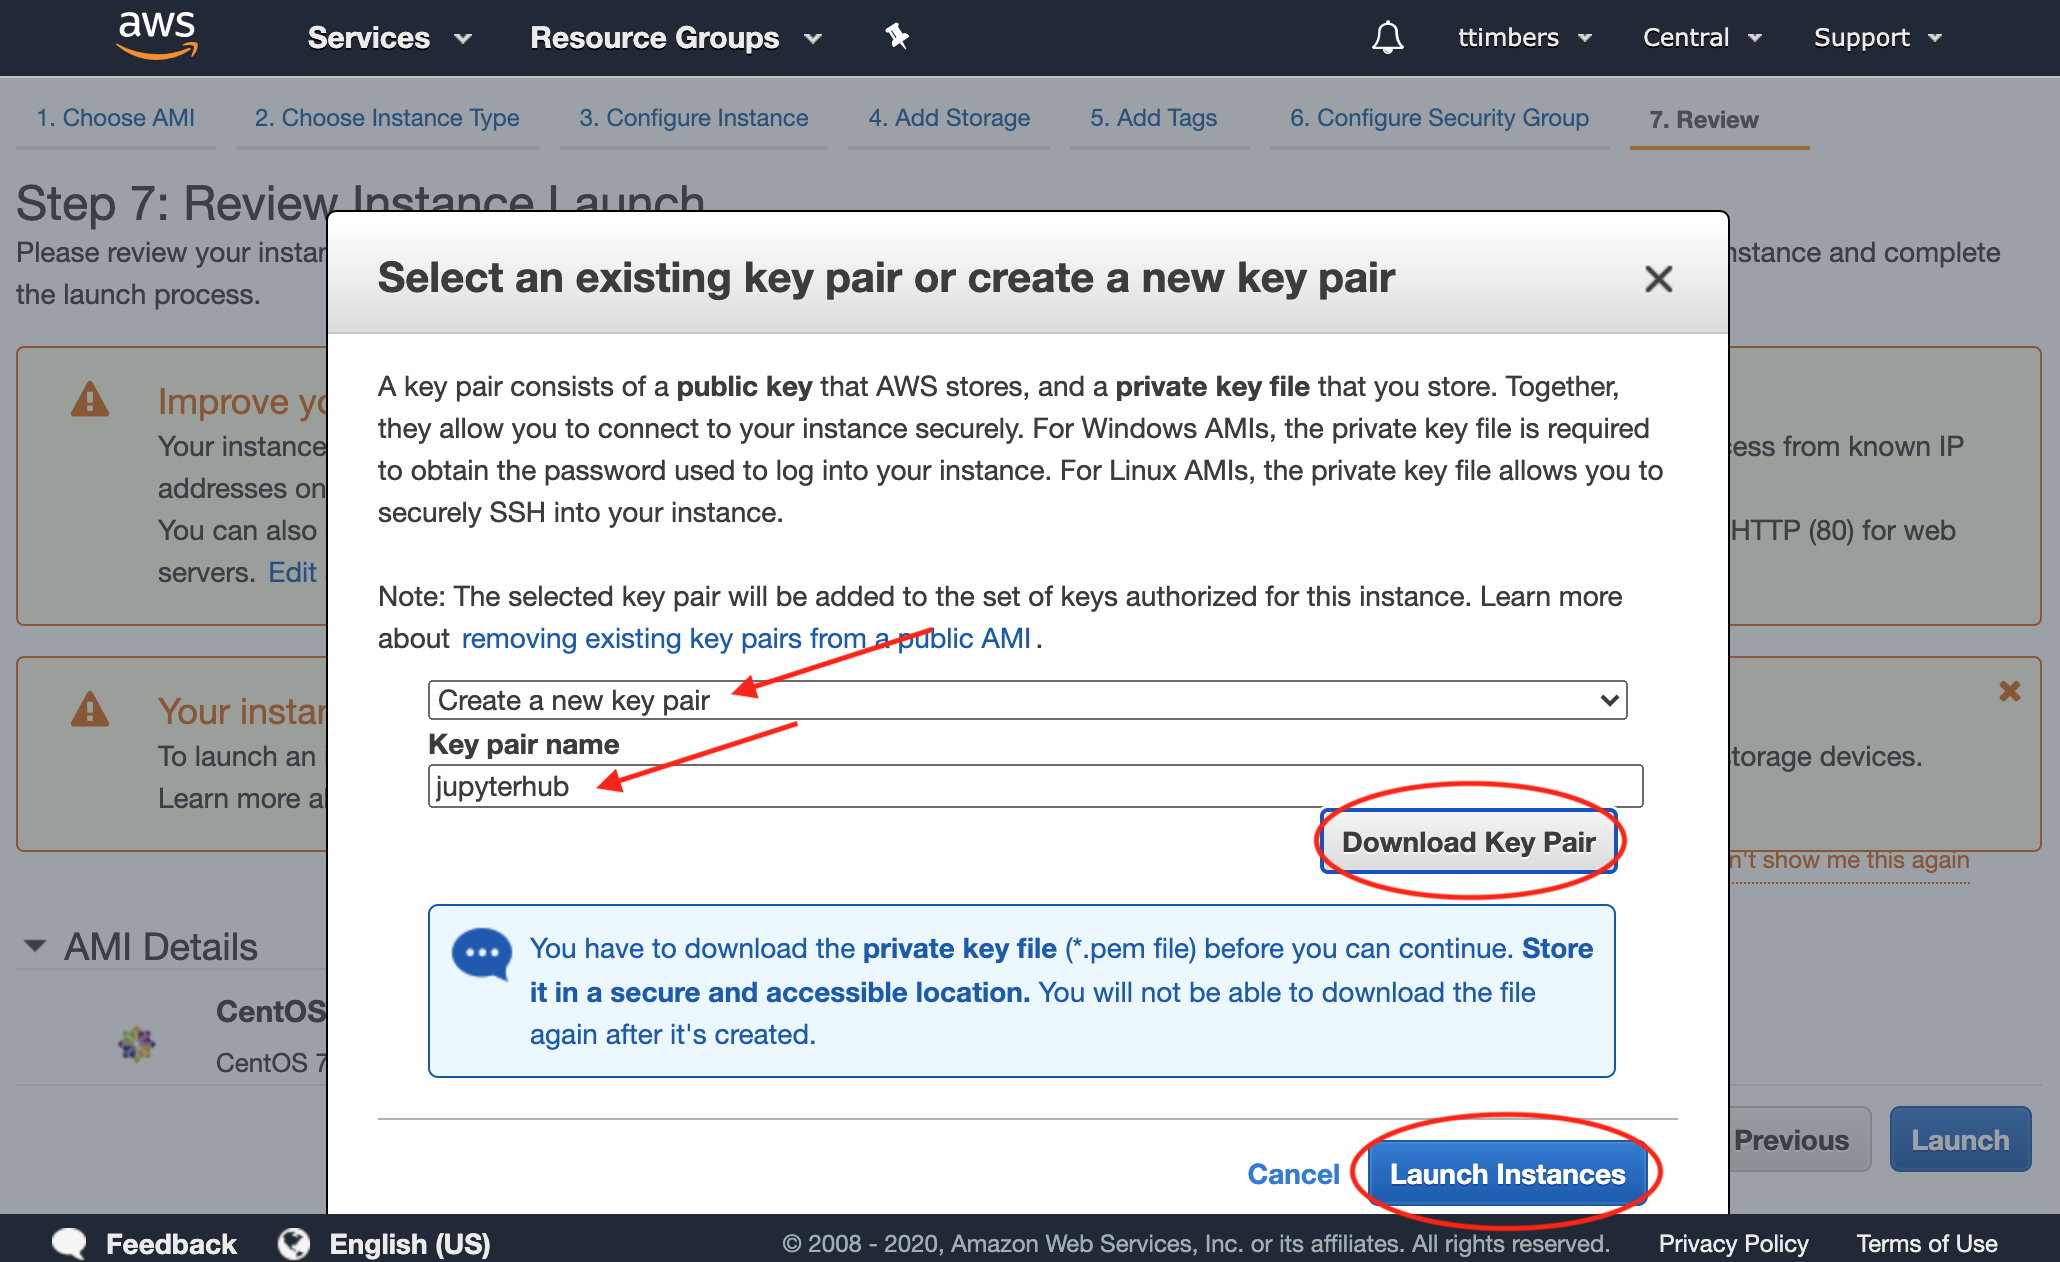
Choose “Create a new key pair” and create a “Key pair name” (here we used jupyterhub). Click “Download Key Pair” and then the blue “Launch Instance” button:
Save the key pair somewhere intentional on your laptop (e.g.,
~/.ssh/) and then type the following to update the permissions of the key:chmod 400 ~/.ssh/jupyterhub.pem
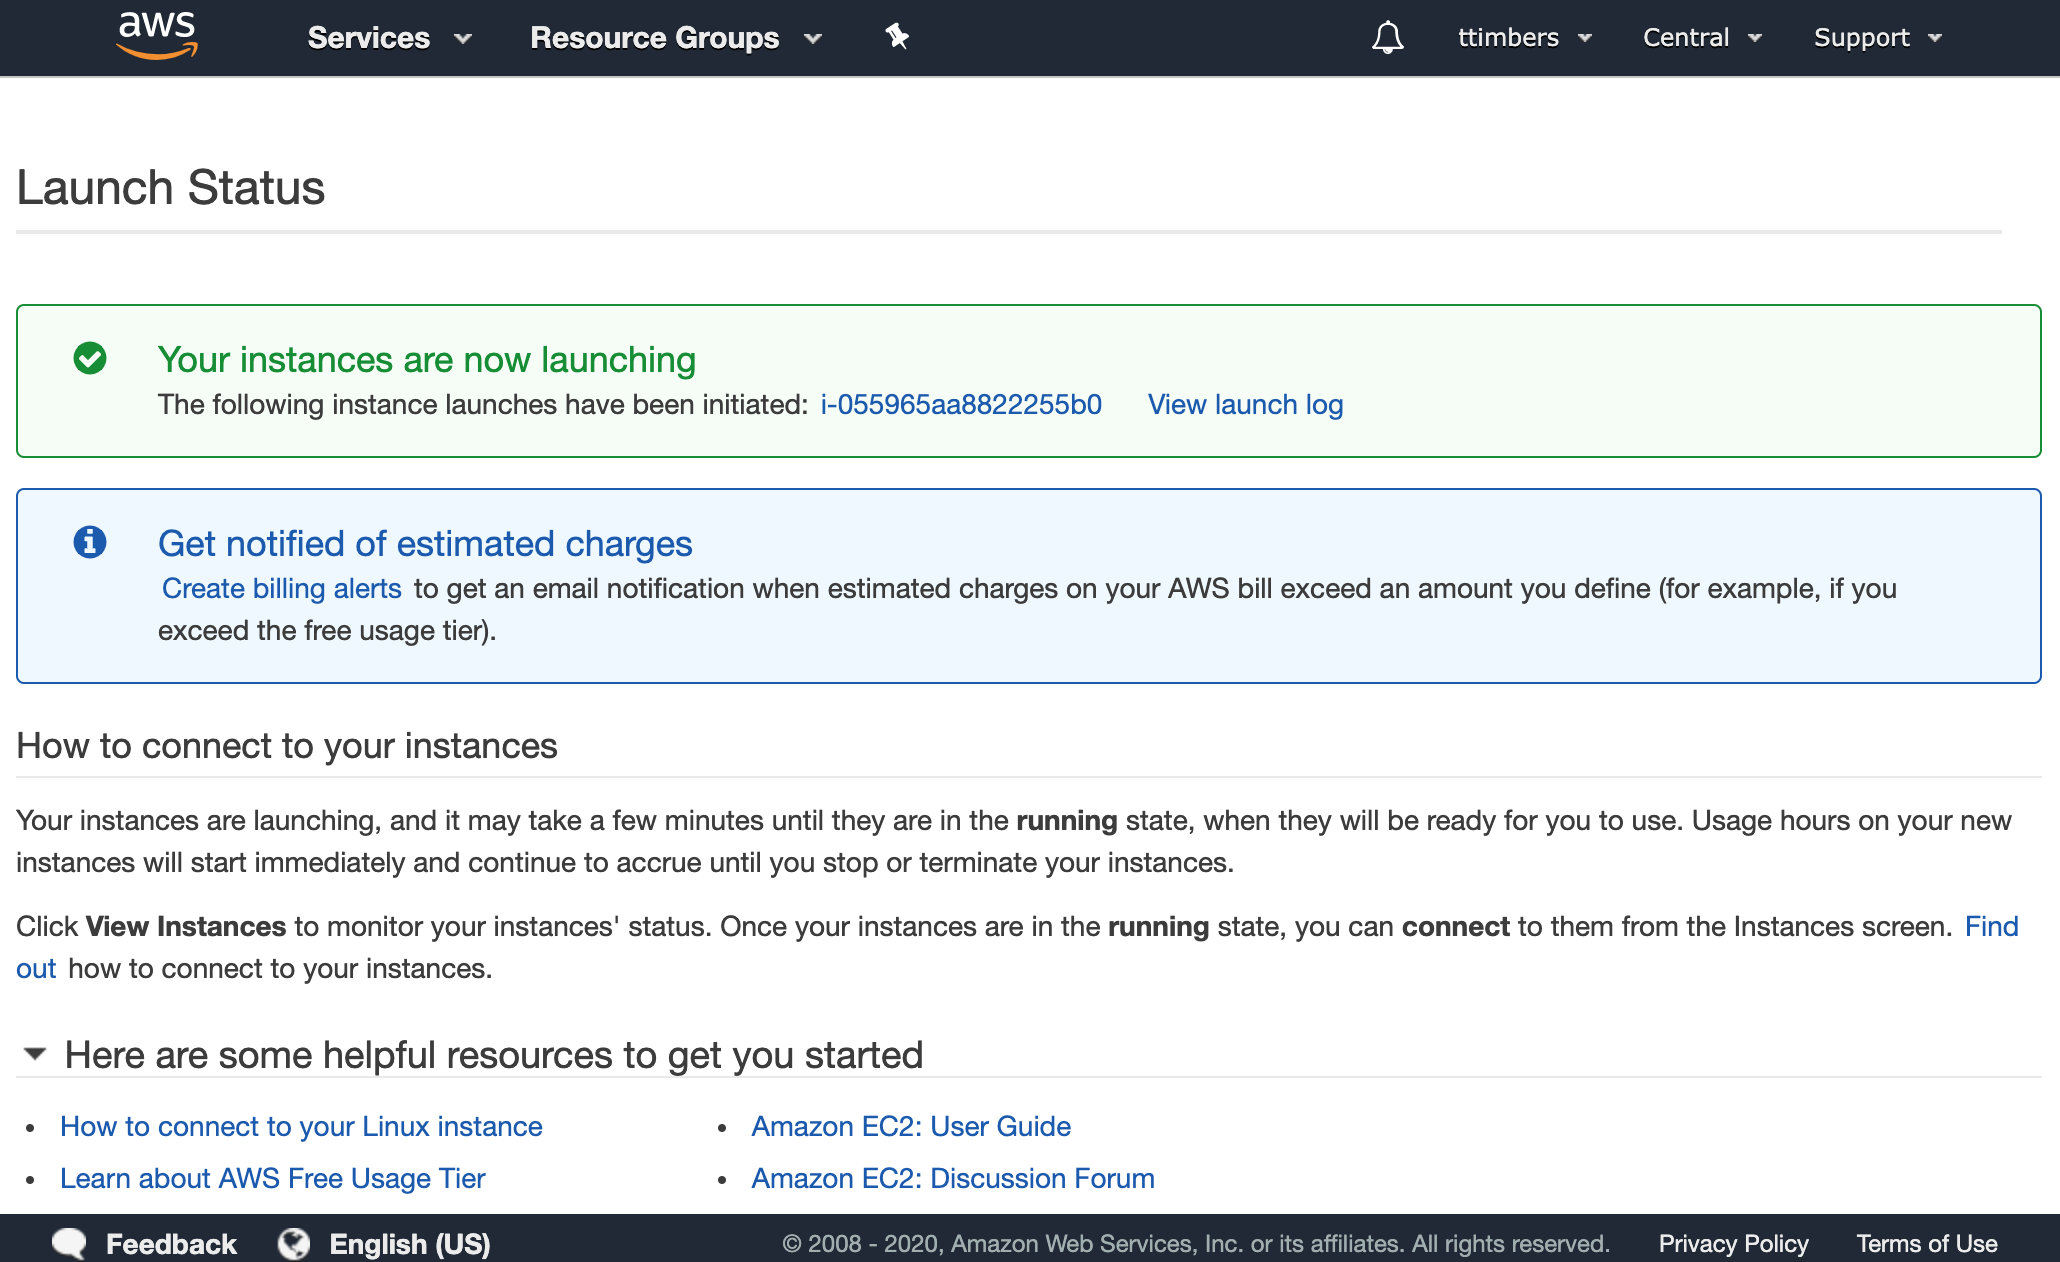
If successful, you should see this screen:
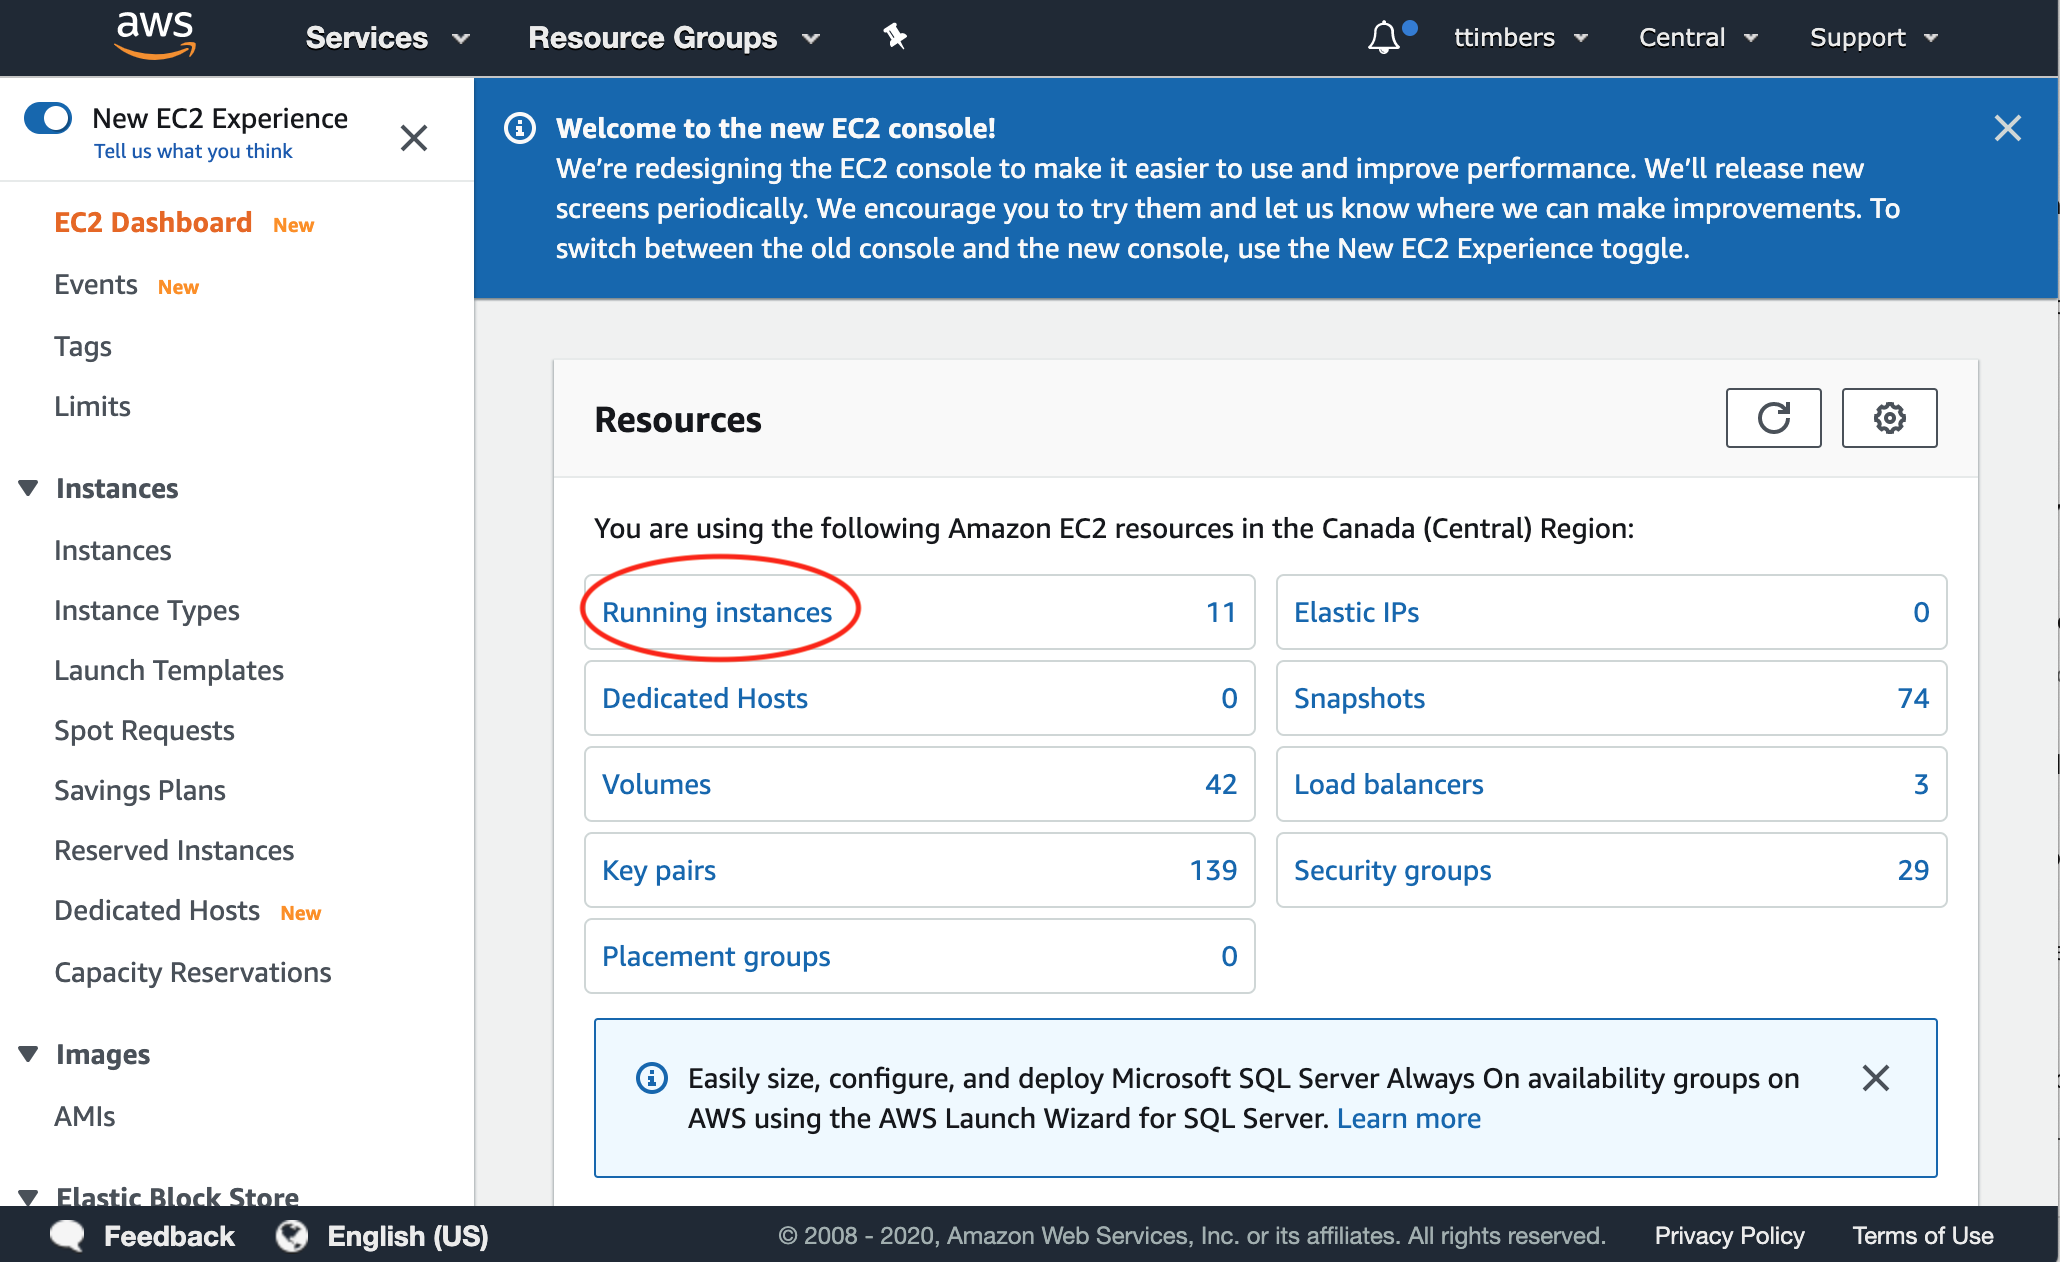
Go back to the EC2 Dashboard (reminder: you can get there via searching for EC2 in the AWS services search bar) and click on the “Running instances” link:
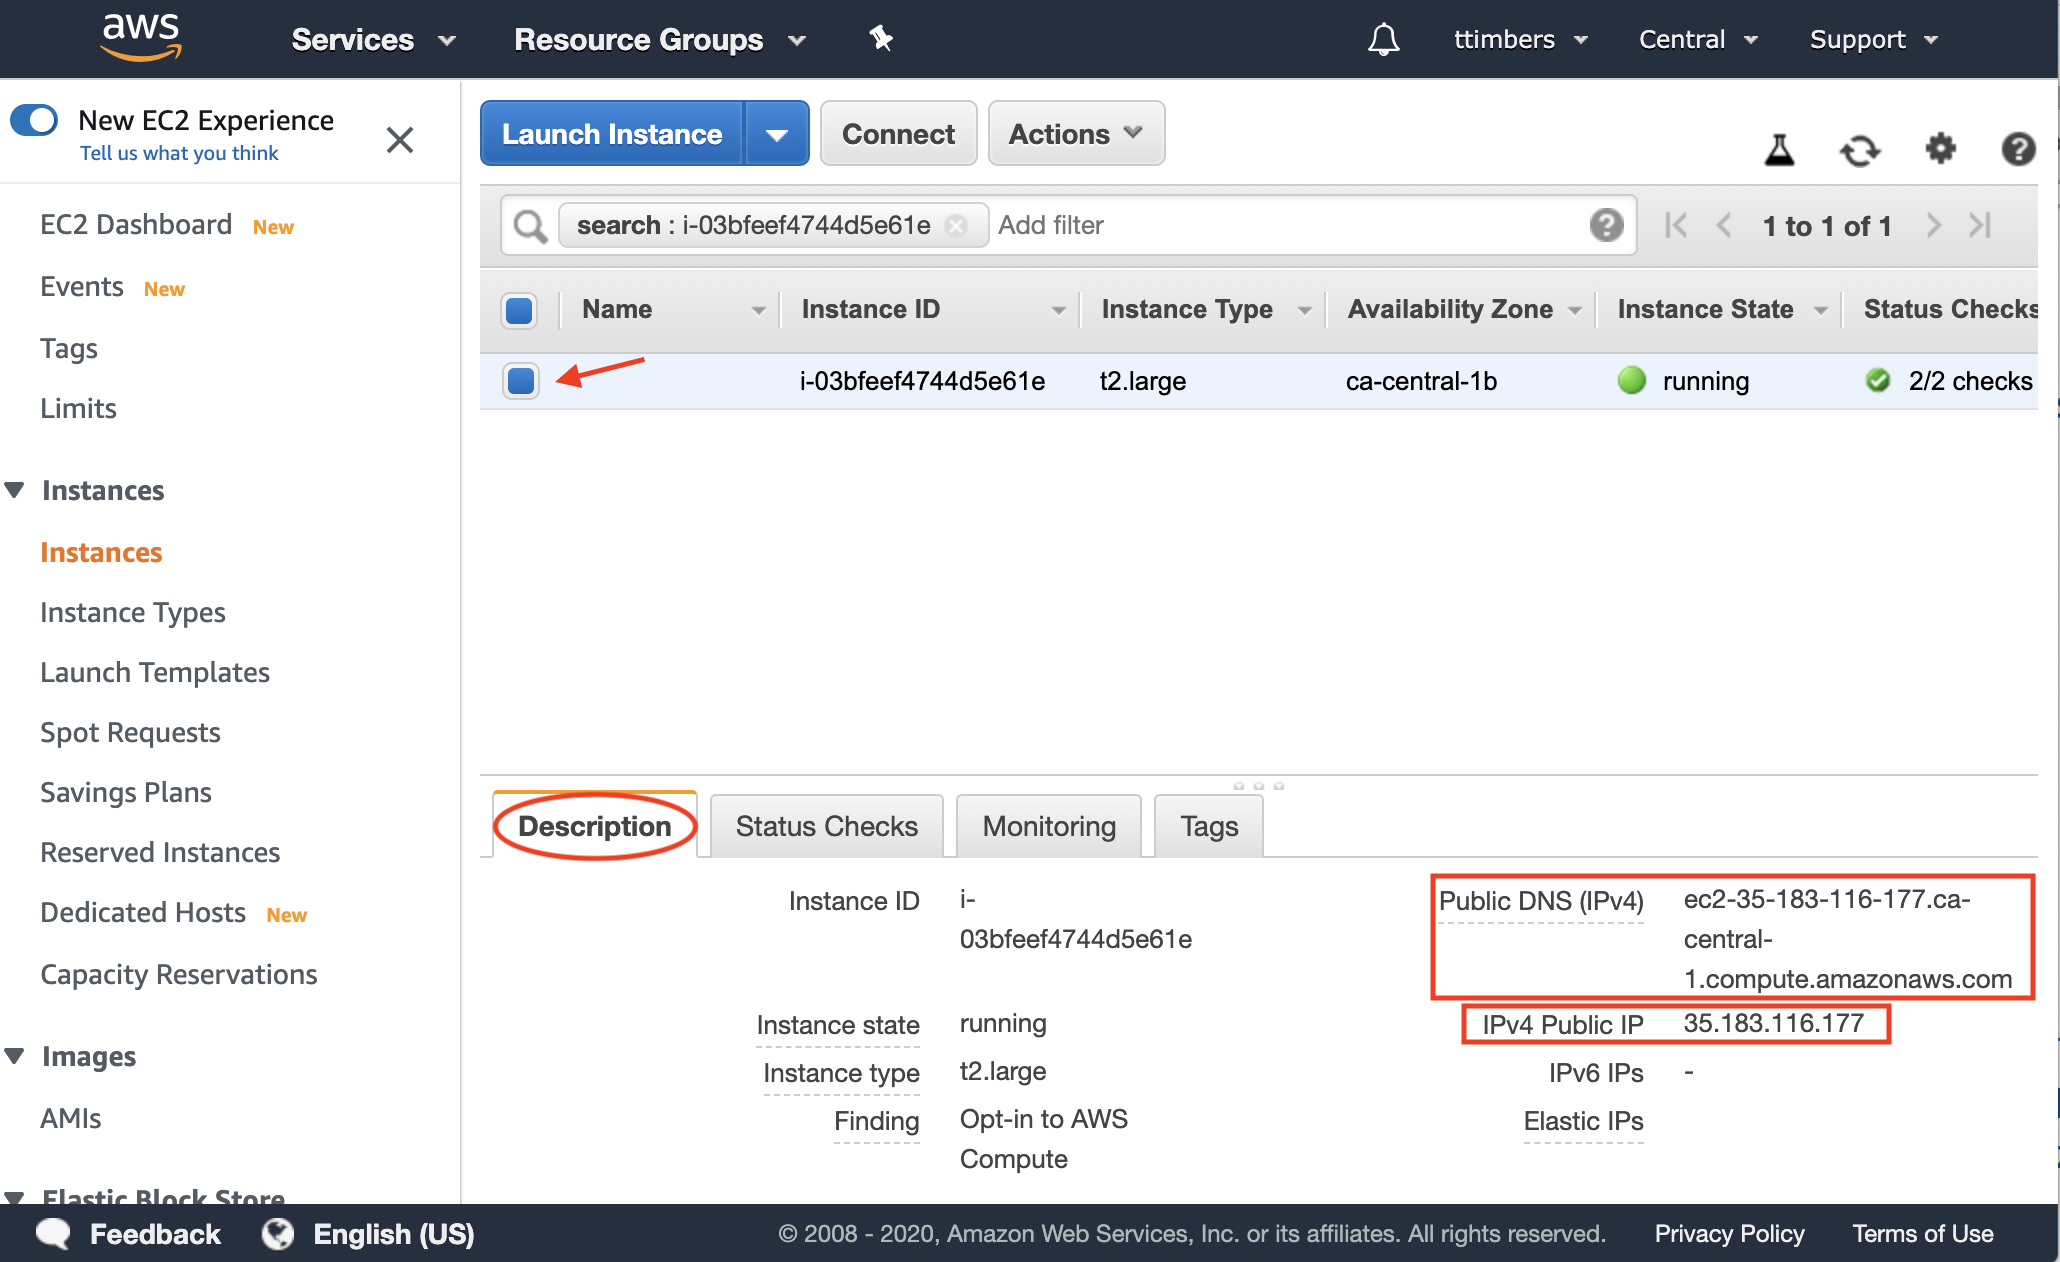
Select the instance you just launched and under the “Description” tab note (and record somewhere for future reference) the Public DNS (IPv4) value (which will be used to ssh into the instance) and the IPv4 Public IP address (which will be used by ansible and for mapping your custom domain name to the server):
Add the Ansible machine’s (e.g., your laptop’s) public key to
~/.ssh/authorized_keyson the EC2 instances. To do this you need to ssh into the EC2 instance using the private key you downloaded from Amazon earlier (jupyterhub.pemin this example):ssh -i ~/.ssh/jupyterhub.pem centos@ec2-35-183-116-177.ca-central-1.compute.amazonaws.com
And then use The UNIX vi editor to add your public key the
~/.ssh/authorized_keysfile. To do this type the following to open vi:sudo vi ~/.ssh/authorized_keys
Then press
ito enter insert mode and paste your key using your OS’s paste keyboard shortcut. Then pressESC+w+qto write the file and exit. Now you are are ready to move onto using Ansible to build the student JupyerHub.