Sharing your teaching materials using Git & GitHub
Now that you have learned how to access & use UBC’s JupyterHub (https://ubc.syzygy.ca/), this session will demonstrate how to share your teaching materials using Git & GitHub.
Introduction to me
Hi! I am Tiffany Timbers, an Assistant Professor of Teaching in the Department of Statistics at UBC. I am also a Co-Director for the Master of Data Science Program (Vancouver Option).

Learning outcomes
By the end of this session, participants will be able to:
Use GitHub.com to create a repository to host course materials, and use the web interface to edit and upload files.
Use UBC’s JupyterHub (https://ubc.syzygy.ca/) to create & edit content, as well as send updates to GitHub.com.
Use
nbgitpullerto create a link to distribute and share course materials (e.g., data sets and Jupyter notebooks) with students on UBC’s JupyterHub (https://ubc.syzygy.ca/).
Walkthrough of a demo course on Canvas
Canvas is current course management system used by UBC. We can keep the student experience with other courses at UBC consistent by using Canvas as the pointer to our course materials that we host on GitHub.com (a remote version control web archive). From the students perspective, nothing appears much different from their other courses and so there is no unnecessary cognitive load added for them to learn a new system.
Why use GitHub.com for hosting materials? Well GitHub.com is a remote version control web archive that allows you to view the history of your files, track who made changes to which files, use issue tracking to log and assign course/assignment bugs for fixing, or new features to add. Additionally, it is an authentic data science tool used in industry and academia.
Let’s explore a demo Canvas course:
Course source hosted on GitHub.com:
Some specific source files that might be of interest:
Creating a course repository to host materials on GitHub.com
A repository on GitHub.com can used to host and share your course materials with your students (and fellow Instructors).
Sign up for a free account
Before you can create repositories, you will need a GitHub.com account. You can sign up for a free account here: https://github.com/
Create new repository to host your course materials
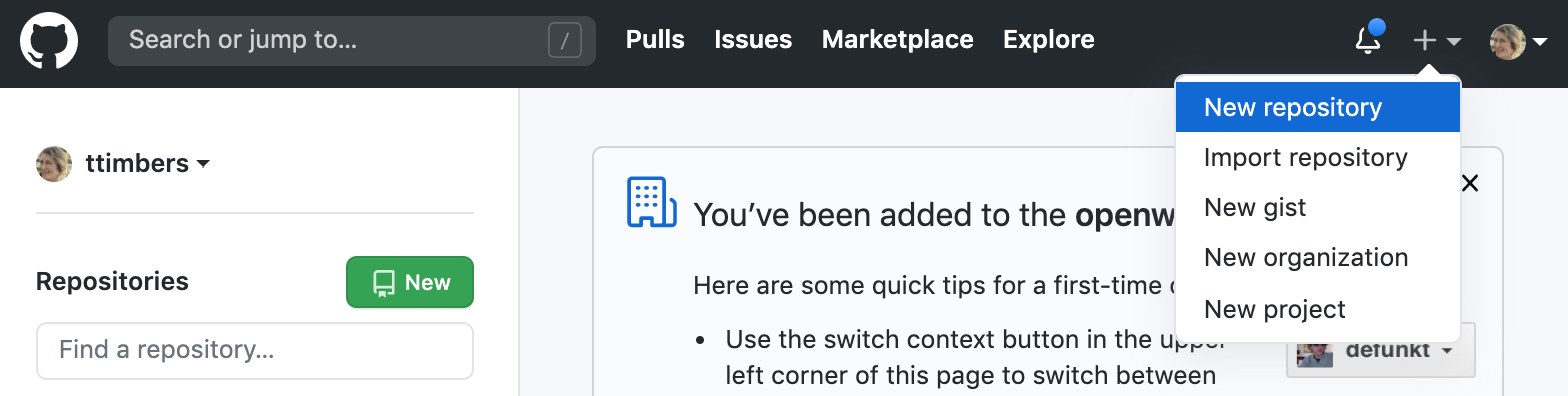
Login to GitHub.com and click on the “+” icon in the upper right hand corner, and then click on “New Repository” as shown below:
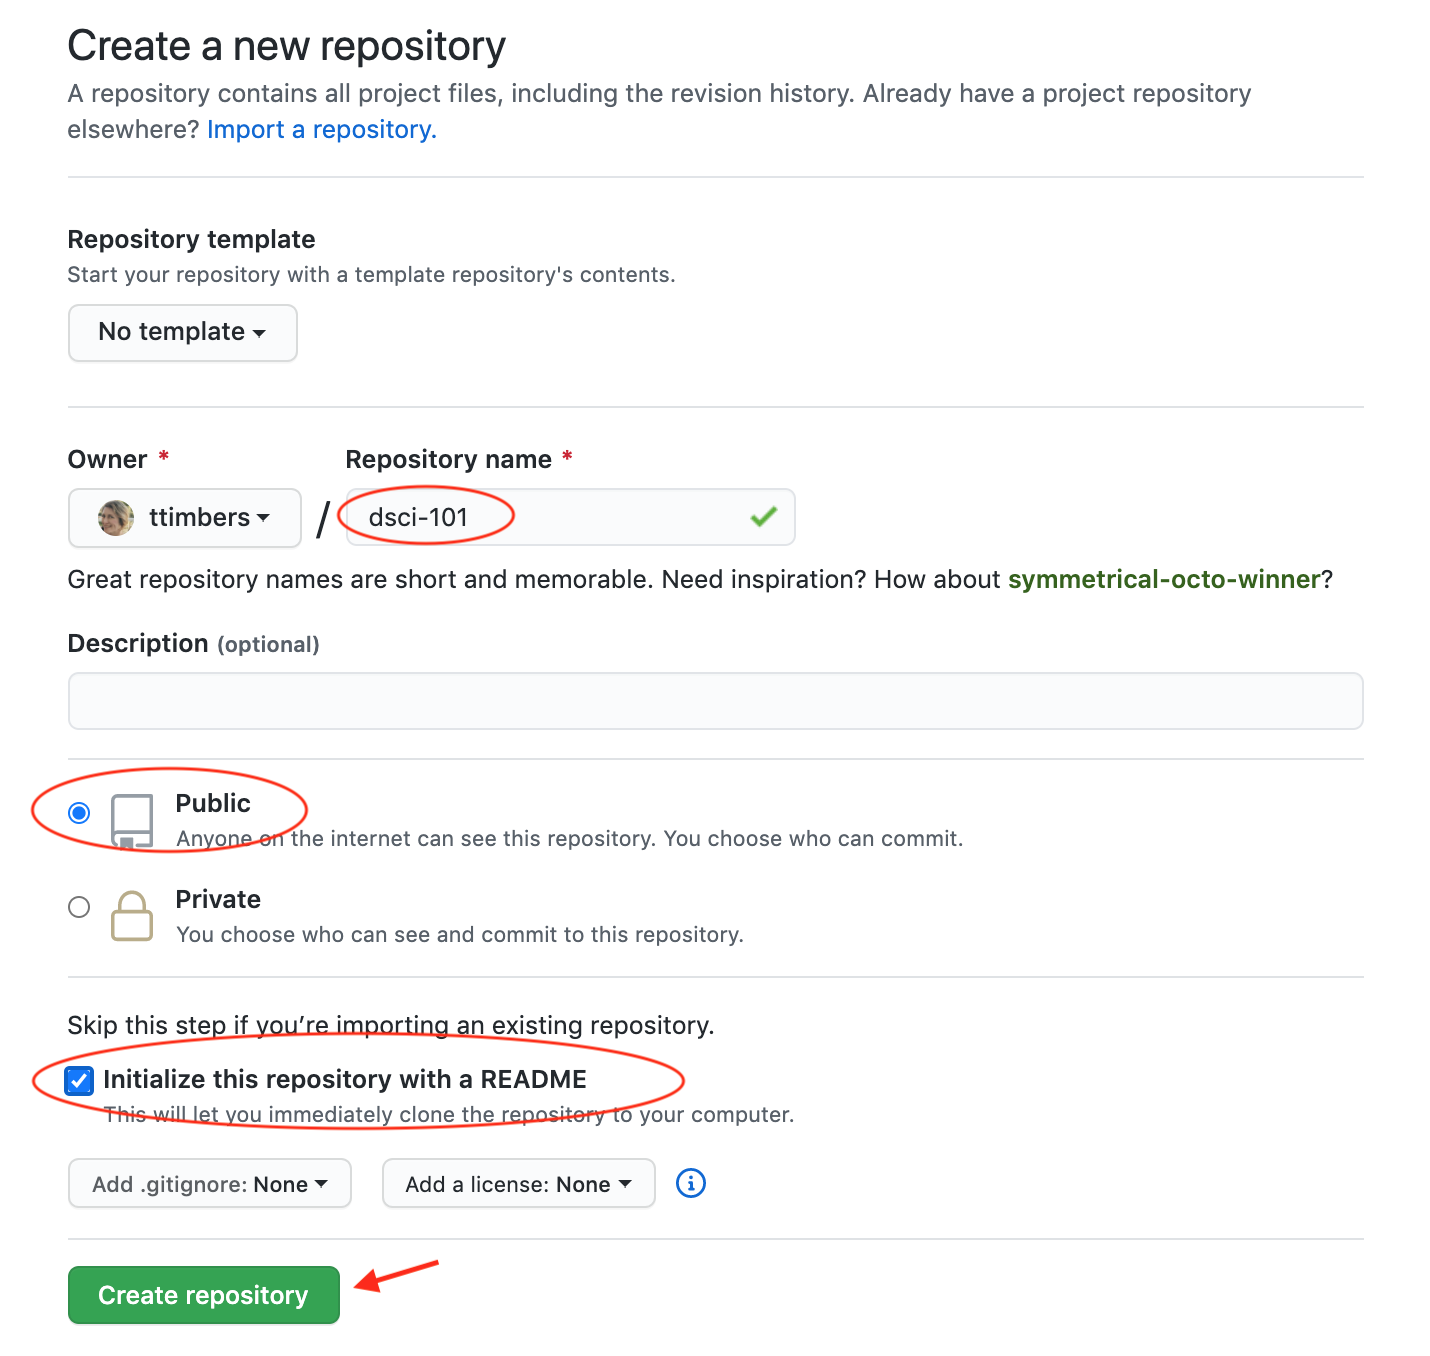
On the next page, do the following:
[ ] enter the name for the repository (here we put
dsci-101)[ ] Select “Public”
[ ] Select “Initialize this repository with a README”
[ ] click on the green “Create Repository” button
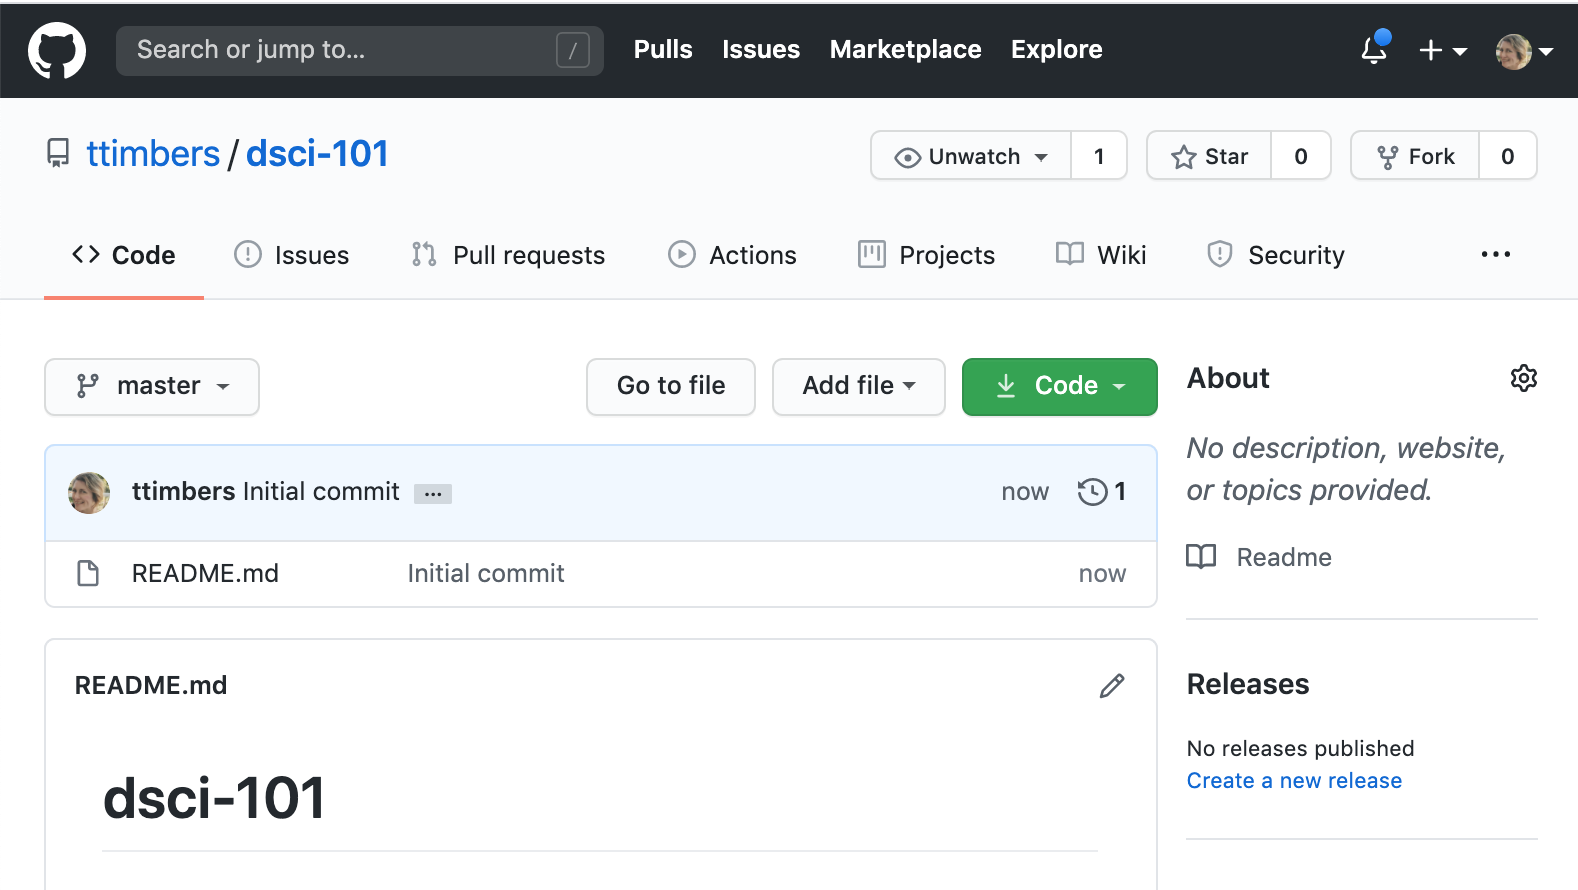
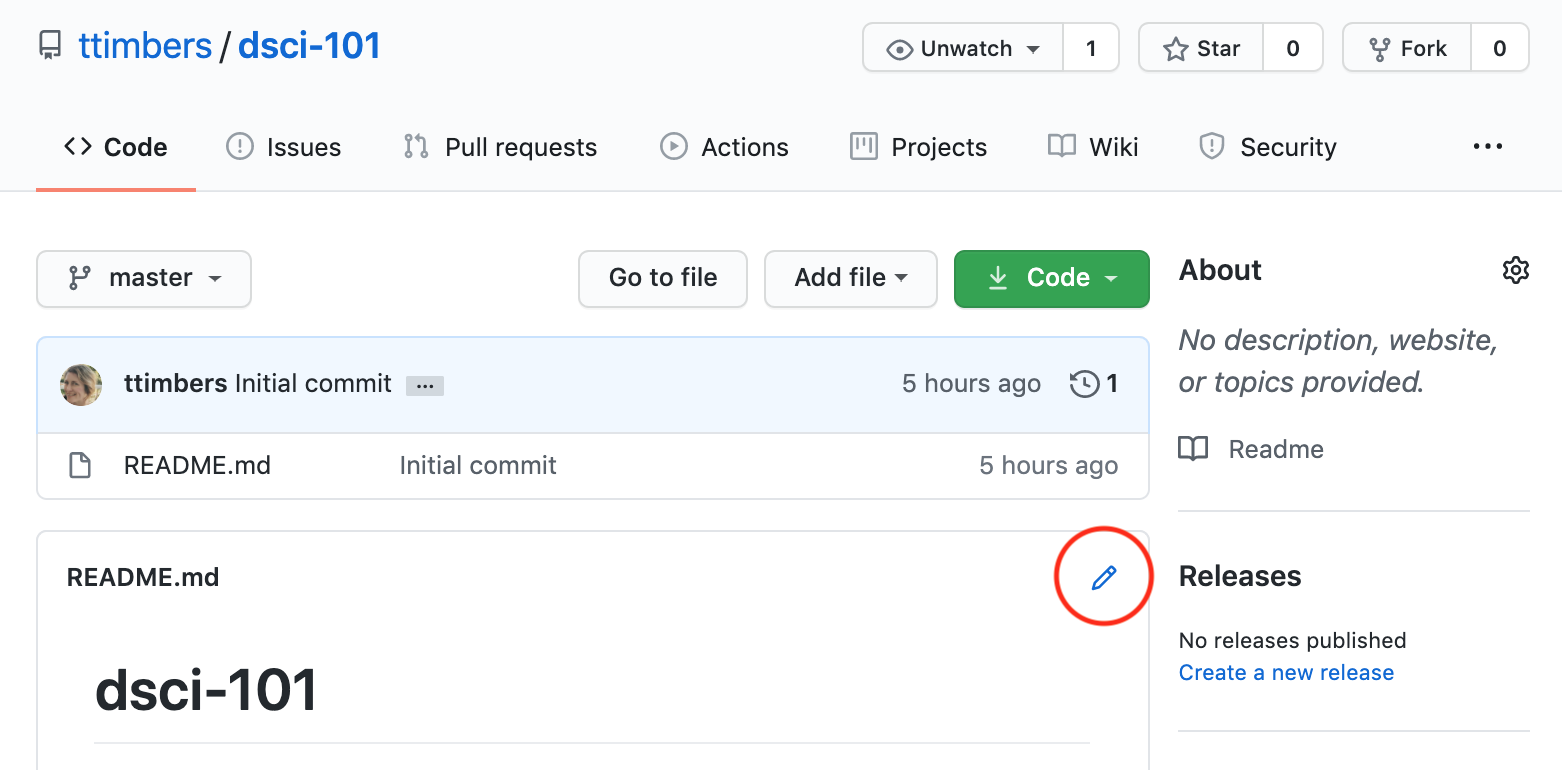
Now you should have a repository that looks something like this:
Edit and add materials in your course repository on GitHub.com
There are several ways you can directly use the GitHub.com web interface; either using the pen tool to edit existing files, or the “Add file” drop down where you can choose to “Create new file” or “Upload files”.
Use the pen tool to edit existing files
The pen tool can be used to edit existing plain text files. Click on the pen tool:
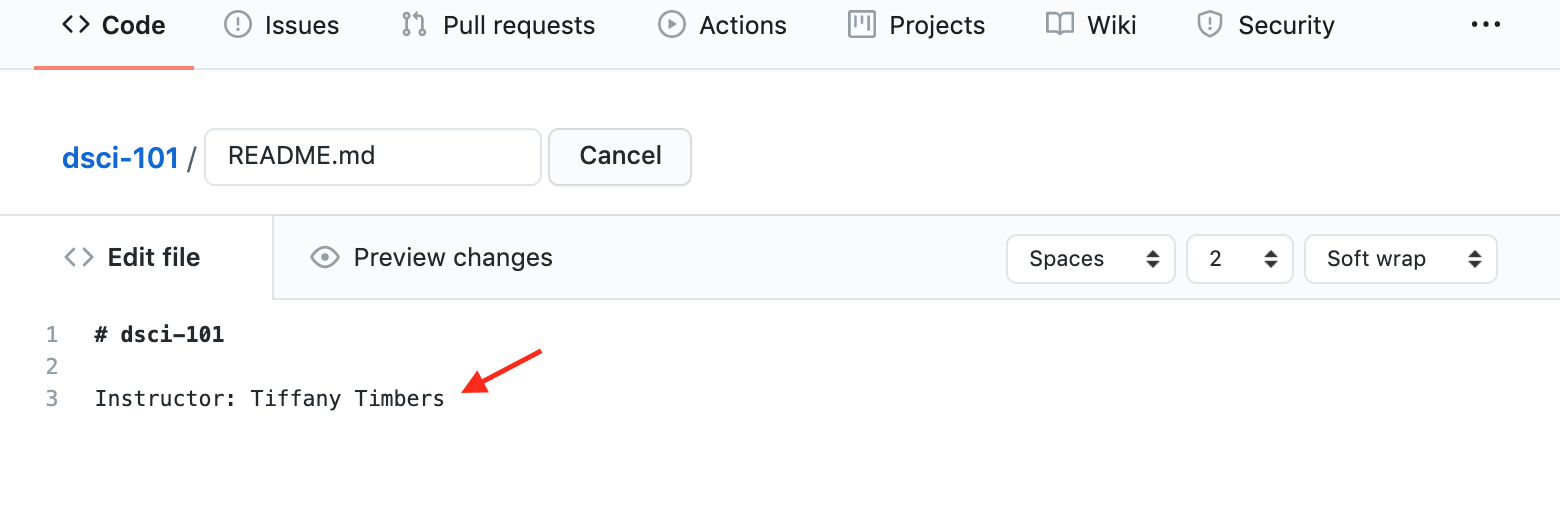
Use the text box to make your changes:
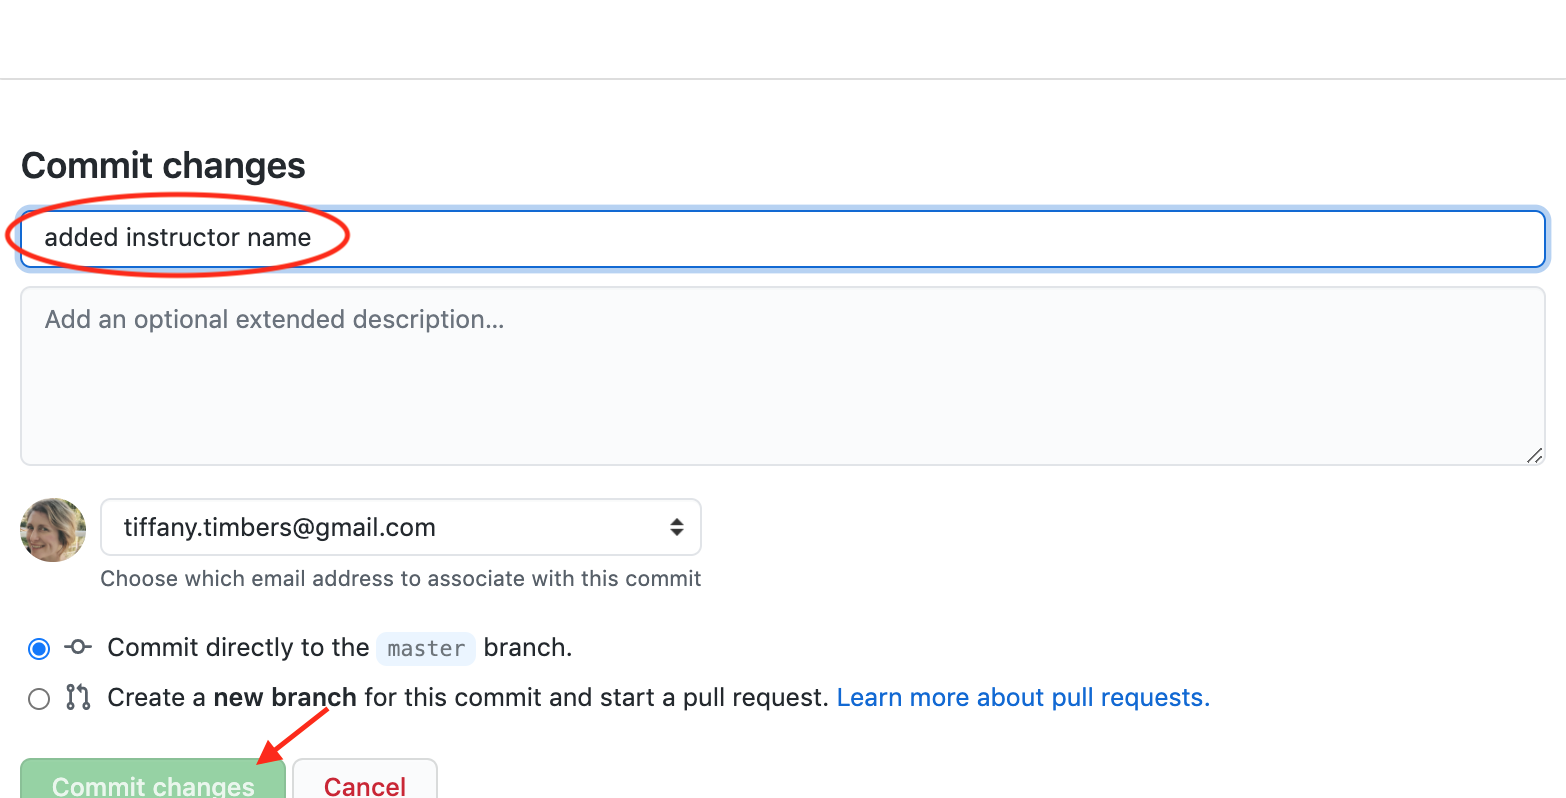
Save/commit your changes by click the green “Commit changes” button (adding a useful commit message is recommended).
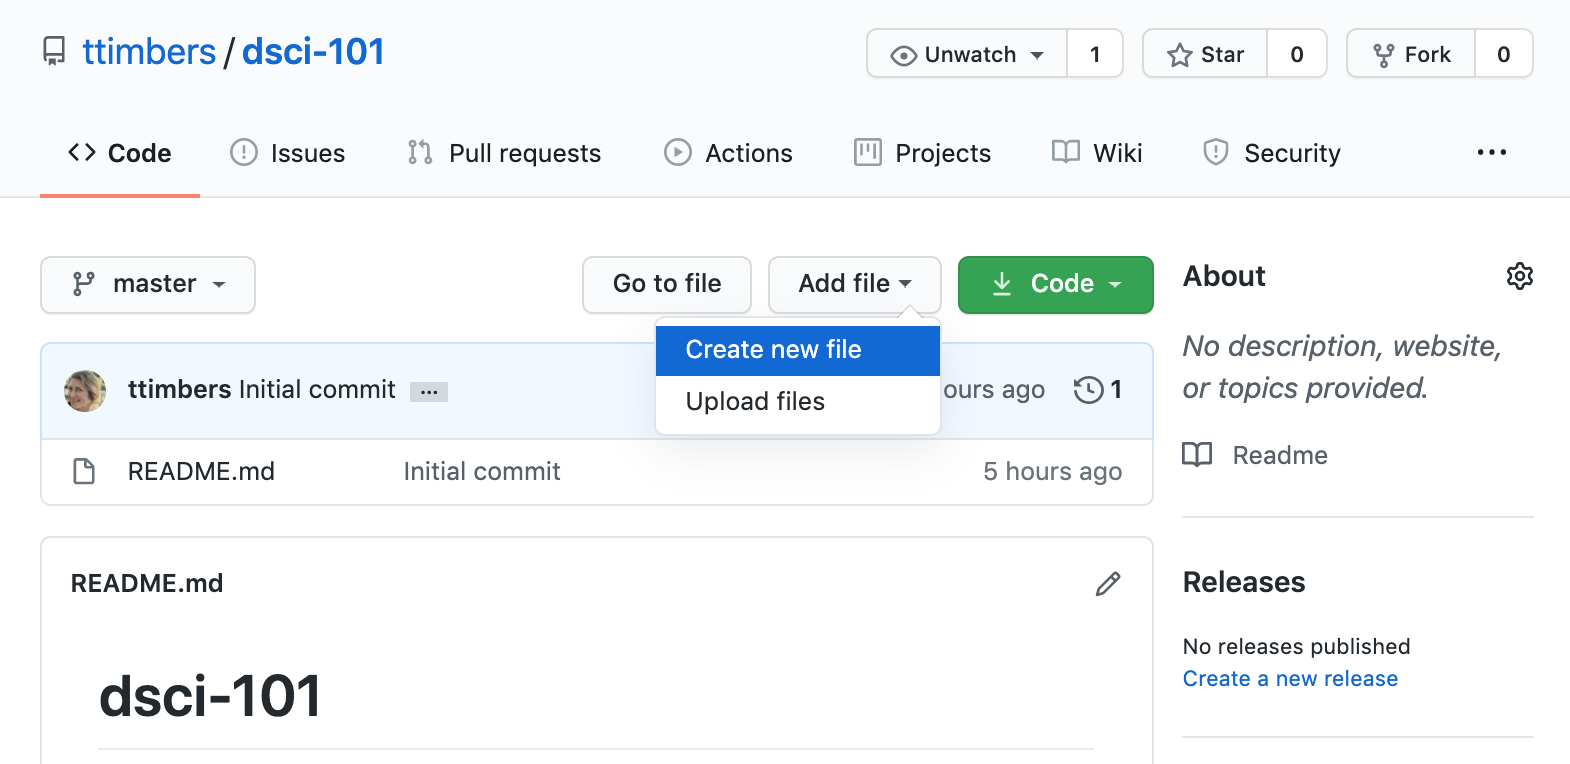
Use the “Add file” drop down menu and “Create new file” to create new plain text files
New, plain text files can be created via the “Add file” drop down menu and selecting the “Create new file” option:
After click the “Create new file” option, a page will open with a small text box for the file name to be entered, and a larger text box where the desired file content text can be entered. Note the two tabs, “Edit new file” and “Preview”. Togelling betweent them lets you enter and edit text and view what the text will look like when rendered, respectively.
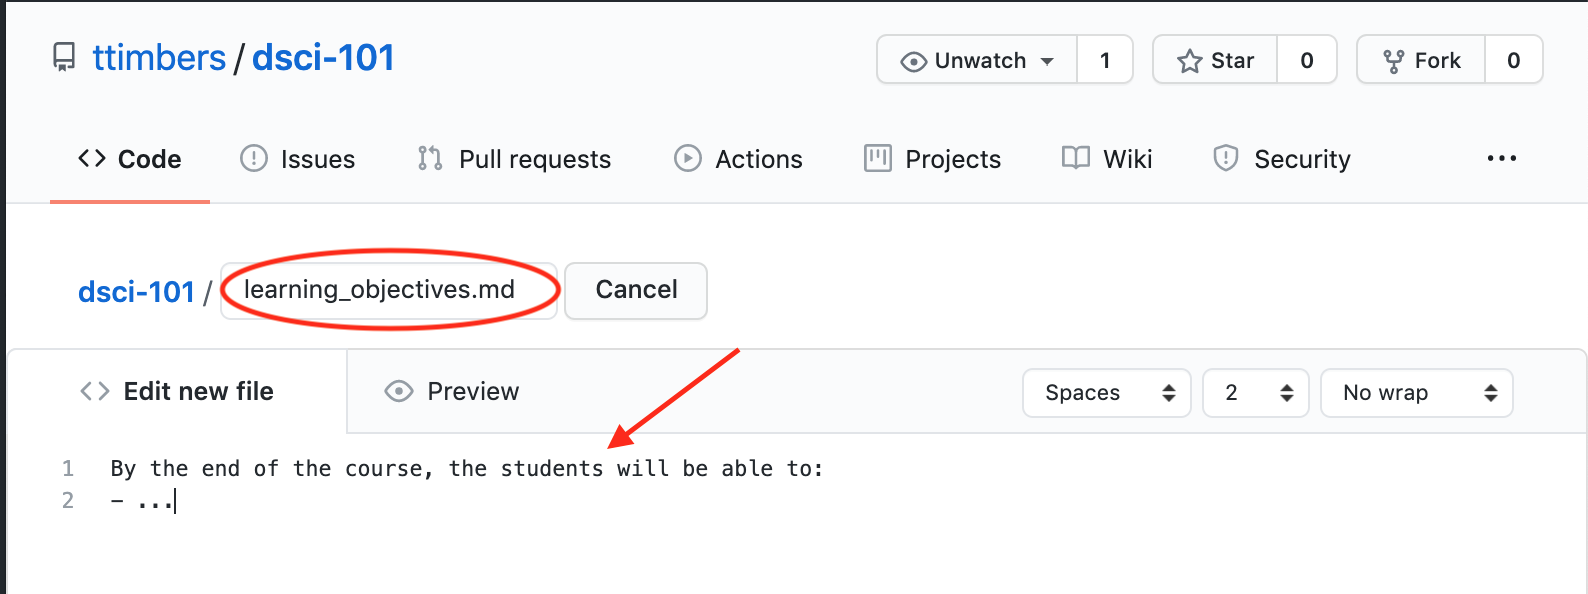
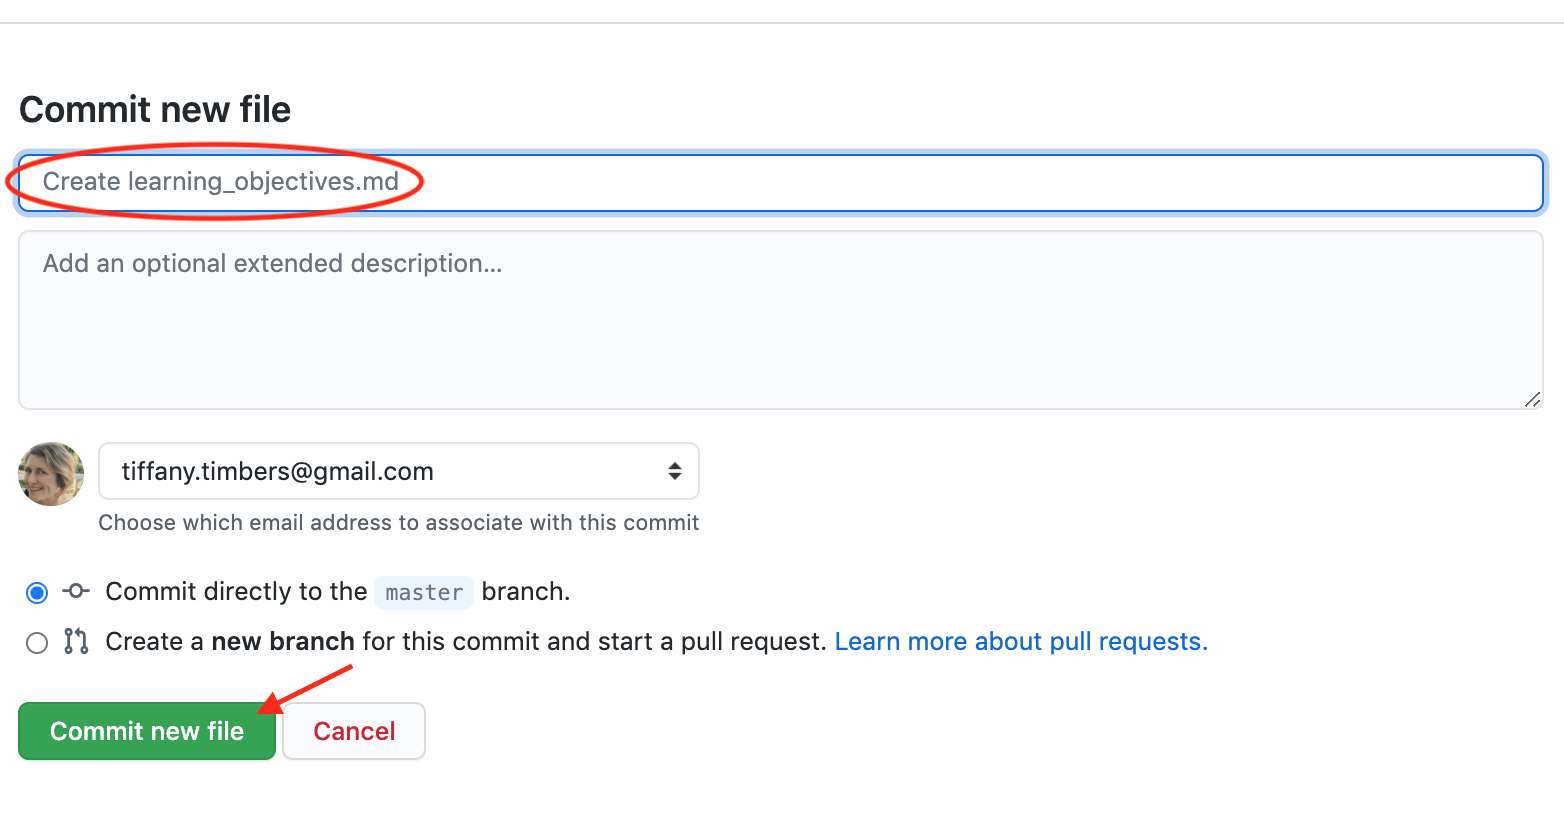
Save/commit your changes by click the green “Commit changes” button at the bottom of the page (adding a useful commit message is recommended).
Use the “Add file” drop down menu and “Upload files” to get files from my laptop to GitHub.com
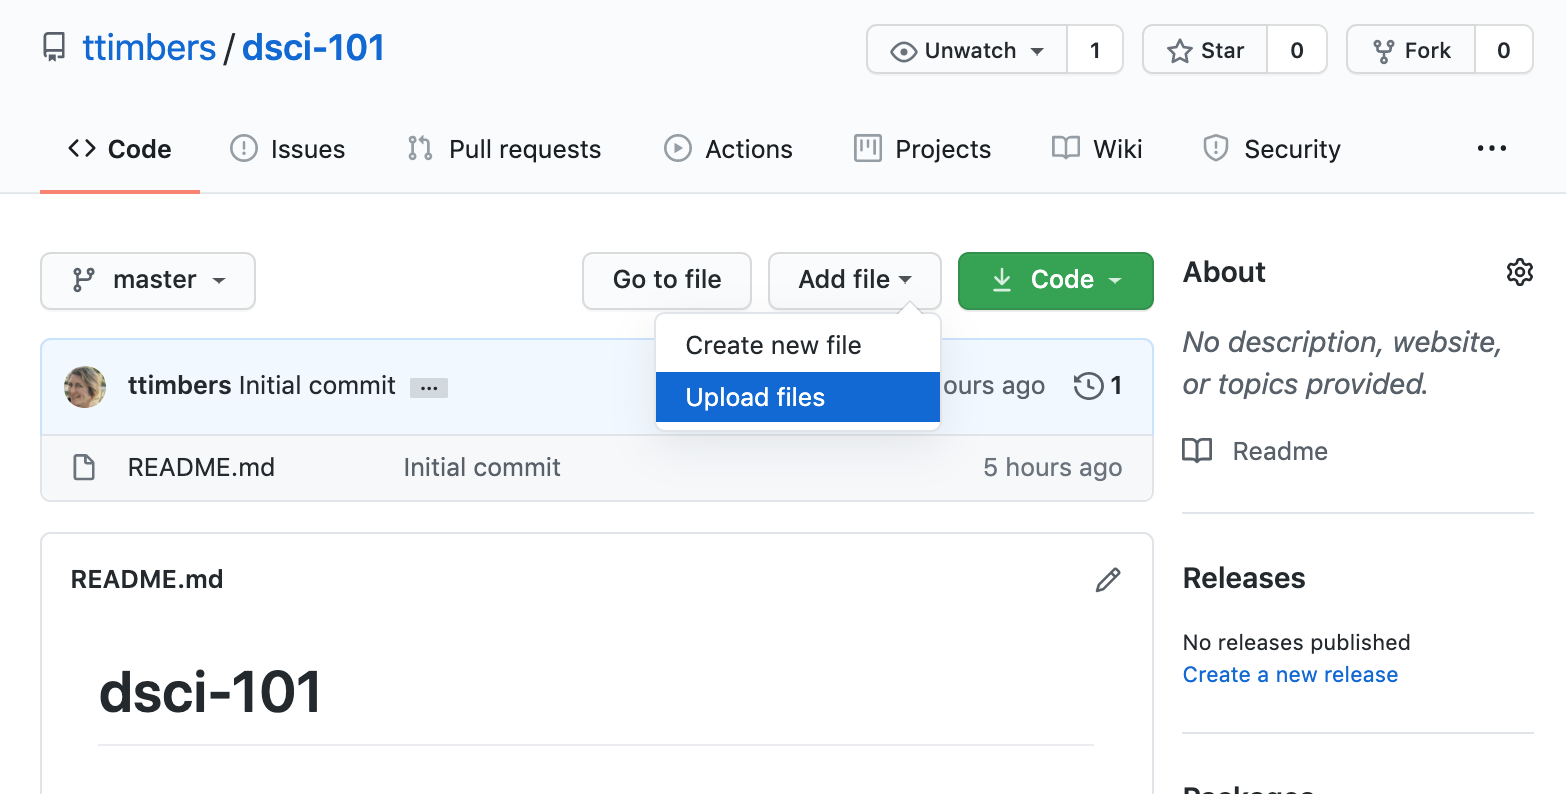
You can also upload files that you have created on your local machine by using the “Add file” drop down menu and selecting “Upload files”:
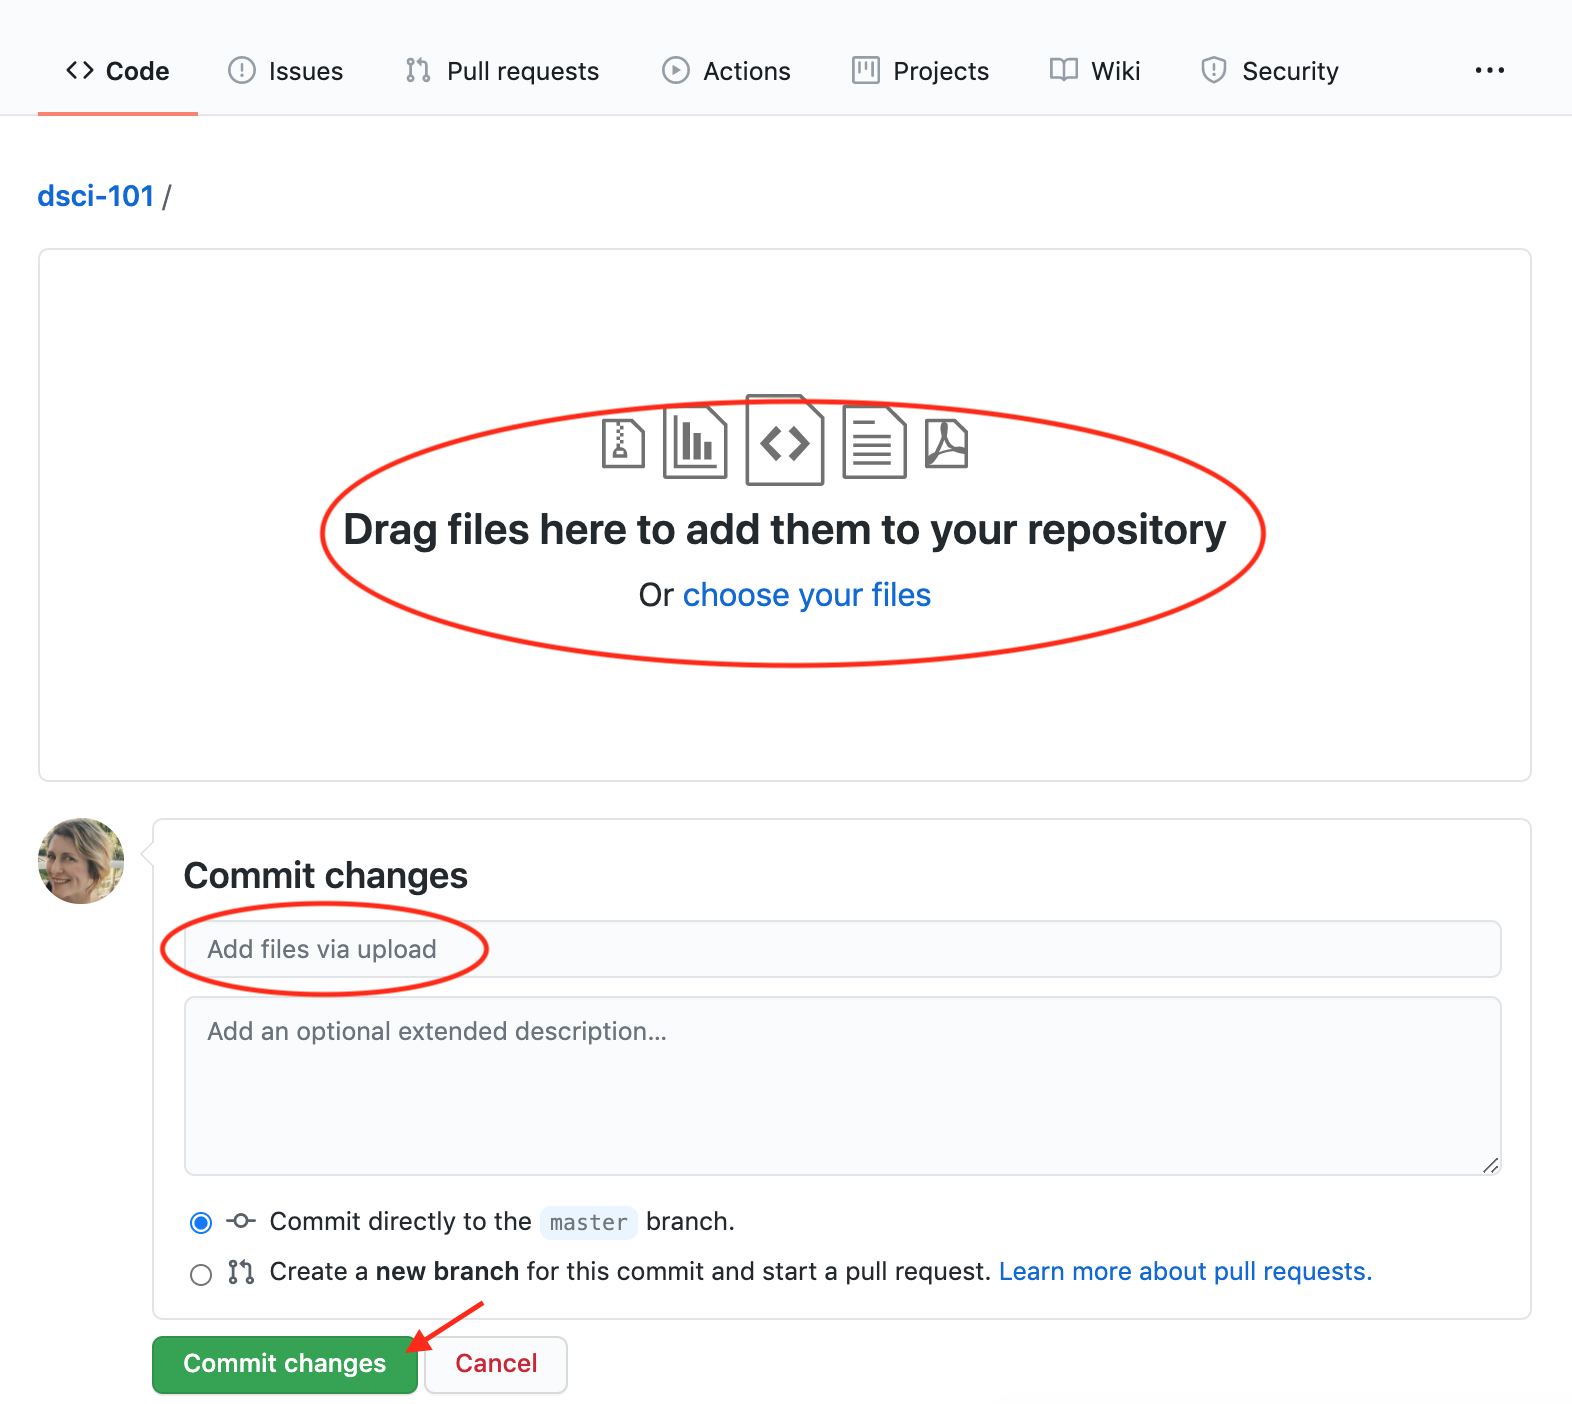
To select the files from your local computer to upload, you can either drag and drop them into the grey box area shown below, or click the “choose your files” link to access a file browser dialog. Once the files you want to upload have been selected, click the green “Commit changes” button at the bottom of the page (adding a useful commit message is recommended).
Using JupyterHub to create & edit content, as well as send updates to GitHub.com
Although there are several ways to create and edit files on GitHub.com they are not quite powerful enough for efficiently creating and editing complex files, or files that need to be executed to assess whether they work (e.g., files containing code). Thus, it is useful to be able to connect the course repository that was created on GitHub.com to a coding environment. This can be done on your local computer, or using a JupyterHub. Given the focus of these Jupyterdays, we will here show how to do this using a JupyterHub.
Cloning your GitHub.com course repository to a JupyterHub
We will be using a Jupyter lab git extension tool to clone our GitHub.com course repository to the UBC JupyterHub. There are other ways to do this (e.g., use the Git command line tools in the terminal on JupyterHub), however we think this is the most user friendly way to introduce this.
On the file browser tab, click the Git+ icon:
Paste the url of the GitHub.com course repository you created and click the blue “CLONE” button:

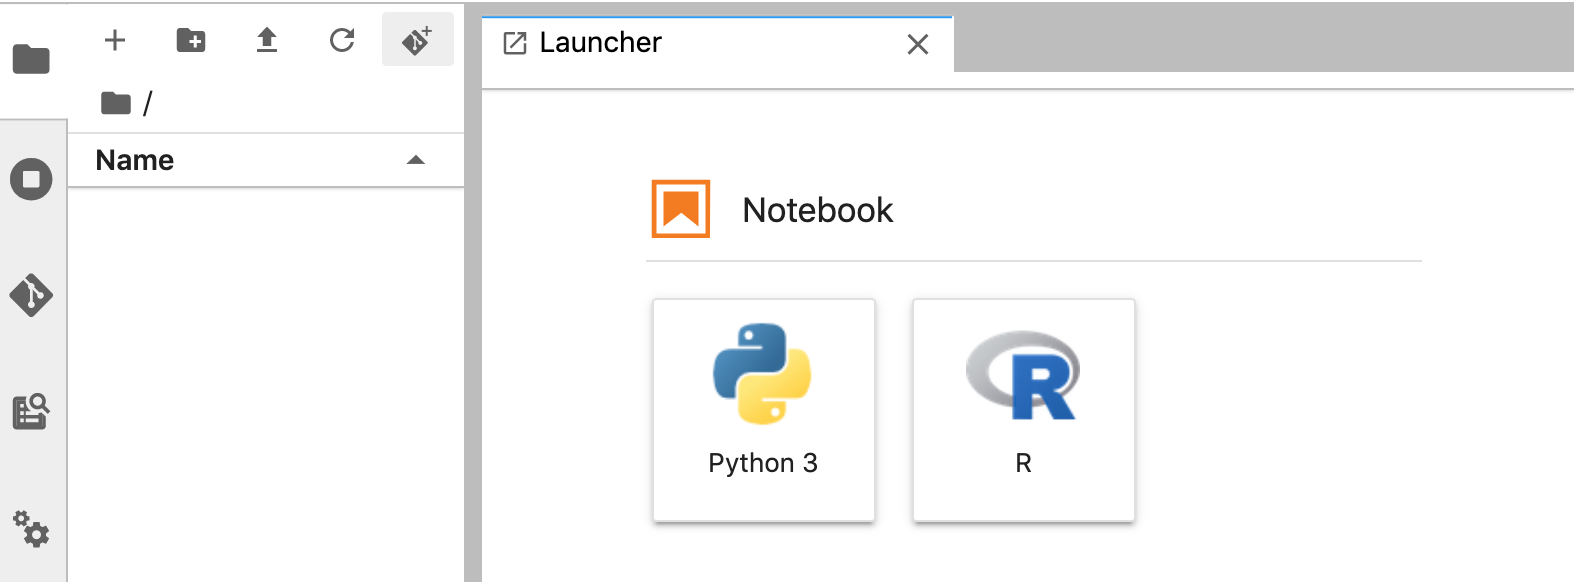
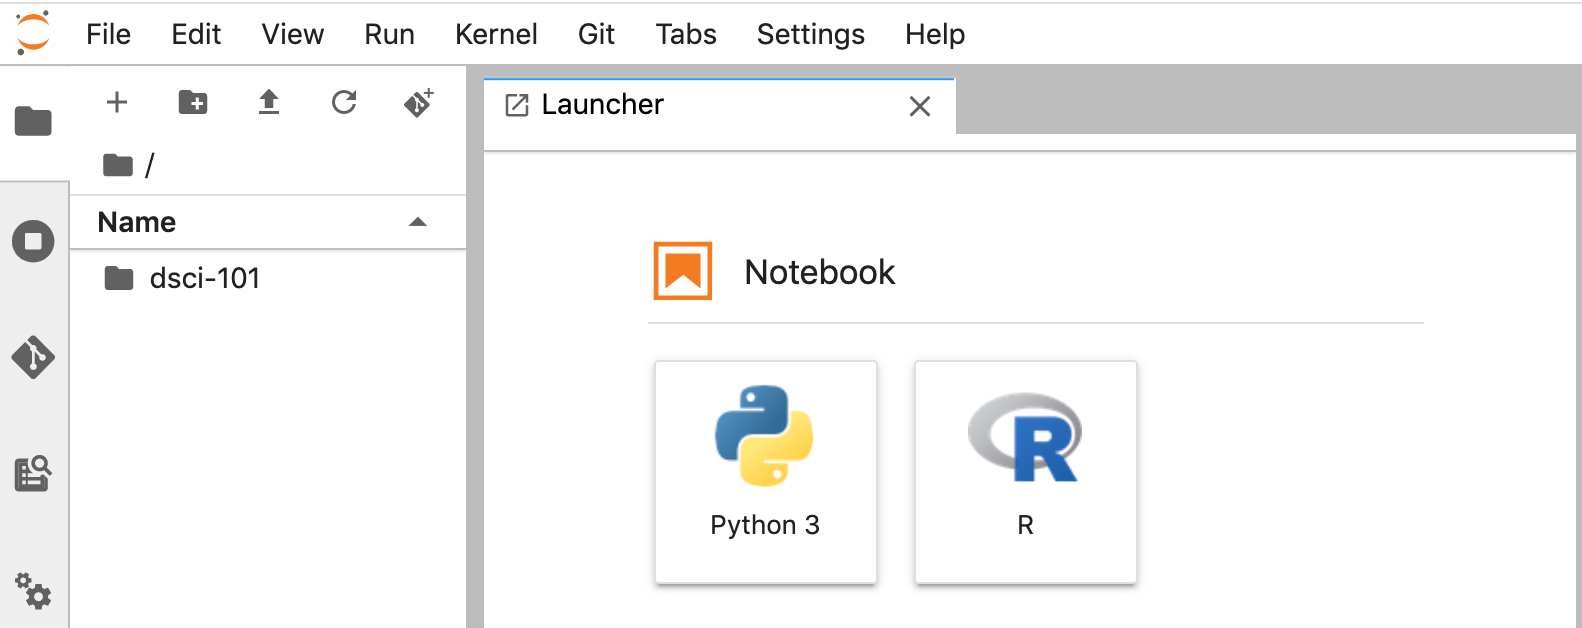
On the file browser tab, you will now see a folder for your course repository (and inside it will be all the files that existed on GitHub.com):
Sending changes you make on JupyterHub back to GitHub.com
Once you make changes (e.g., create or edit files) in your course repository on JupyterHub, you will need to send them back to the course repository on GitHub.com to be able to share these with your students. We can use the Jupyter lab git extension tool to do this. It is a three stage process which includes:
a
git addcommand to flag which modified files you want to send back to the course repository on GitHub.coma
git commitcommand that logs the changes and an associated (useful) message about what was changeda
git pushcommand that sends the added and committed changes to the course repository on GitHub.com
Below we walkthrough how you can use the Jupyter lab git extension tool to do each of the steps outlined above.
1. git add the modified files
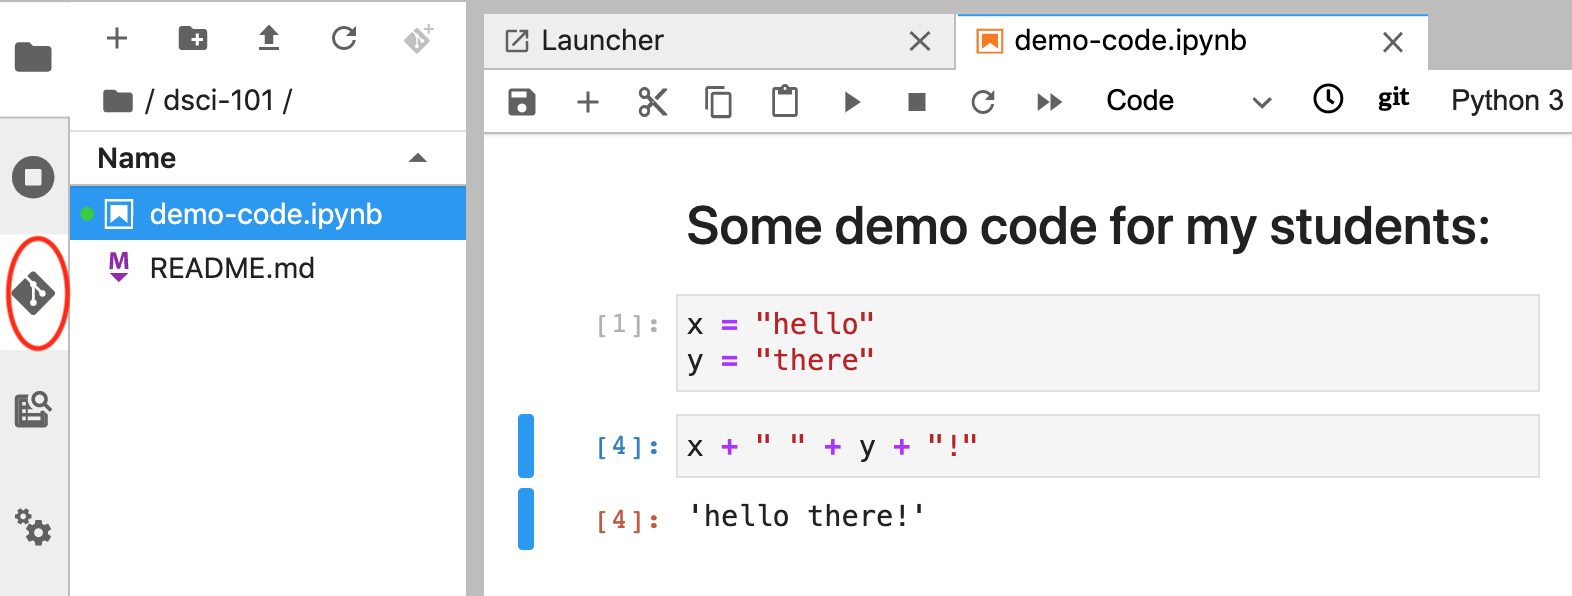
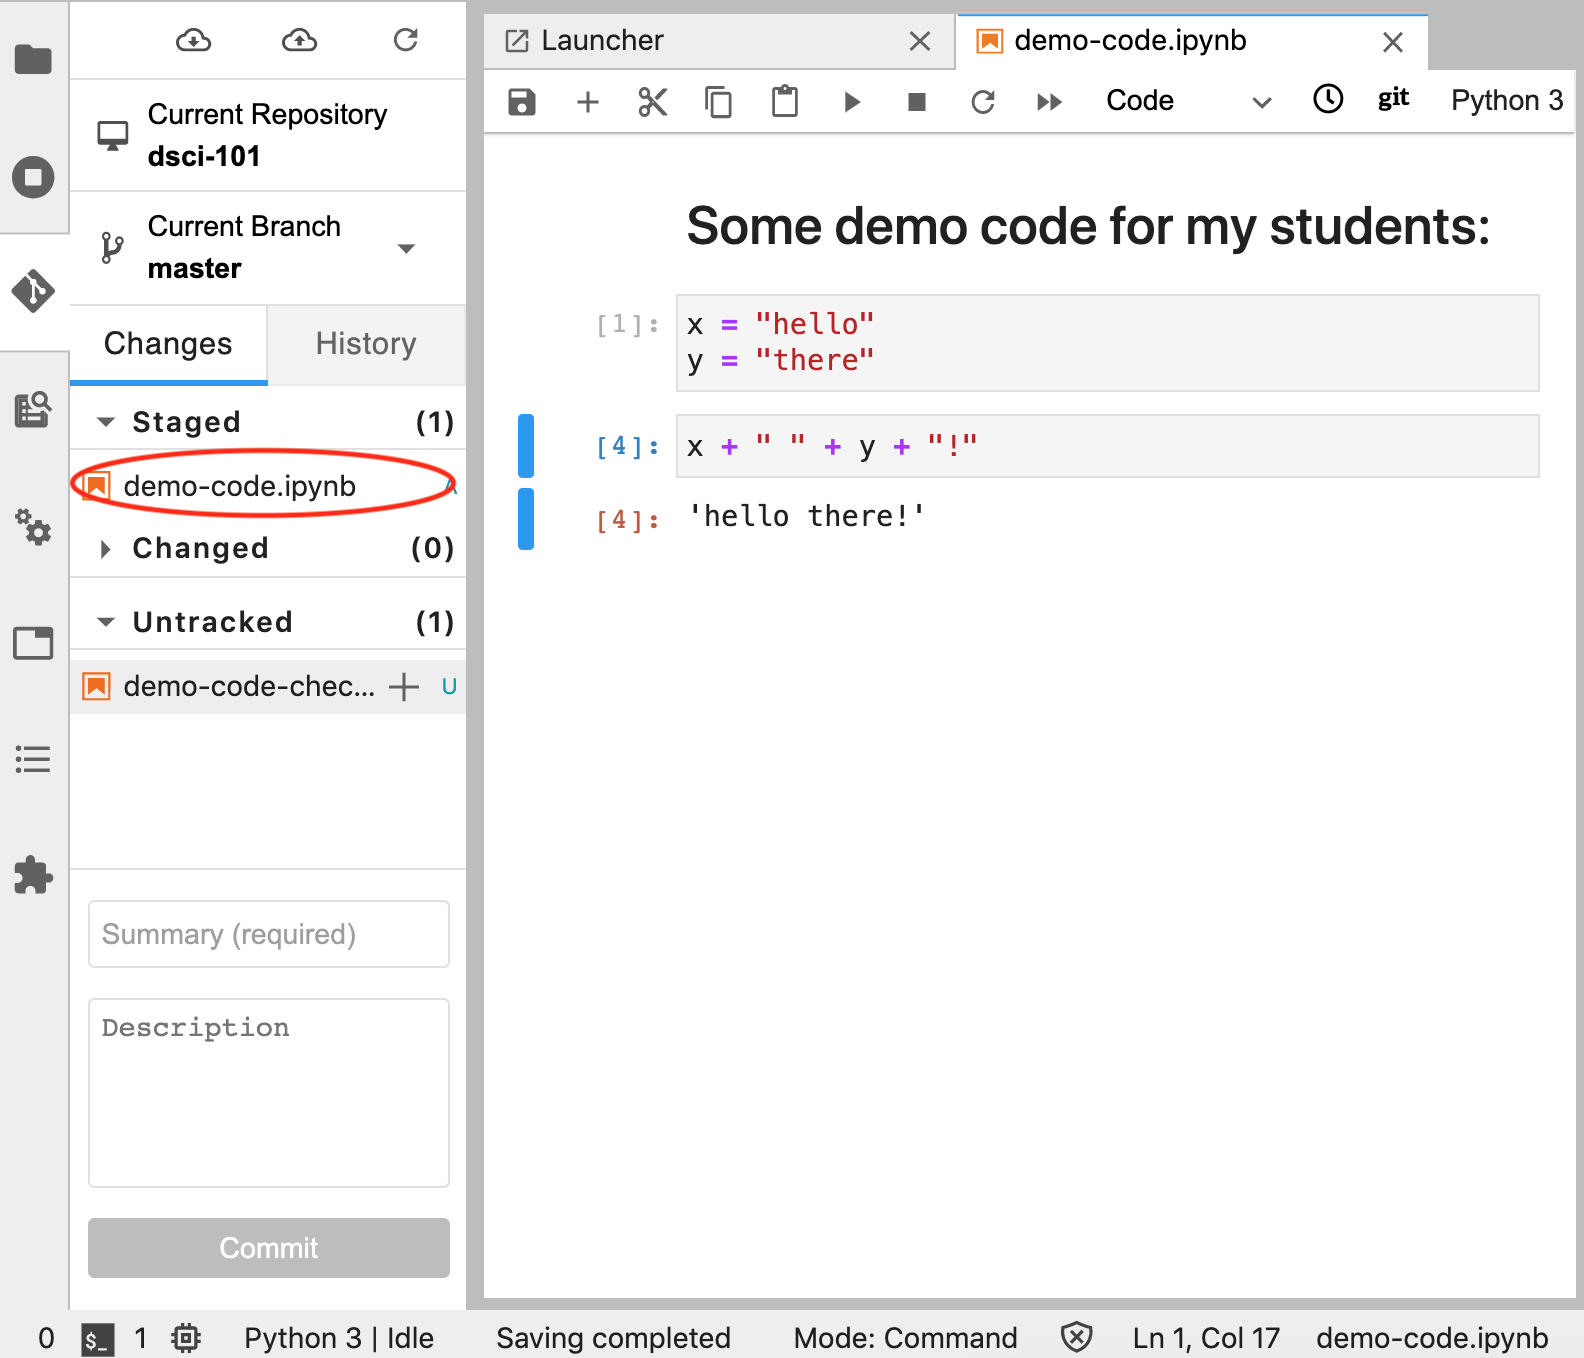
Below we created and saved a new file (named demo-code.ipynb) that we would like to send back to the course repository on GitHub.com. To git add this modified file, we click the Jupyter lab git extension icon on the far left-hand side of Jupyter lab:
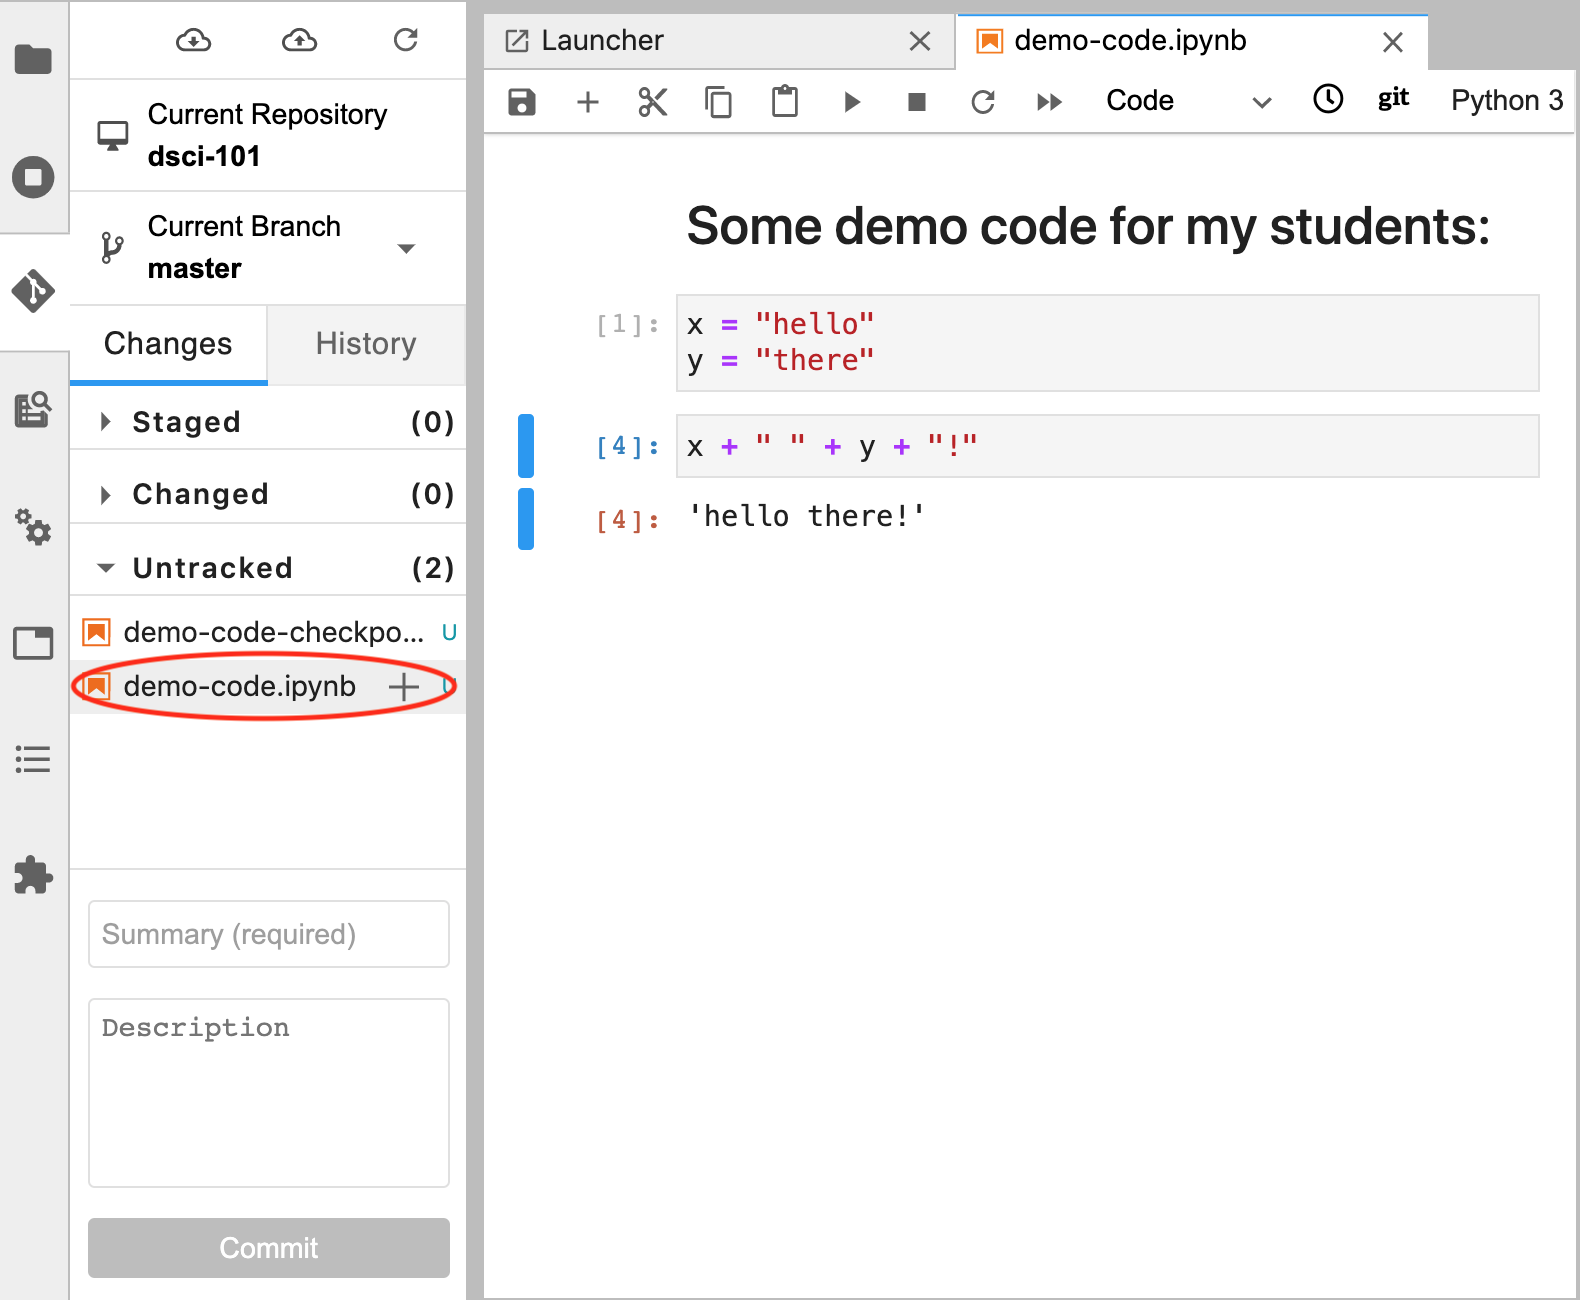
This opens the Git graphical user interface (GUI) pane, and then we click the plus sign beside the file that we want to git add. Note, because this is the first change for this file that we want to add, it lives under the “Untracked” heading. However, next time we edit this file and want to add the changes we made, we will find it under the “Changed” heading.
Note: we can ignore the
demo-code-checkpoint.ipynbfile (sometimes called.ipynb_checkpoints), as it can be thought of as another type of “back-up” of our Jupyter notebook file we created, and we only need to send the file we directly created and edited to GitHub.com.
This moves the file from the “Untracked” heading to the “Staged” heading and we are ready to now git commit the changes to log them and associate a (useful) message about what was changed.
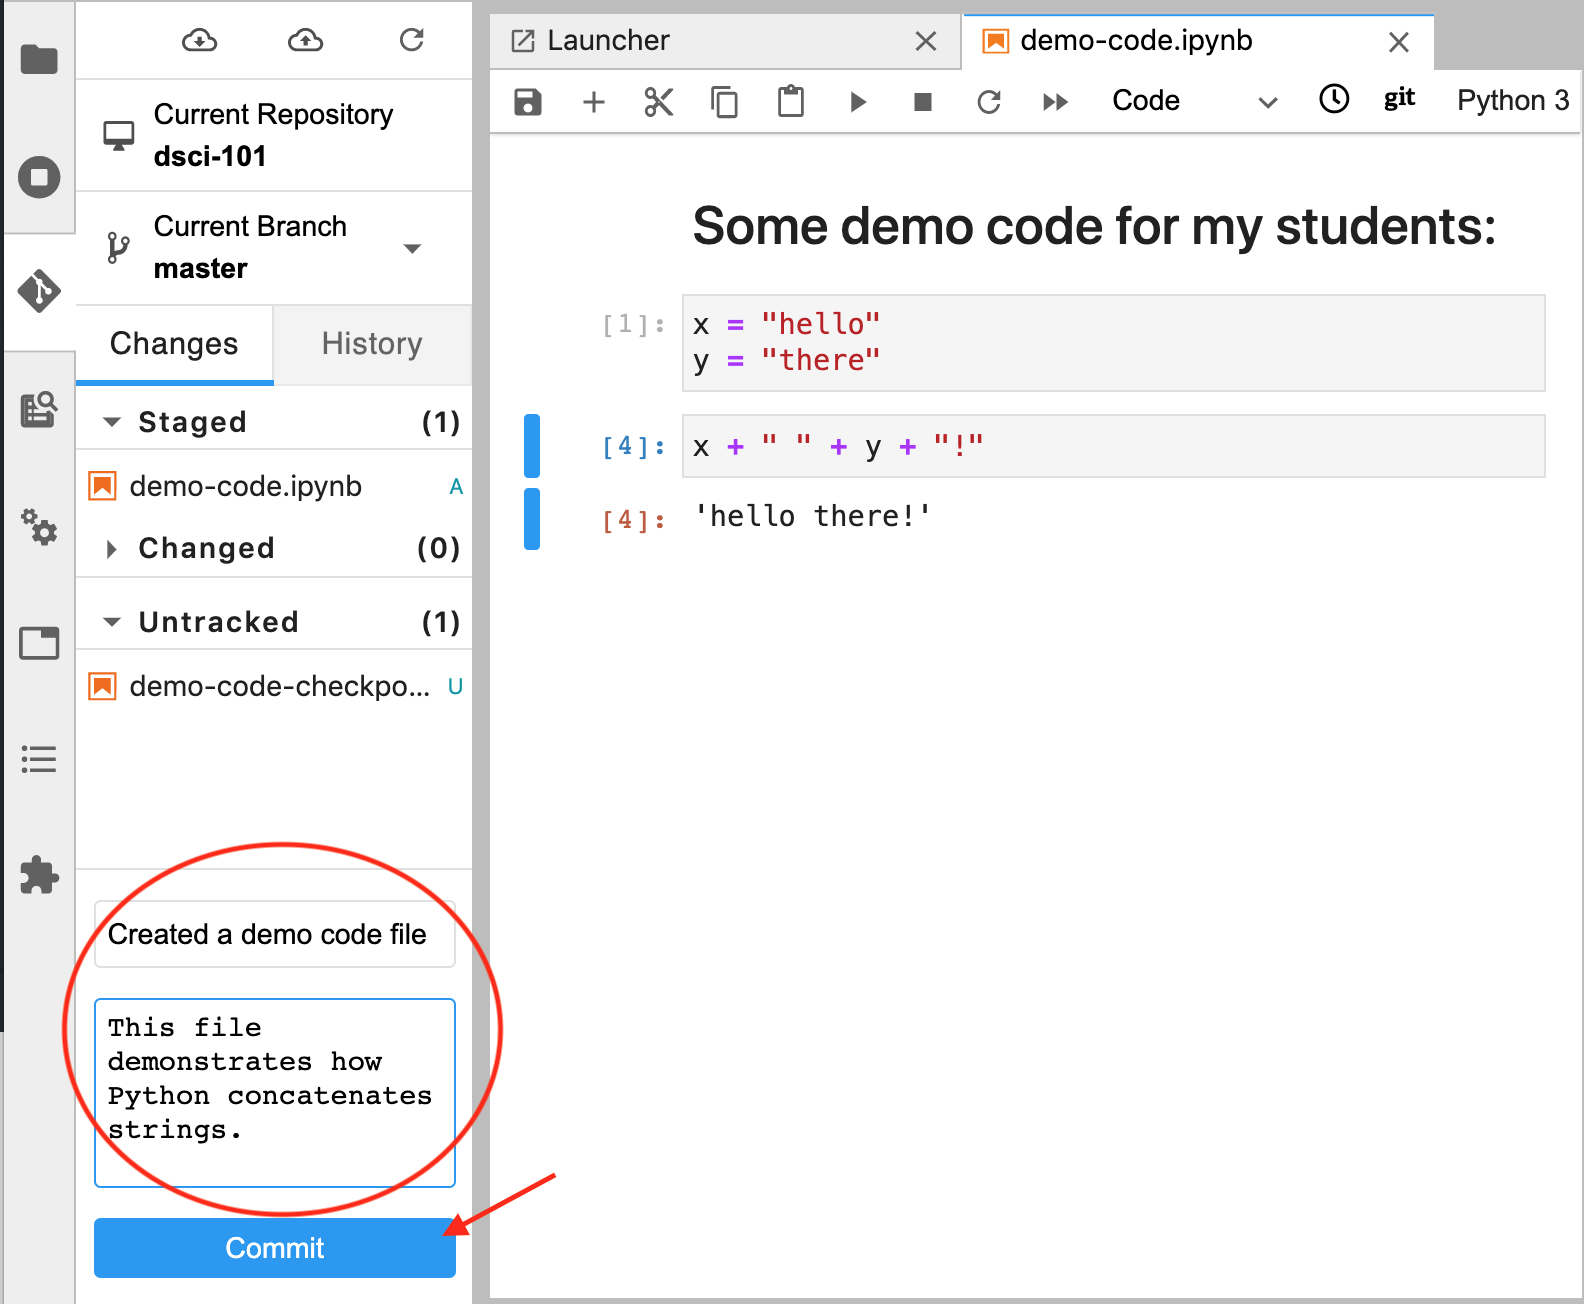
2. git commit the changes and an associated (useful) message about what was changed
To git commit the changes and an associated (useful) message about what was changed, we put our message in the text box at the bottom of the Git GUI pane and click on the blue “Commit” button. Note: It is highly recommended to make this message useful and relevant to the changes that were made, as this can later be used to peruse the file history and understand how the file evolved.
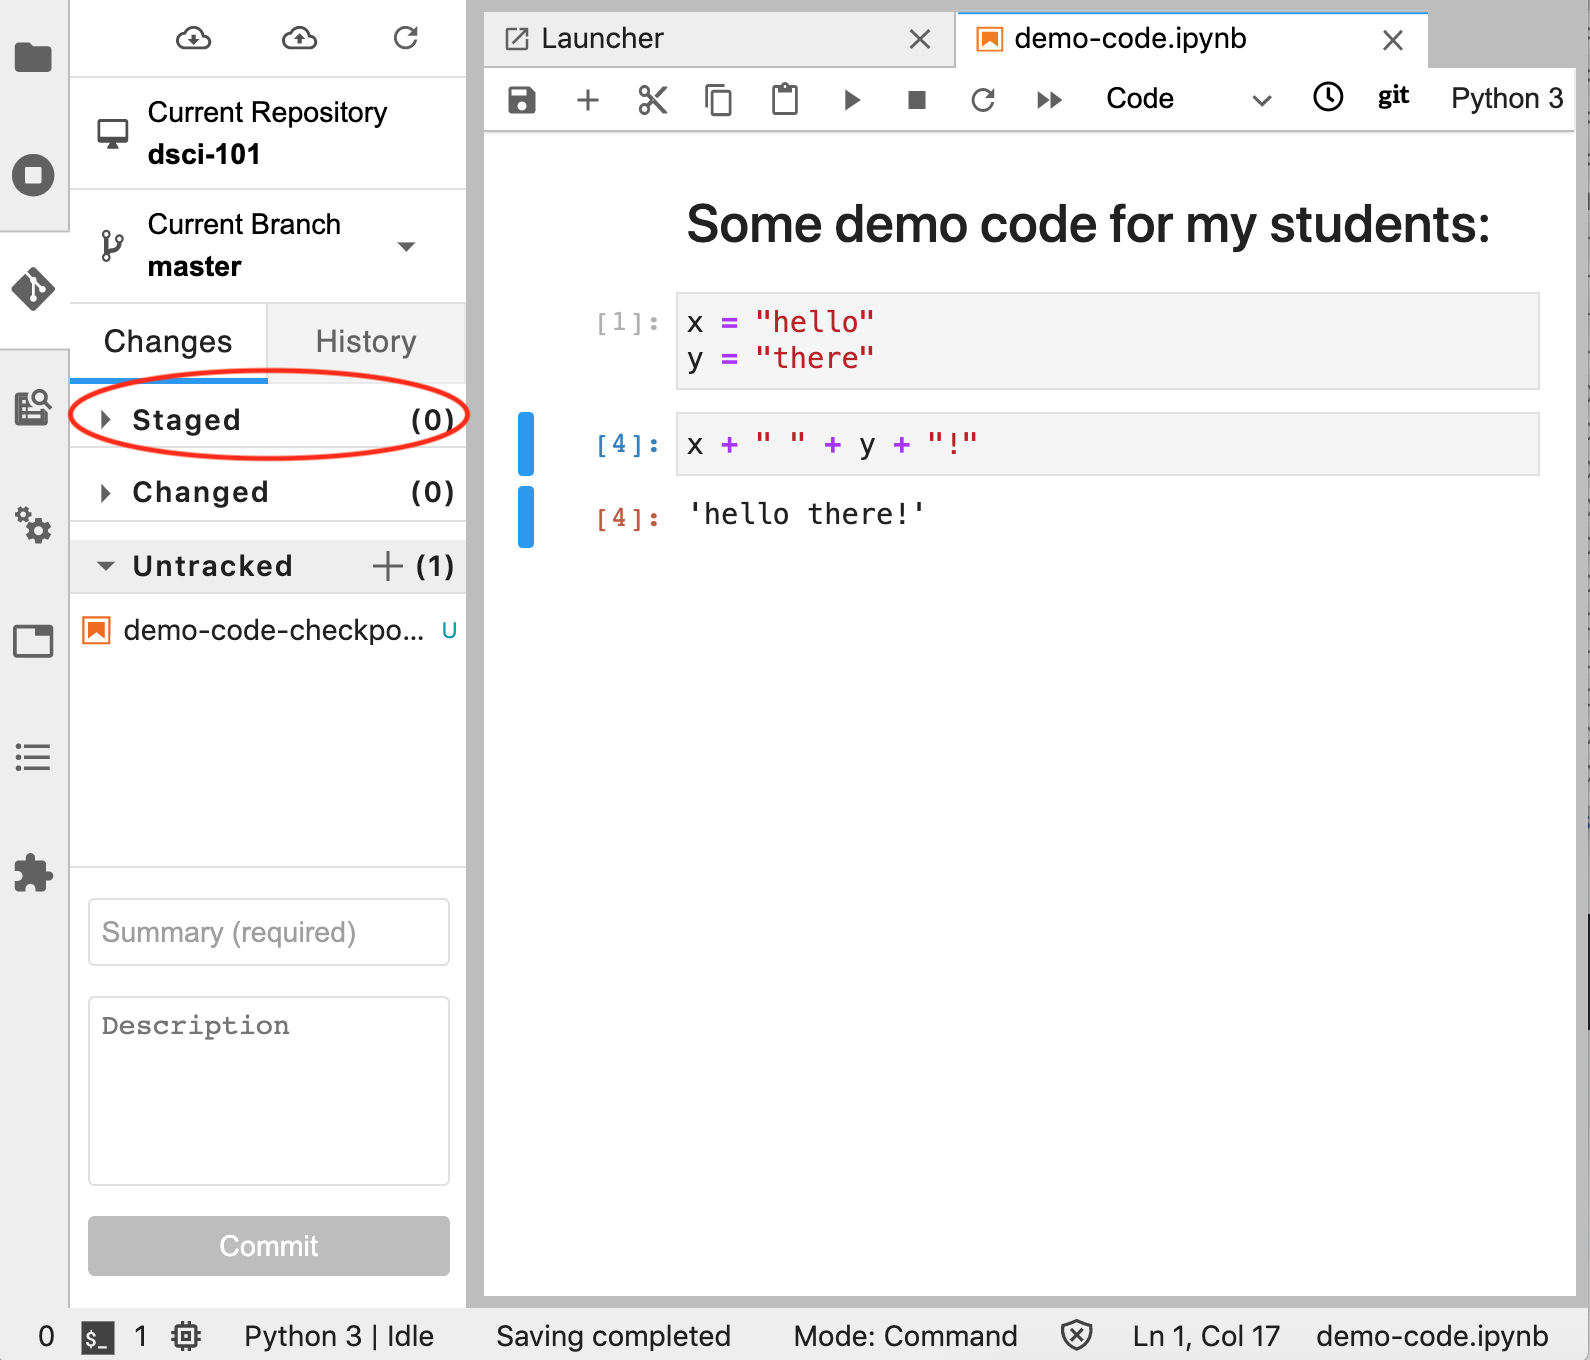
After commiting the file, you will see there there are 0 “Staged” files and we are now ready to push our changes (and the attached commit message) to our course repository on GitHub.com:
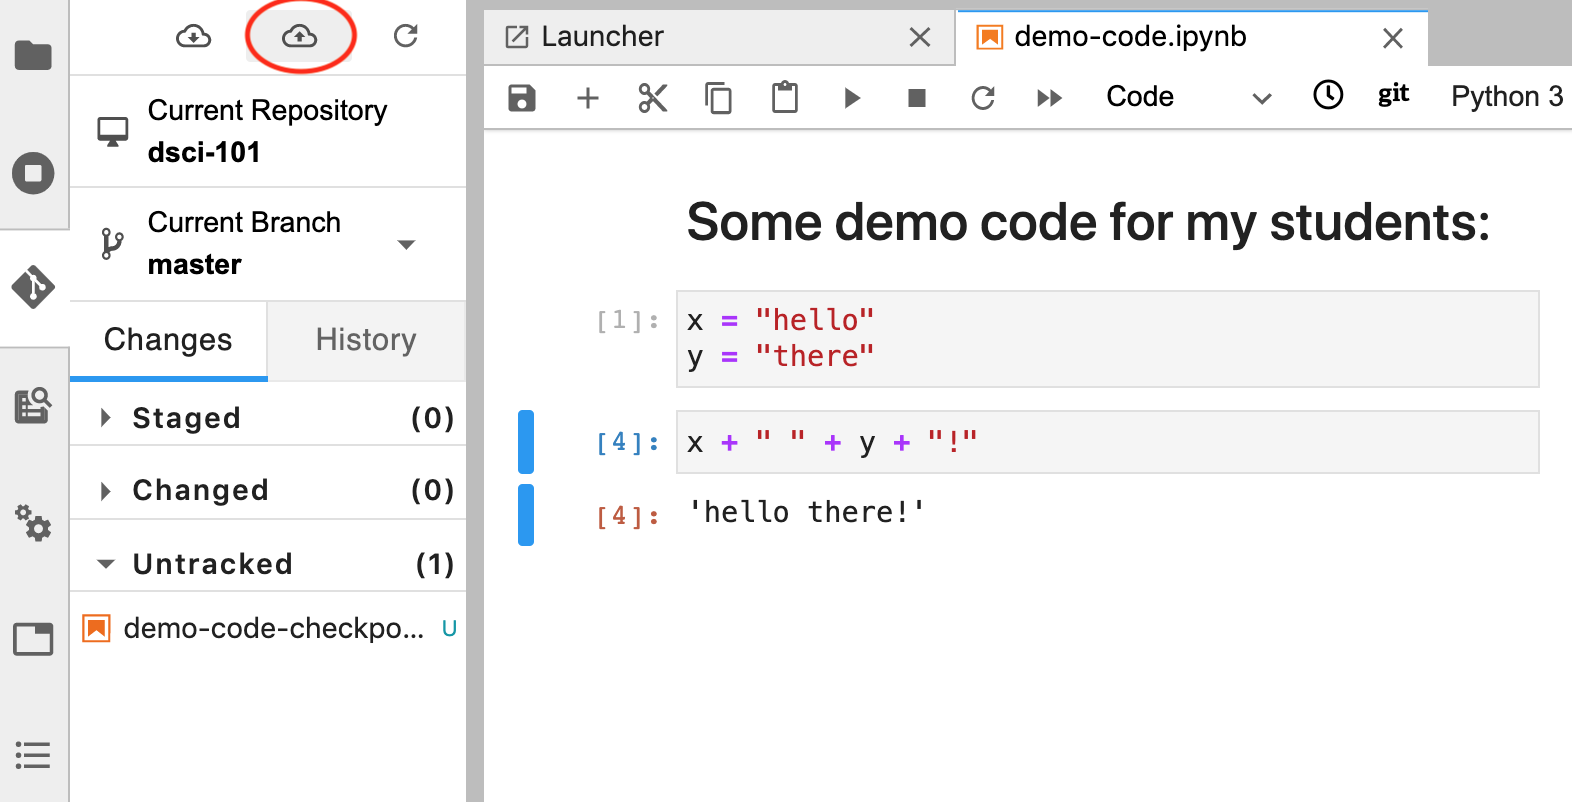
3. git push the changes to the course repository on GitHub.com
To send our added and committed the changes to the course repository on GitHub.com, we need to git push. To do this we click on the cloud icon with the up arrow on the Git GUI pane:
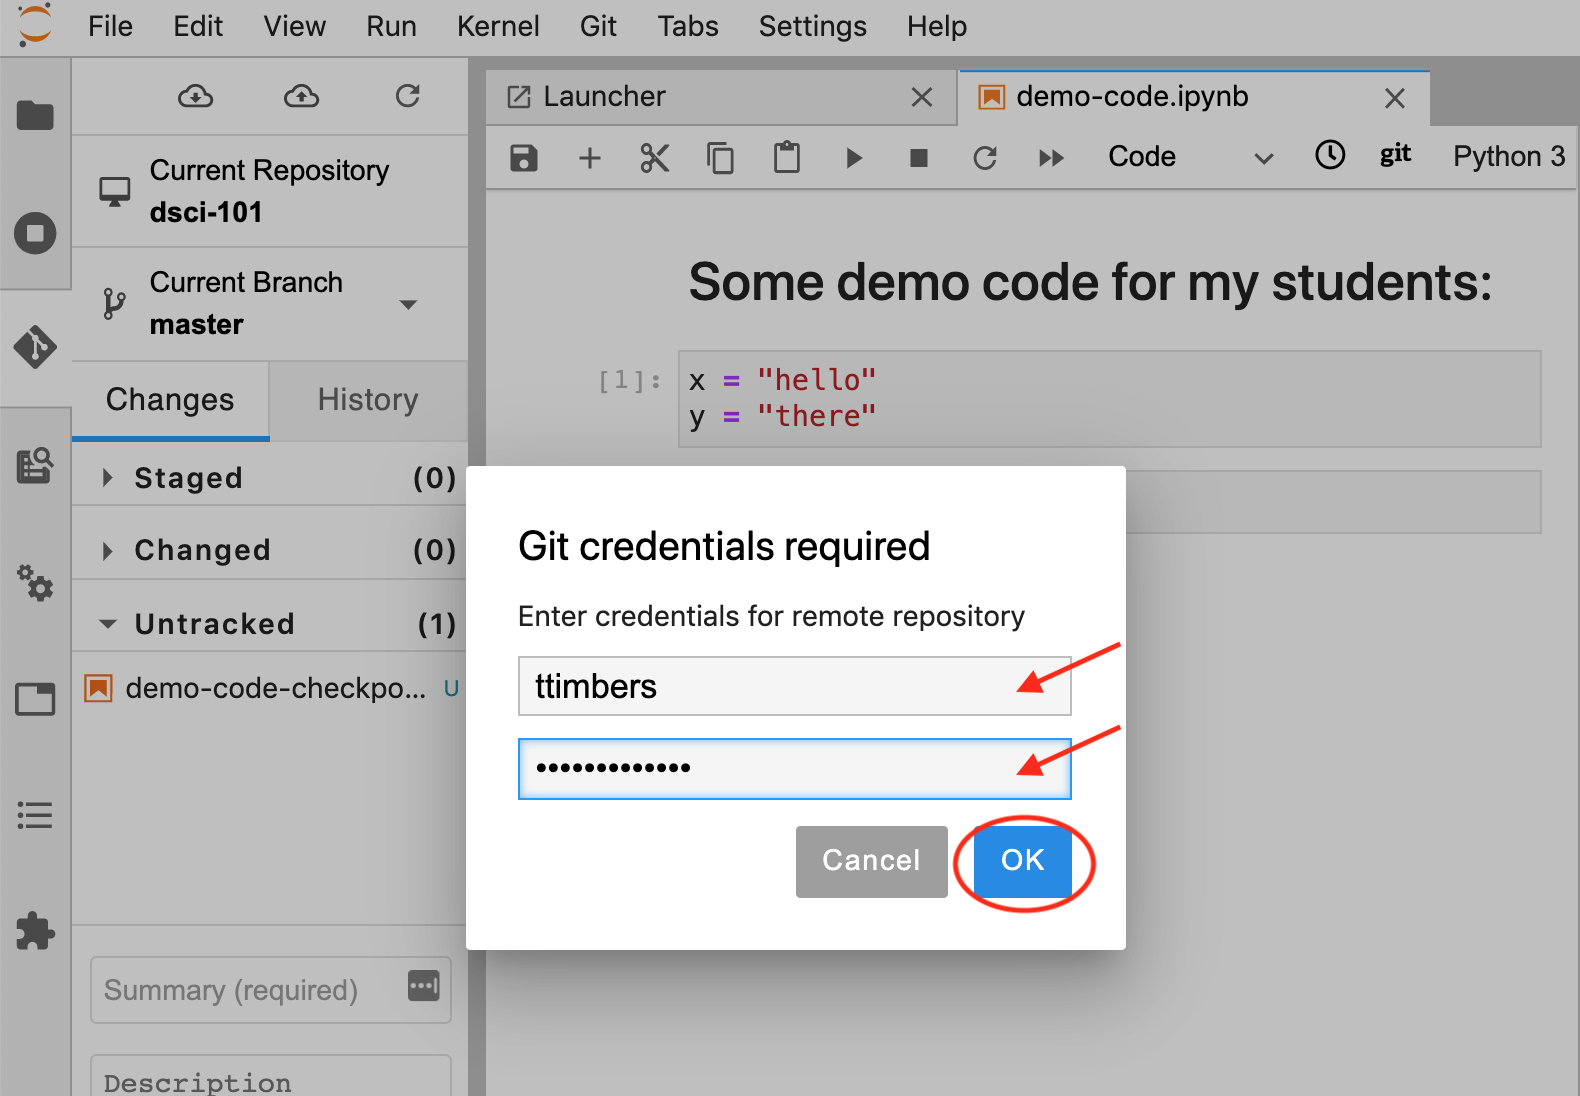
We will then be prompted to enter our GitHub.com username and password, and click the blue “OK” button:
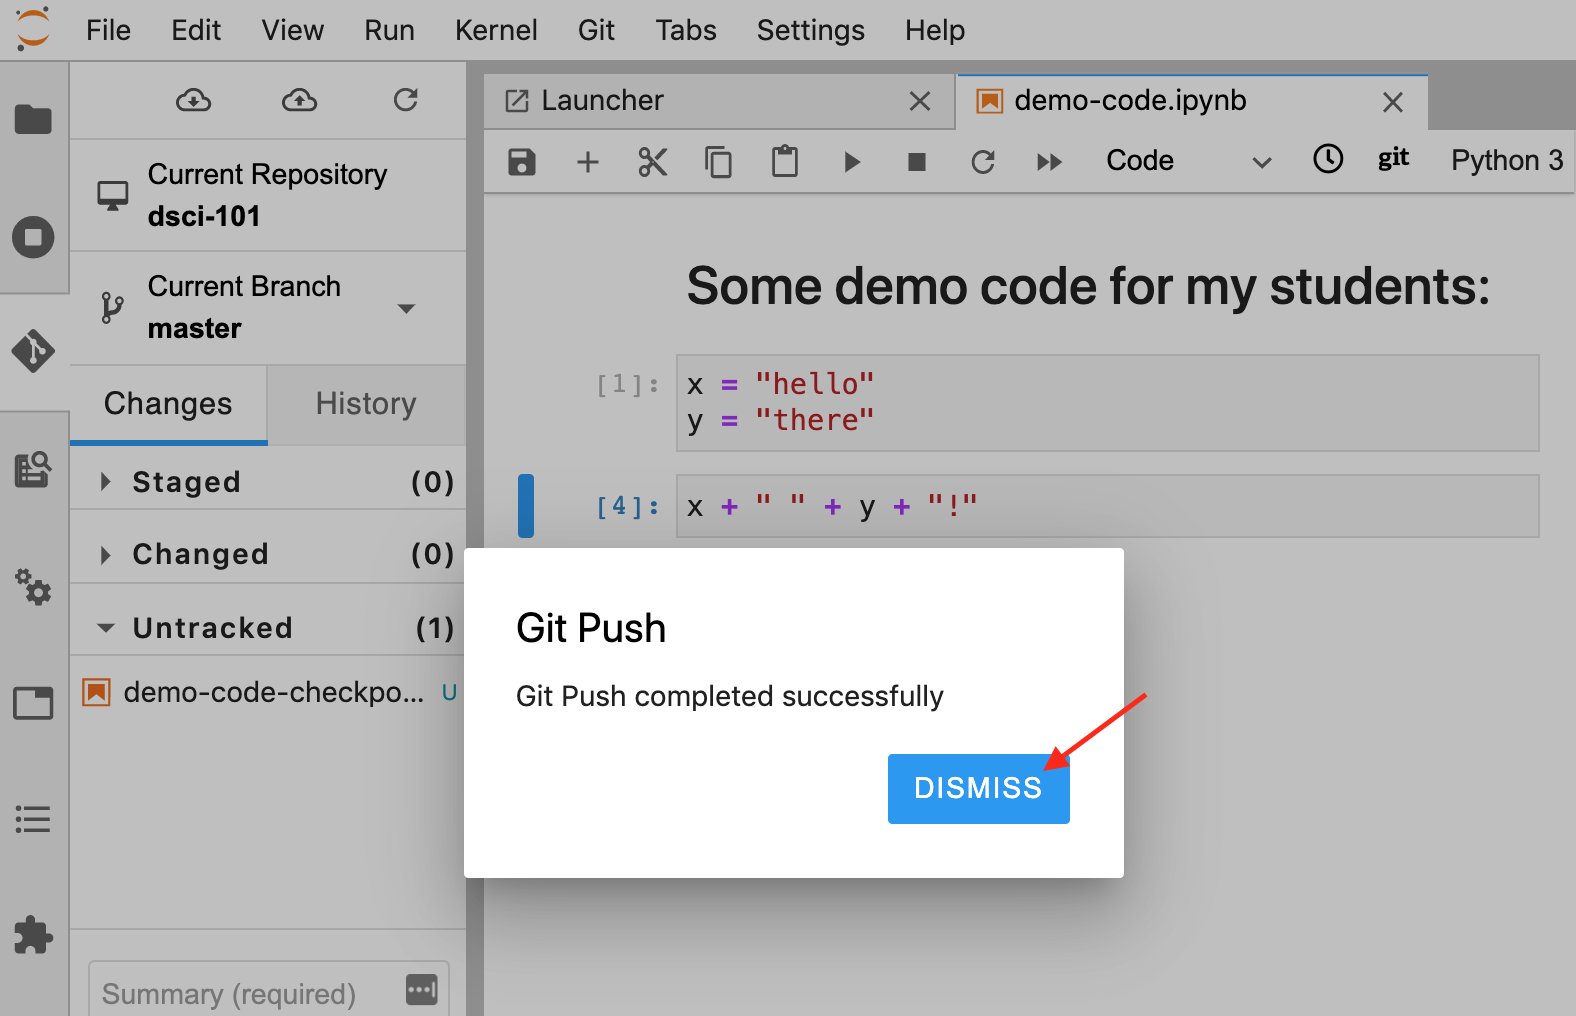
If the files were successfully pushed to our course repository on GitHub.com we will be given the success message shown below. Note: click “Dismiss” to continue working in Jupyter.
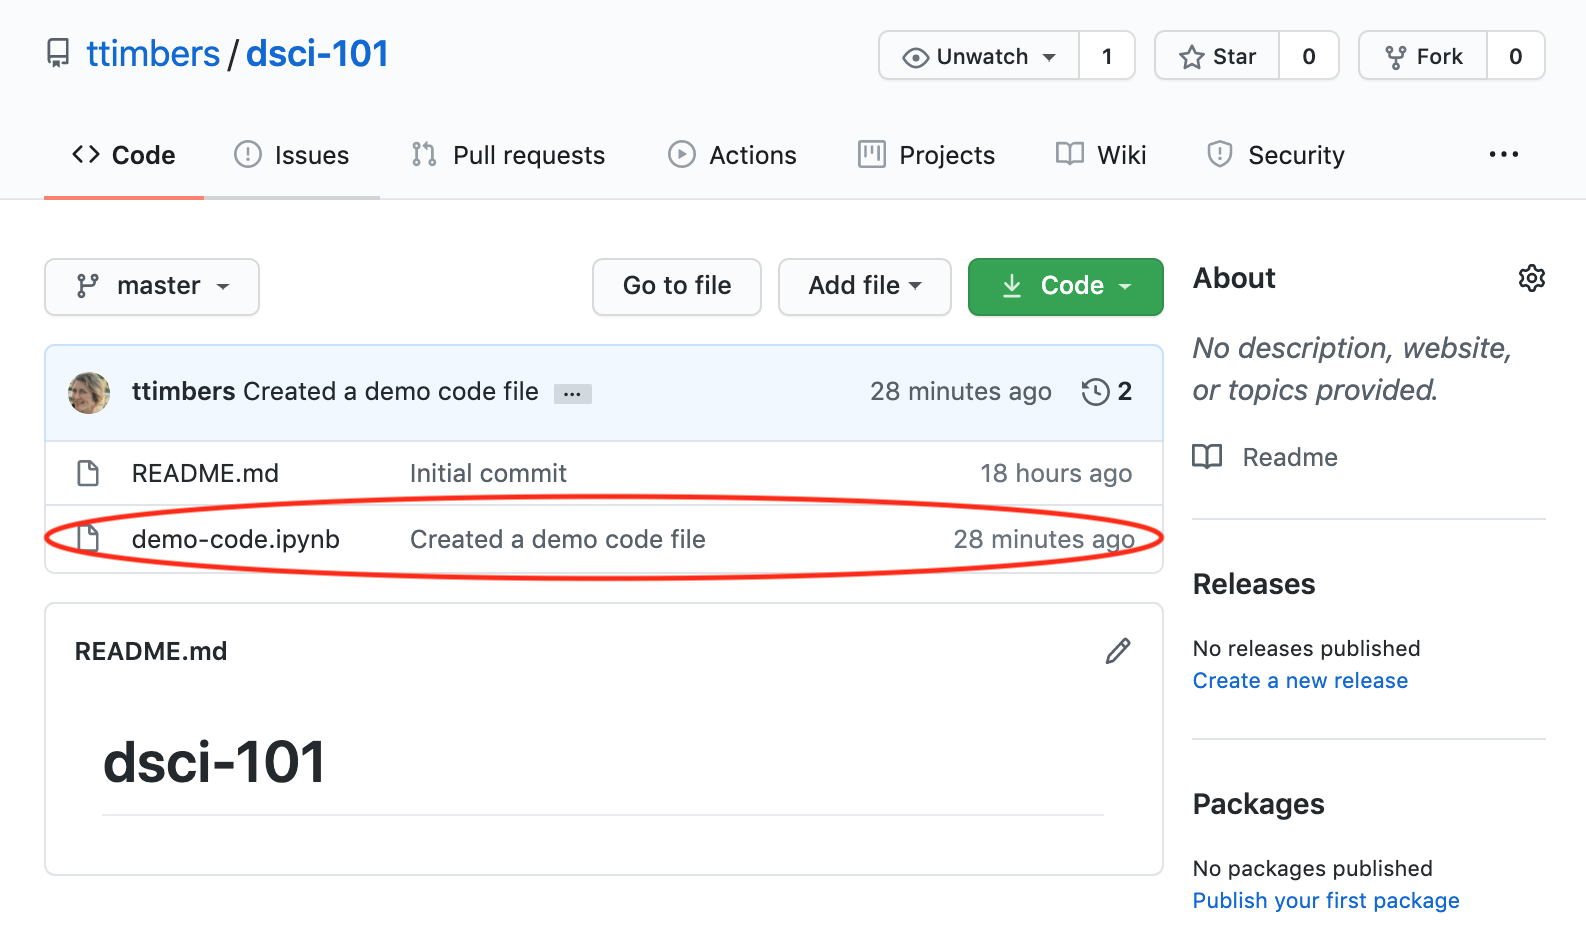
If you now go to the course repository on GitHub.com you will see the changes now exist there!
Pulling changes made in our course repository on GitHub.com to JupyterHub
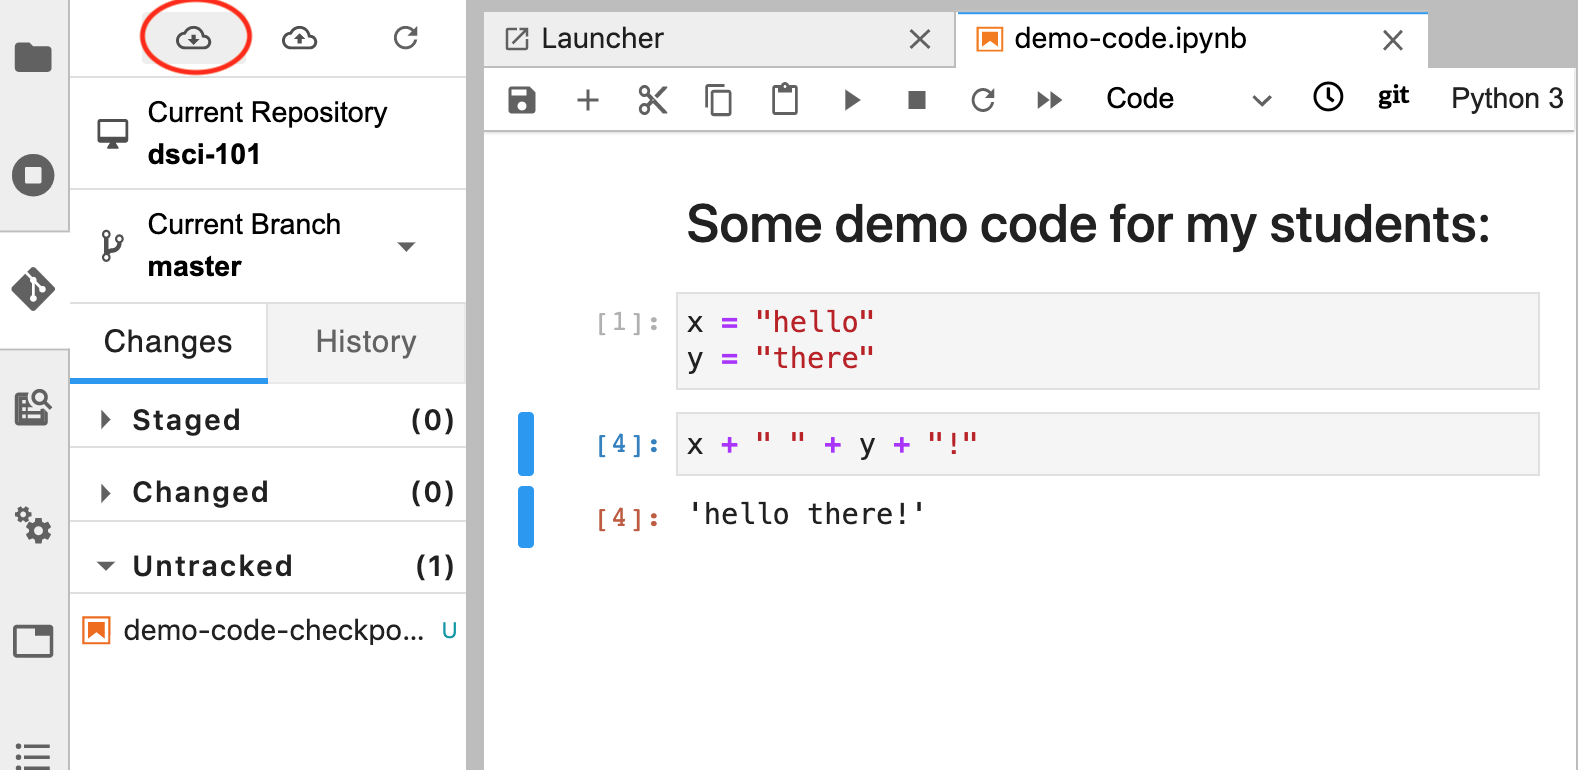
If you make changes in your course repository on GitHub.com using one of the tools described earlier in this session (e.g., the pen tool, or file create/upload menus) then you will need to git pull those changes to the copy of the course repository on JupyterHub to get things in sync. You can do this using the Git GUI pane by clicking on the cloud icon with the down arrow:
Using nbgitpuller to share course materials with students on JupyterHub
Finally, to share your materials with your students you can give them the URL to the GitHub.com repository you created and they can browse the files there, you can create html versions of the files in the GitHub.com and embed the content in Canvas using iframes (e.g., one way to do this is to create a Jupyter book, stay tuned to the next talk to learn how to do this), or you can use nbgitpuller to create a special link that can be provided to the students. This special link automatically clones the GitHub.com repository (including all files) to the students persistent storage on the JupyterHub specified in the link. Additionally, the link can be setup so that it opens up to a desired file in that repository on the JupyterHub when clicked.
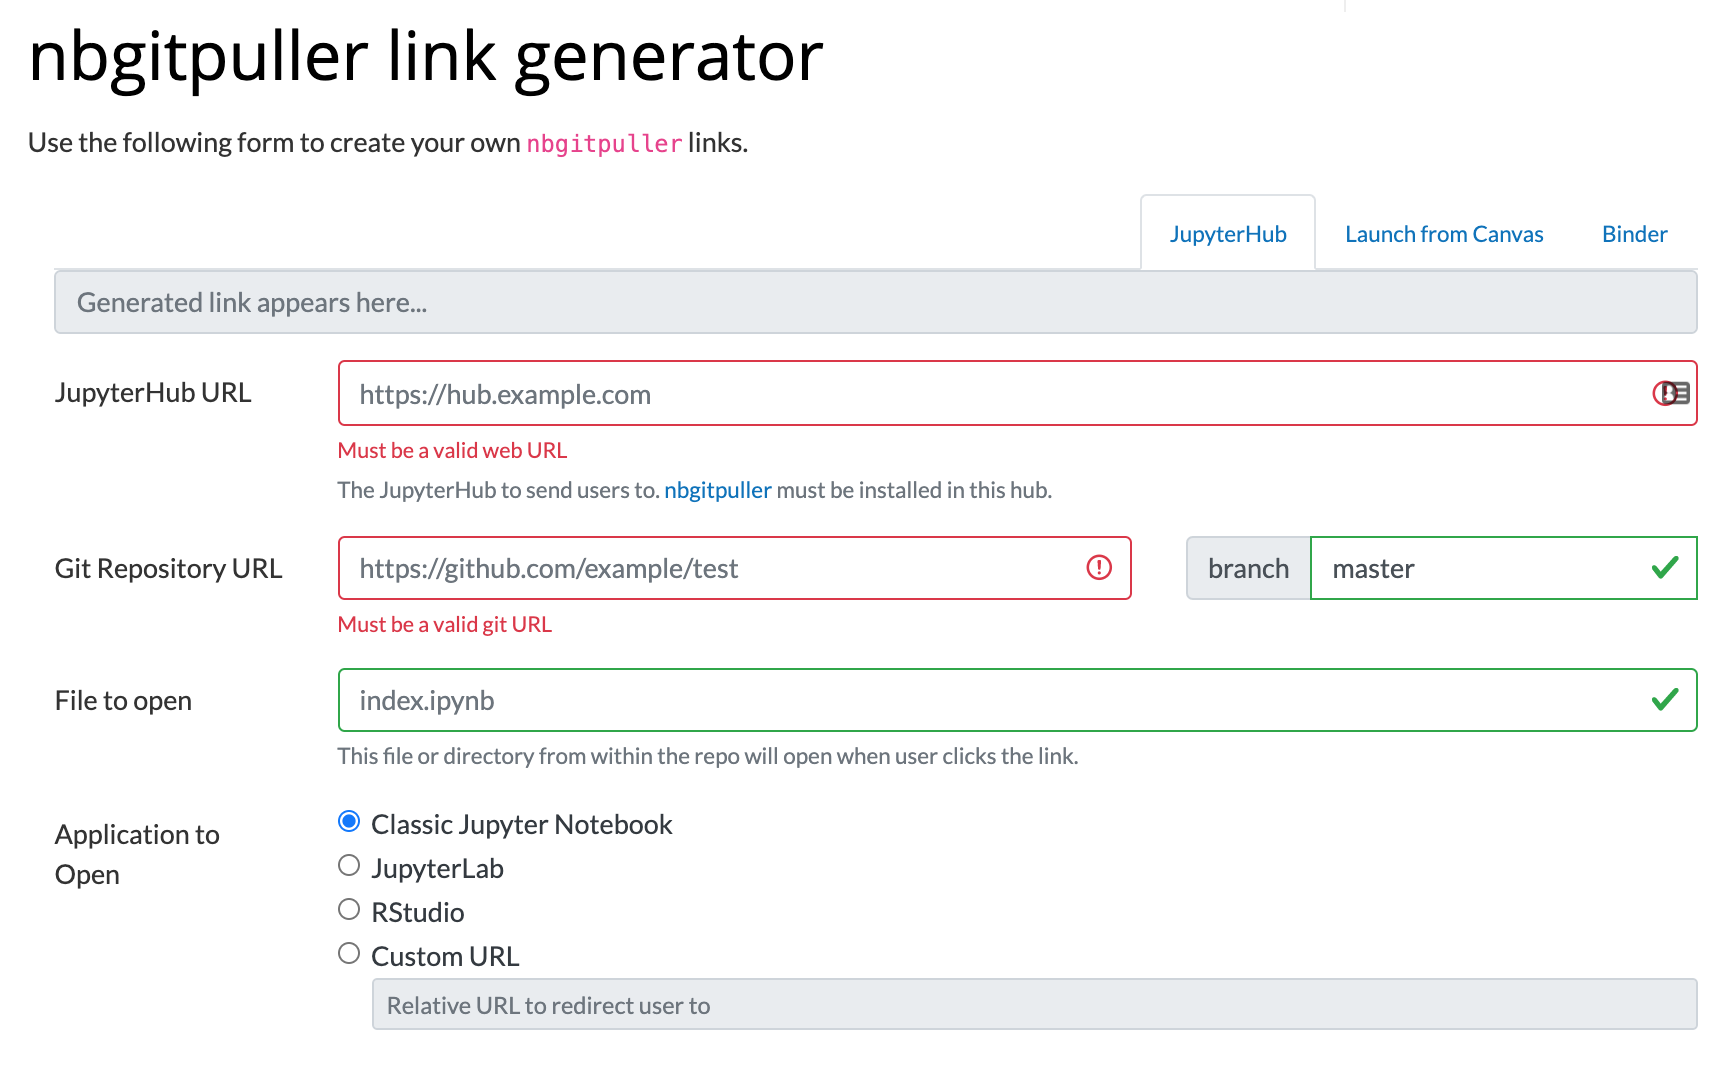
The nbgitpuller documentation has a very user friendly web interface, called the “nbgitpuller link generator” for crafting these special links: https://jupyterhub.github.io/nbgitpuller/link.html
The nbgitpuller link generator looks like this:
Here is a demonstration of how you would create a link to give to your students that would:
clone the
dsci-101course repository from GitHub.com to the UBC JupyterHubuses the Jupyter lab (as opposed to Jupyter notebook) interface when the link is clicked
opens Jupyter lab to the specified file, here
demo-code.ipynb
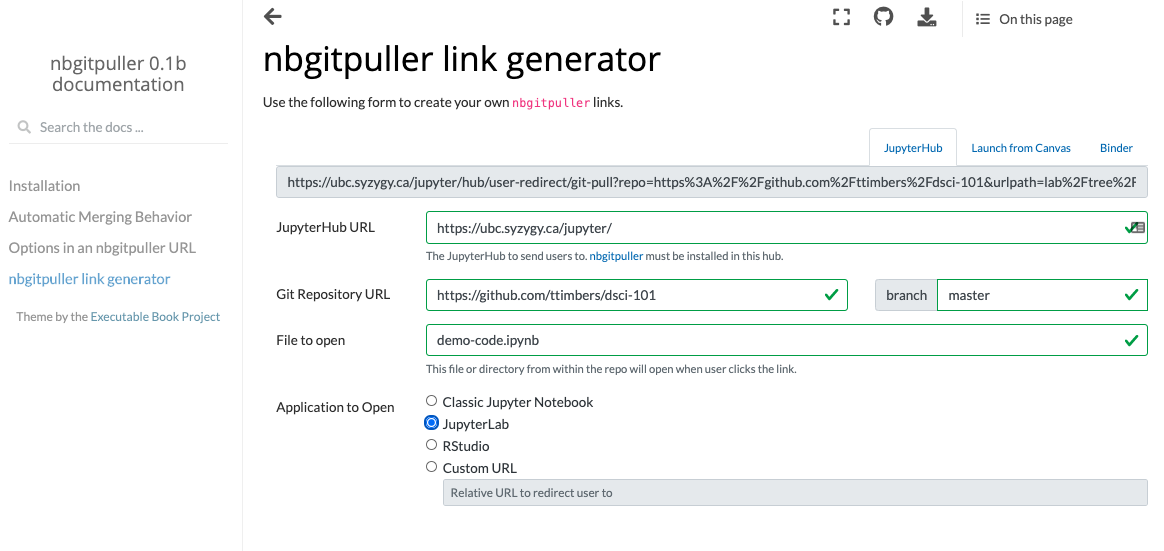
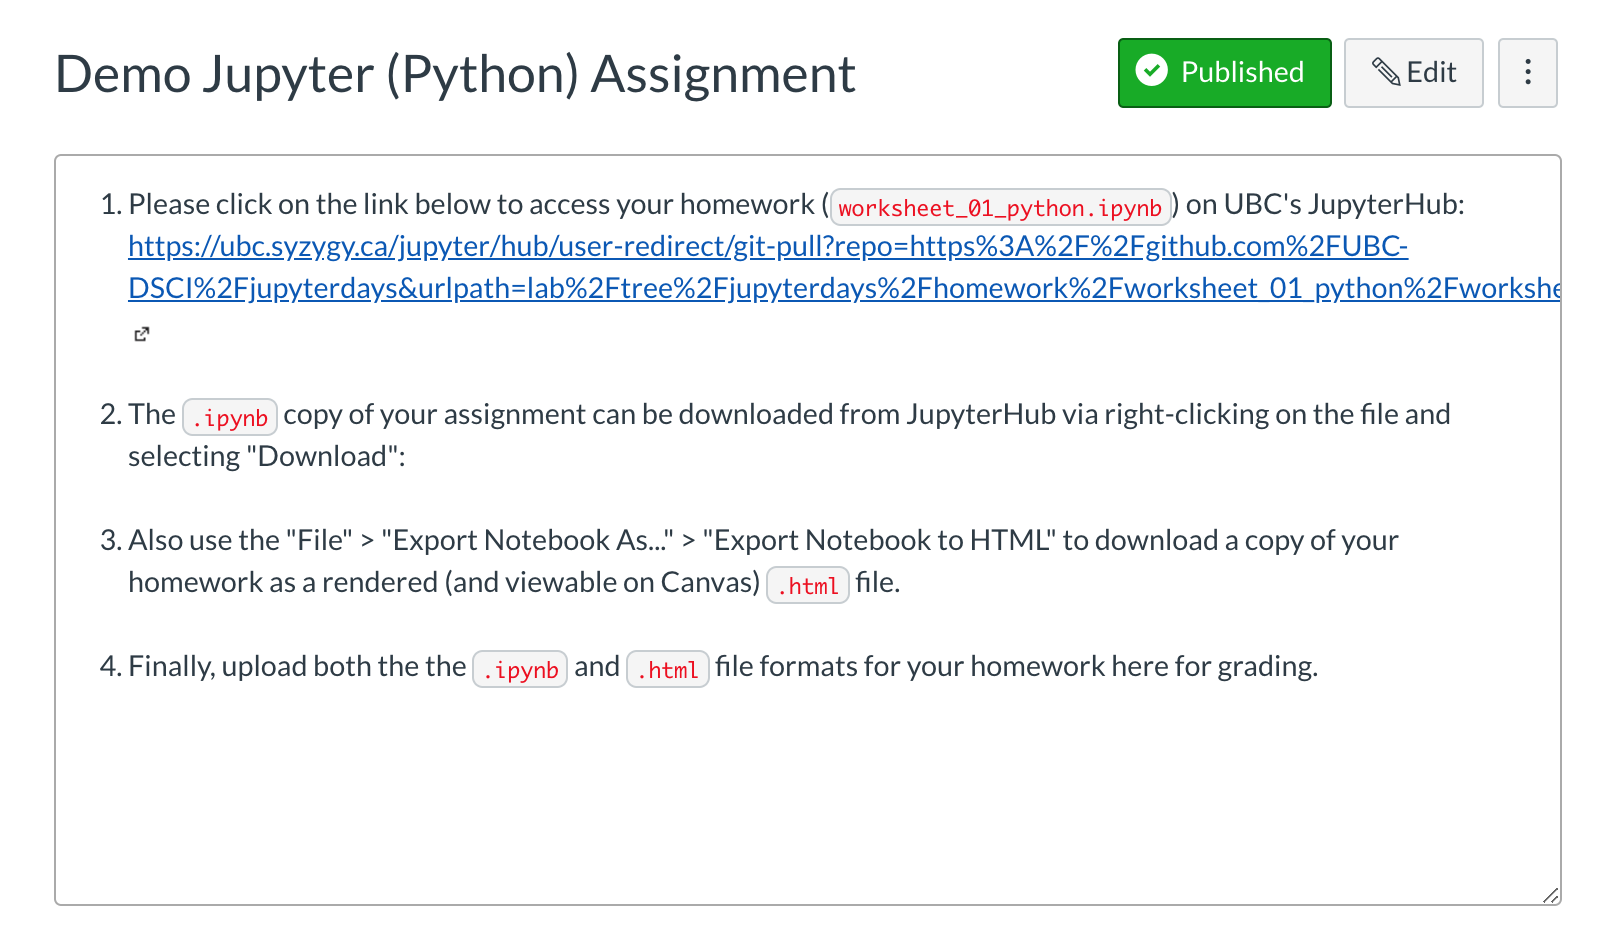
The link below is what is generated from the example above, and is the link you would share with your students:
If you distribute the link on Canvas, your assignment instructions could look something like this: